Creating a LINE Bot
Register a LINE Developer Account
- Visit the LINE Developers website and log in with your LINE account
- After logging in, enter the developer console
Create Provider and Channel
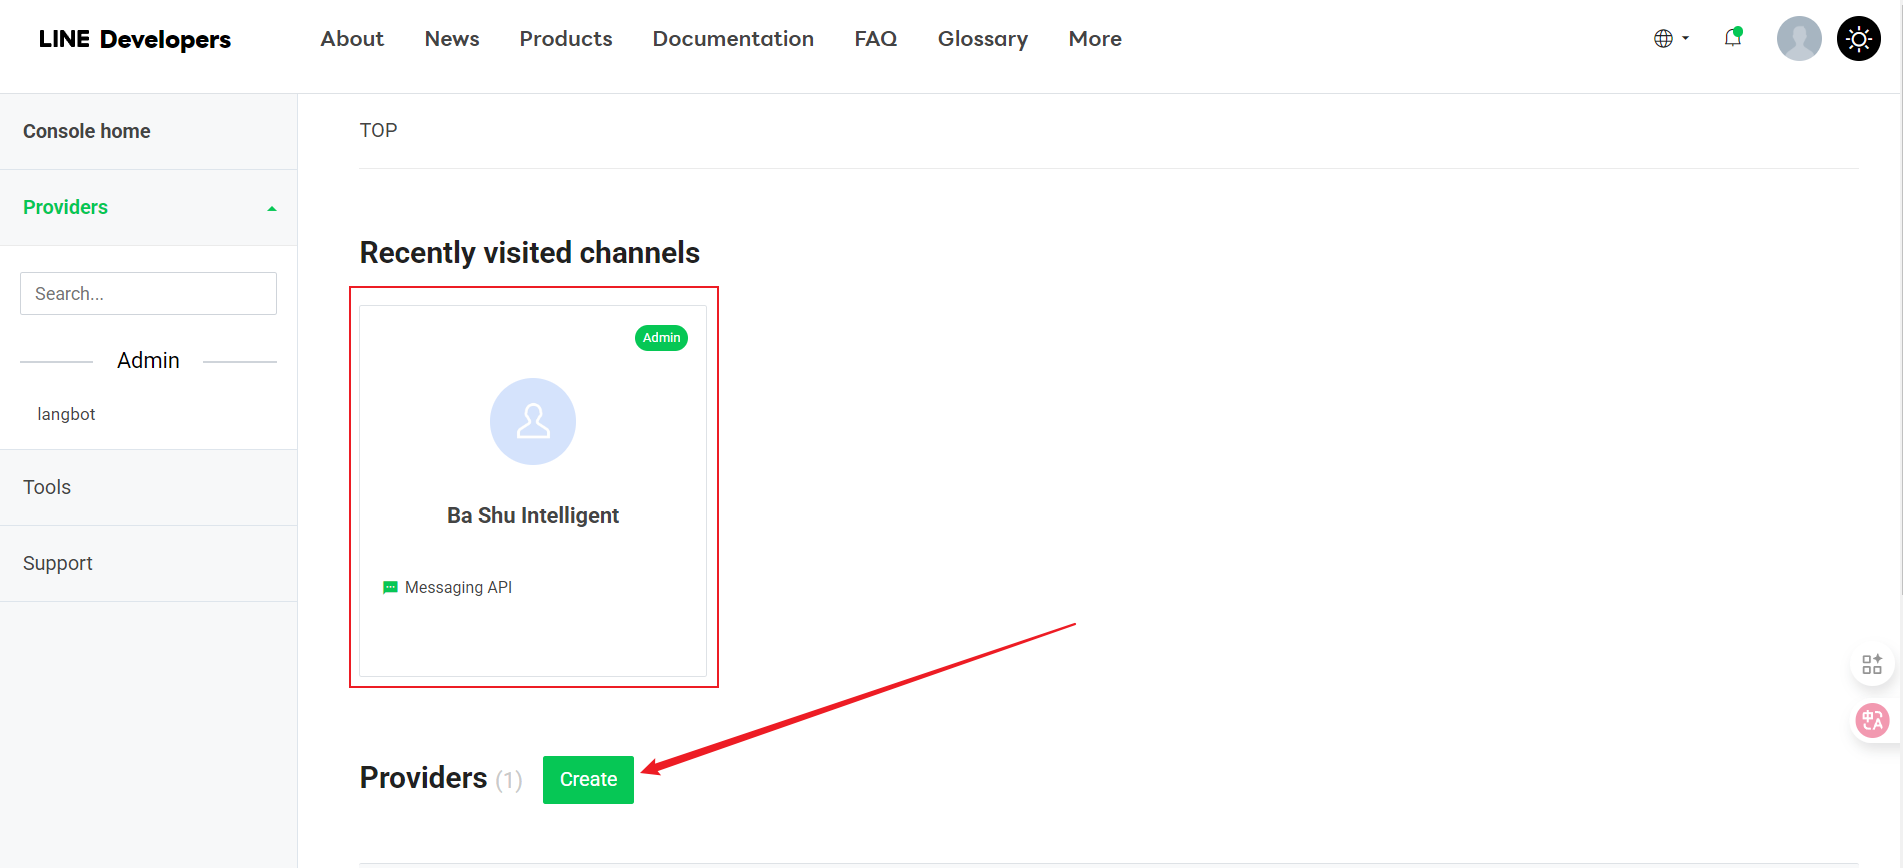
Developer Console
-
In the developer console, create a new Provider (if you don’t have one)
-
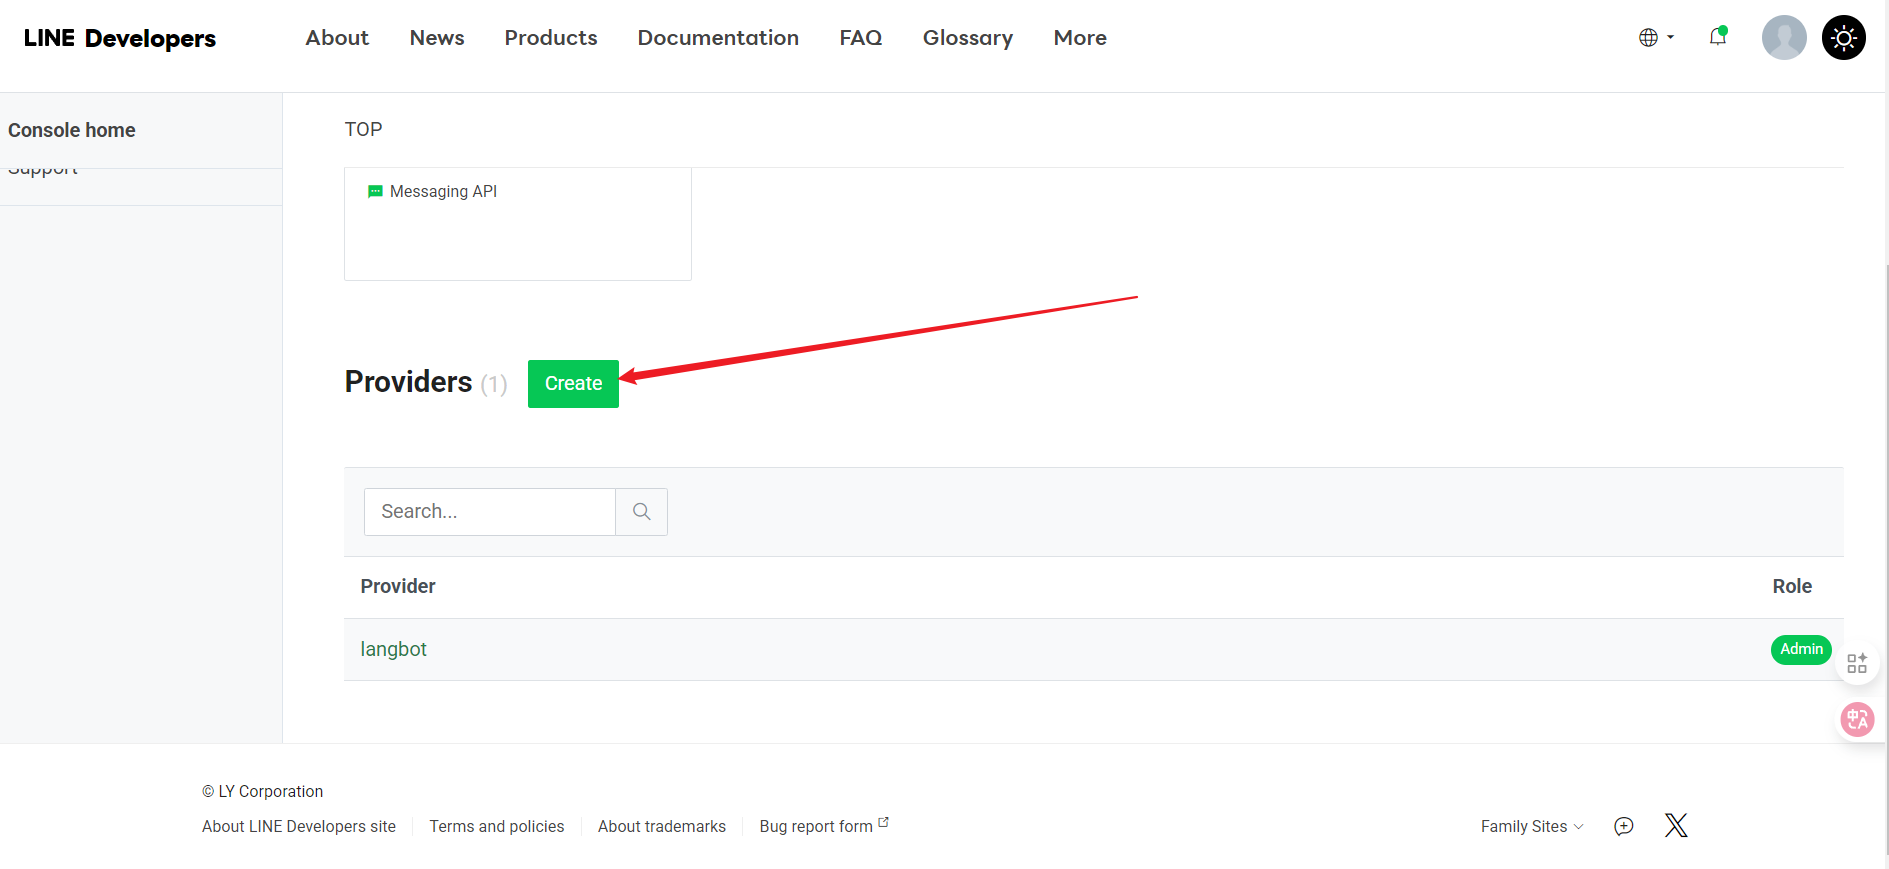
Under the Provider, click “Create”
-
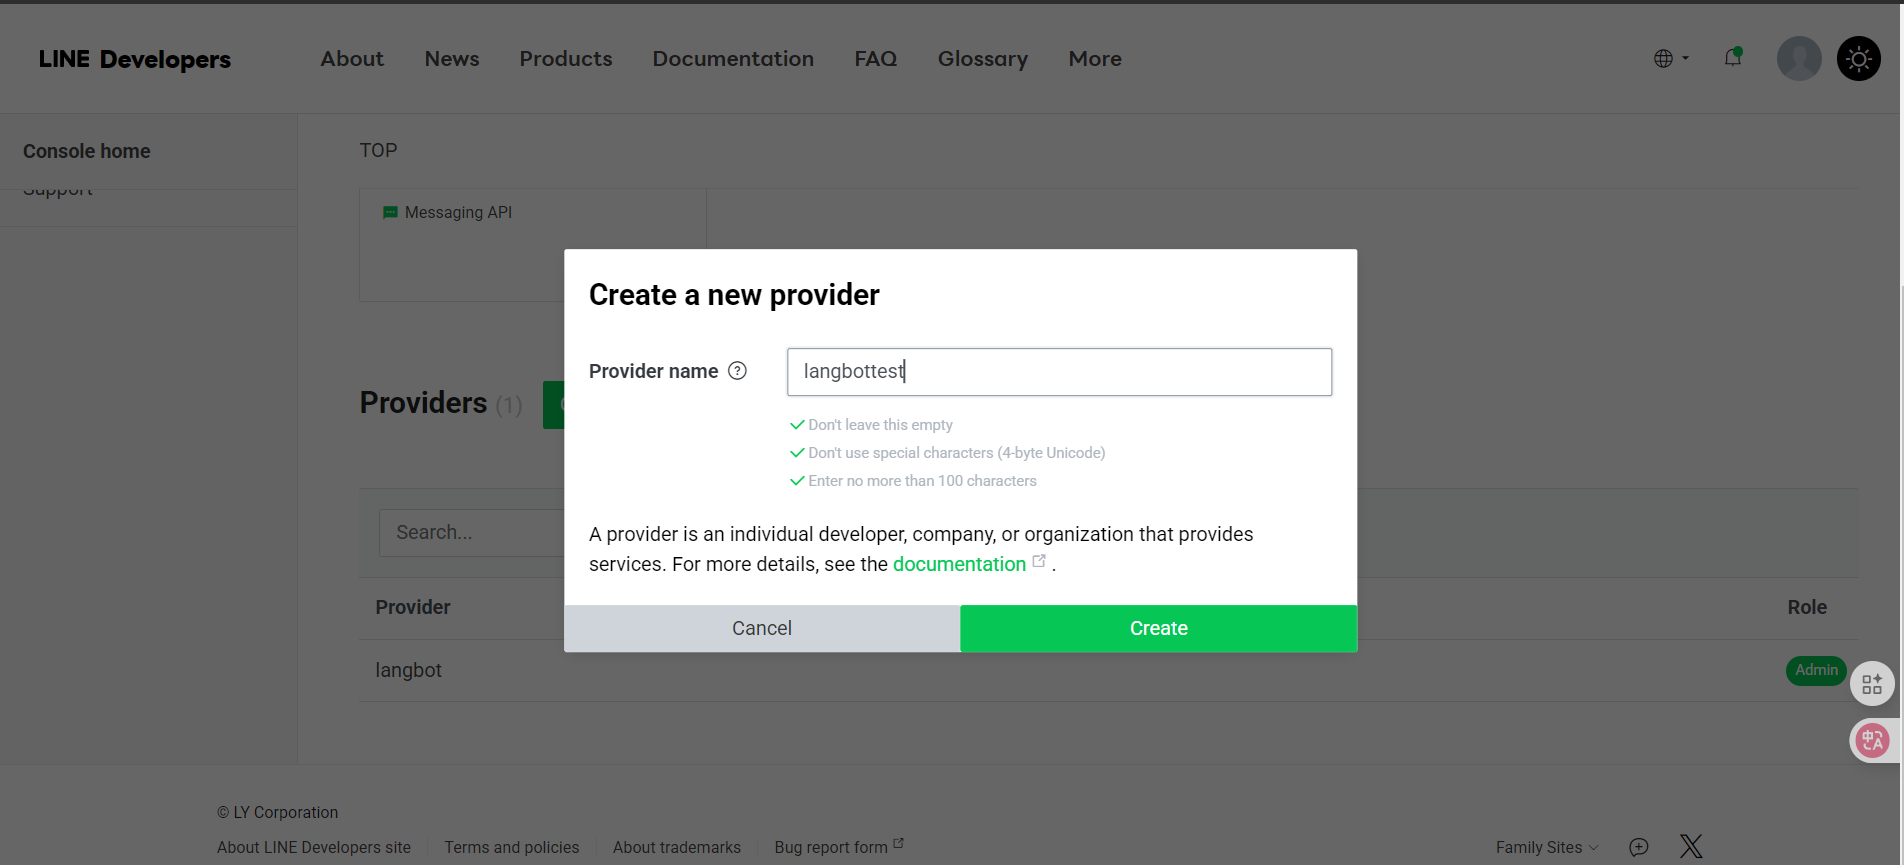
Enter a name and click Create
-
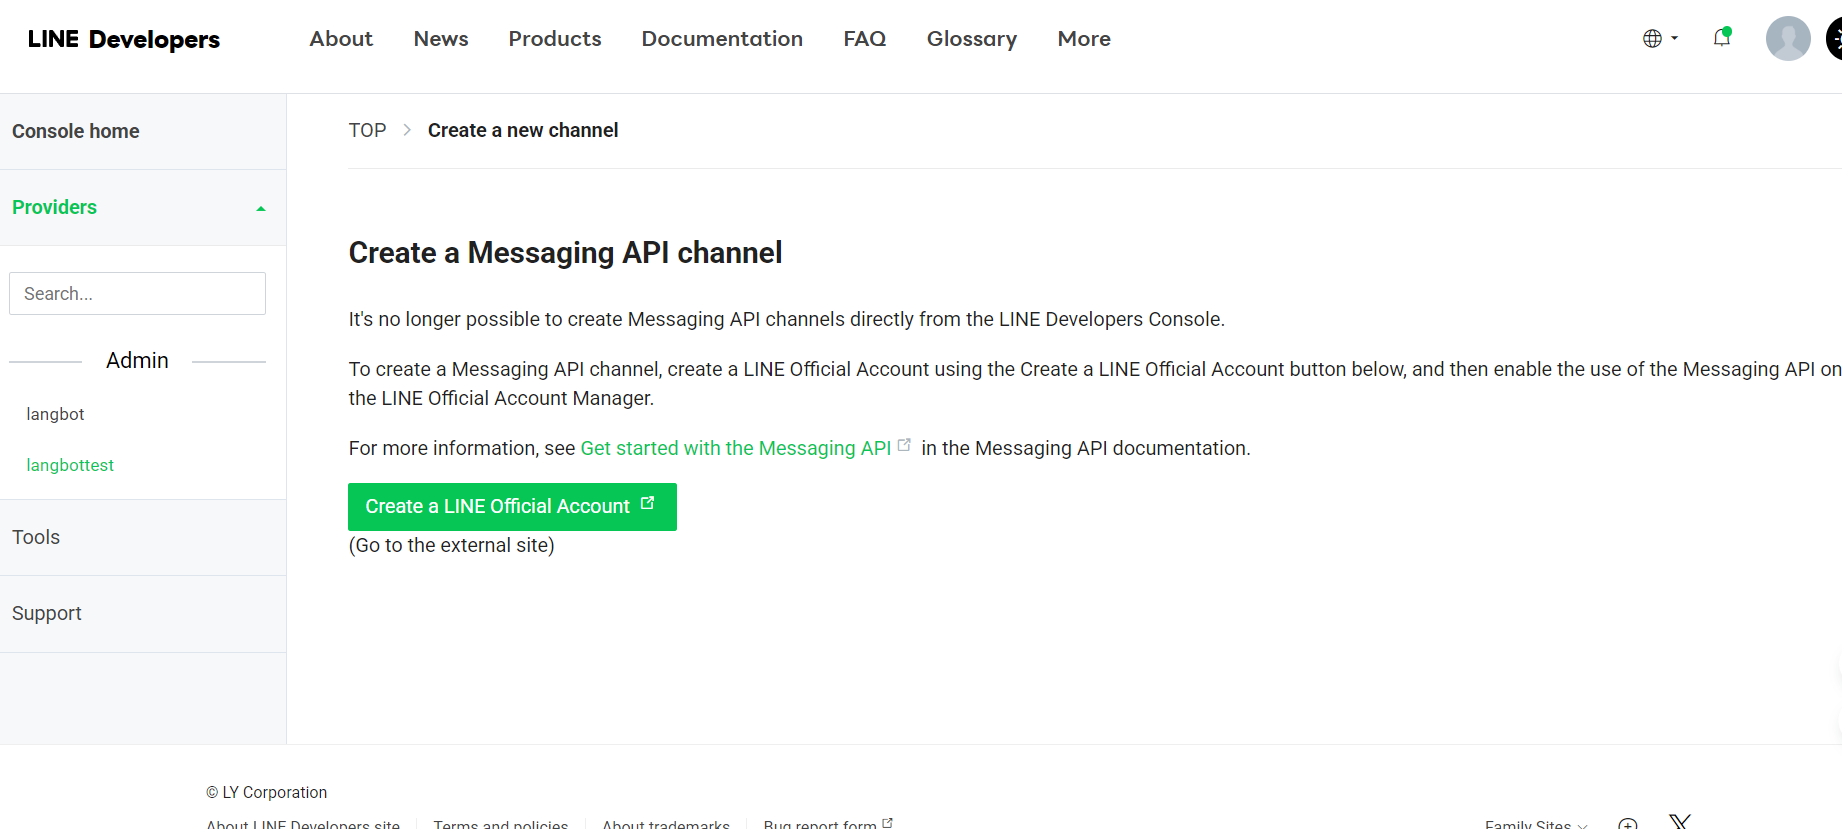
After being redirected, select Create a Message API
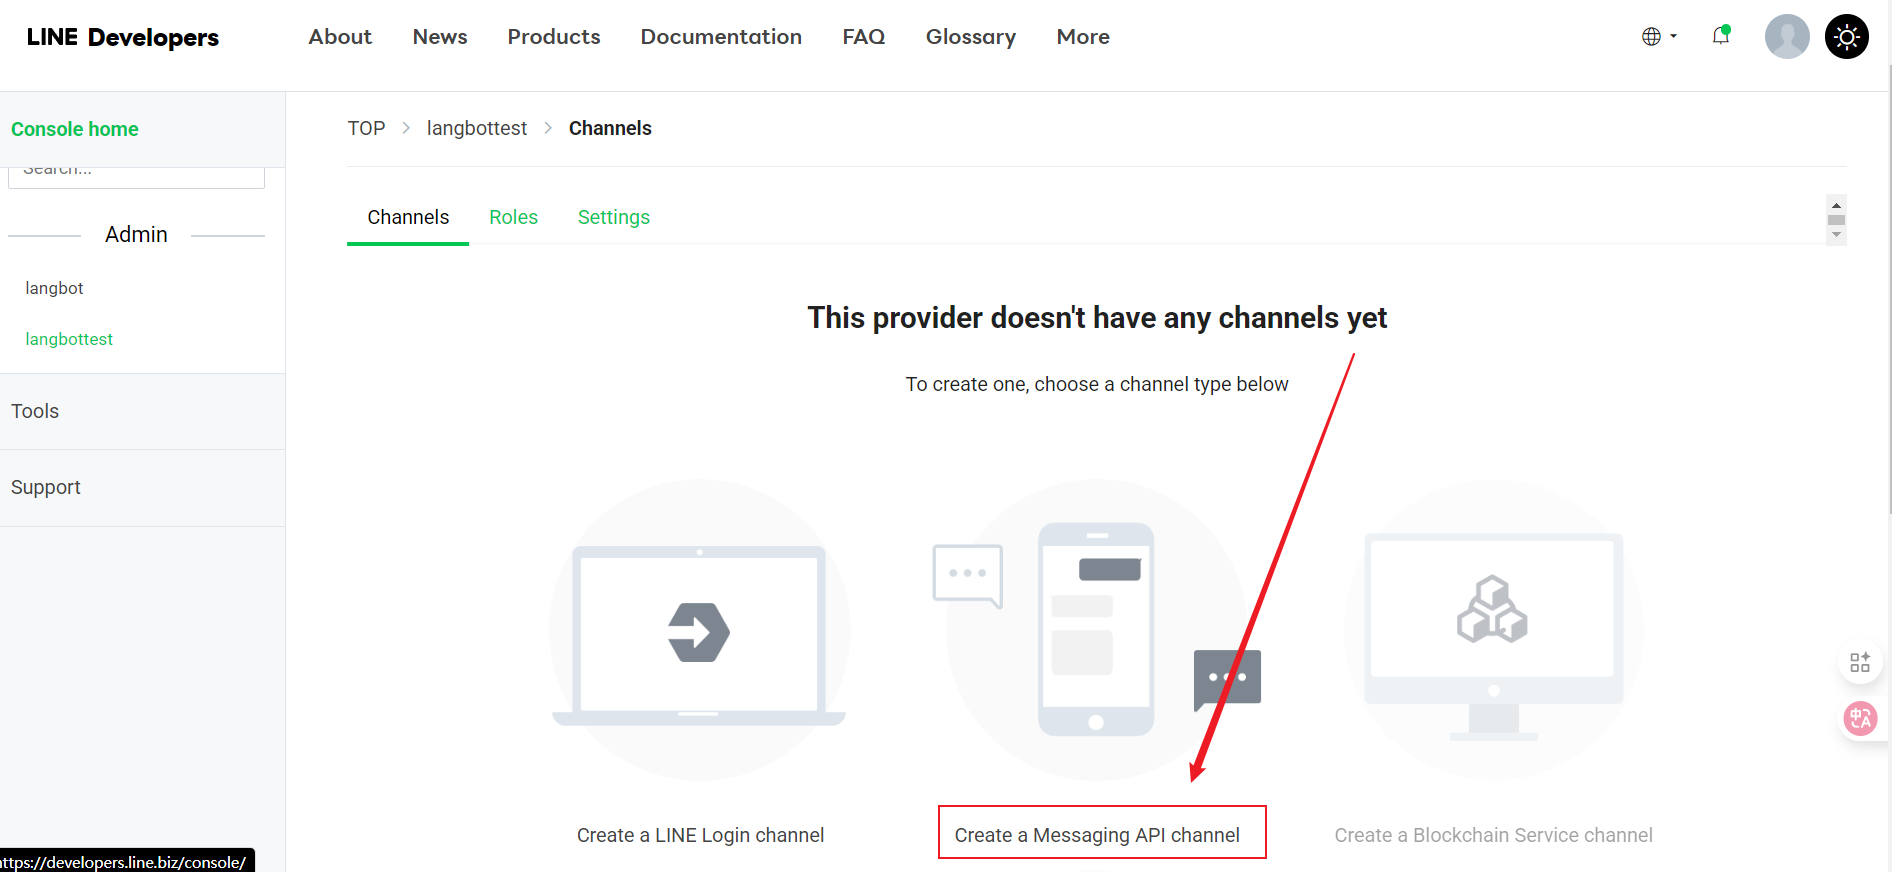
- Continue by clicking Create a Message API
- After being redirected, fill in the basic information
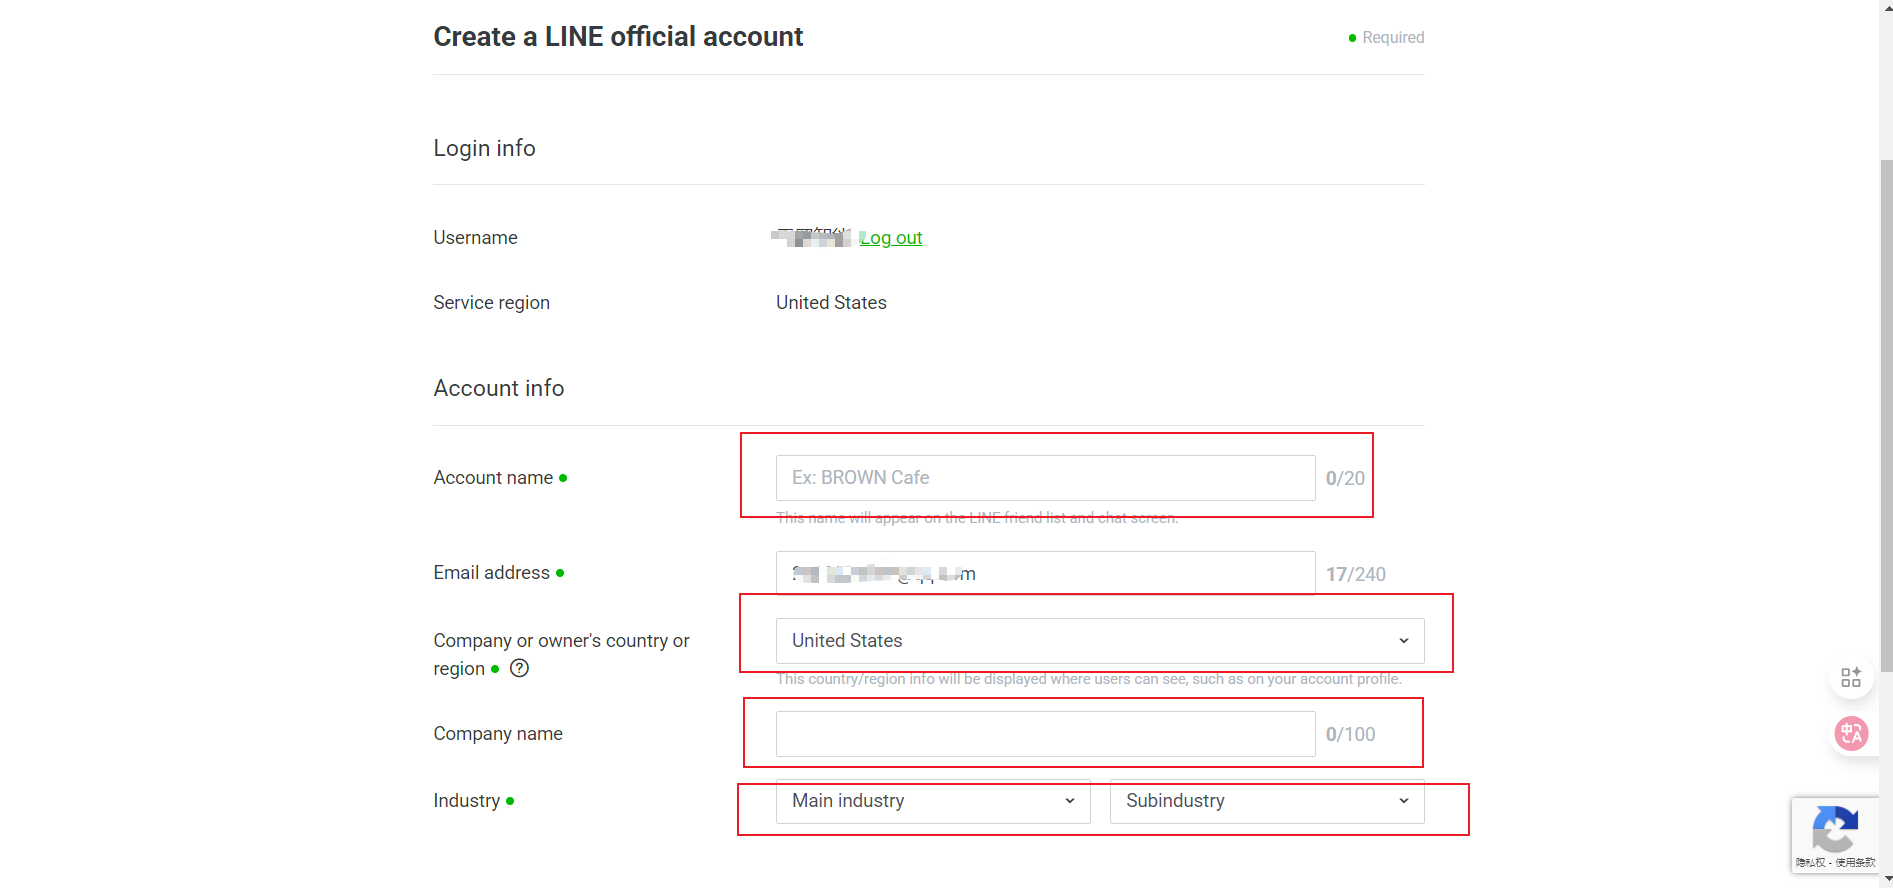
- Channel Name
- Channel Description
- Category
- Subcategory
- Email Address
- After filling in all information, click “Continue” to create
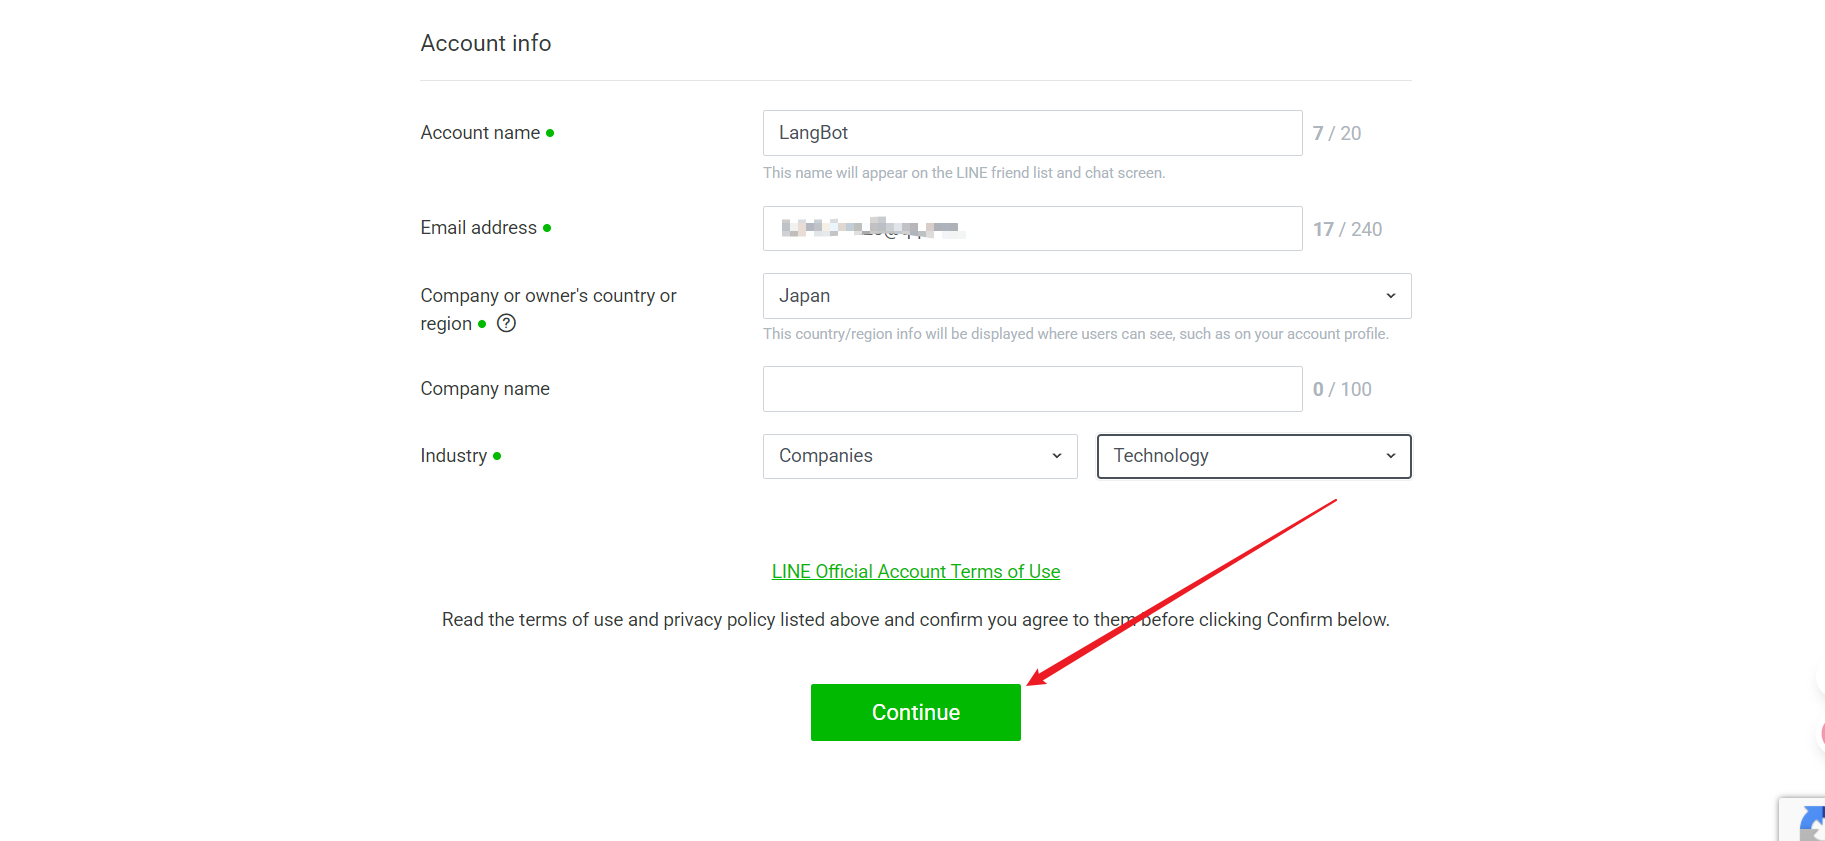
- Check the information you entered, and if there are no issues, click Submit
- Successfully created, proceed to use
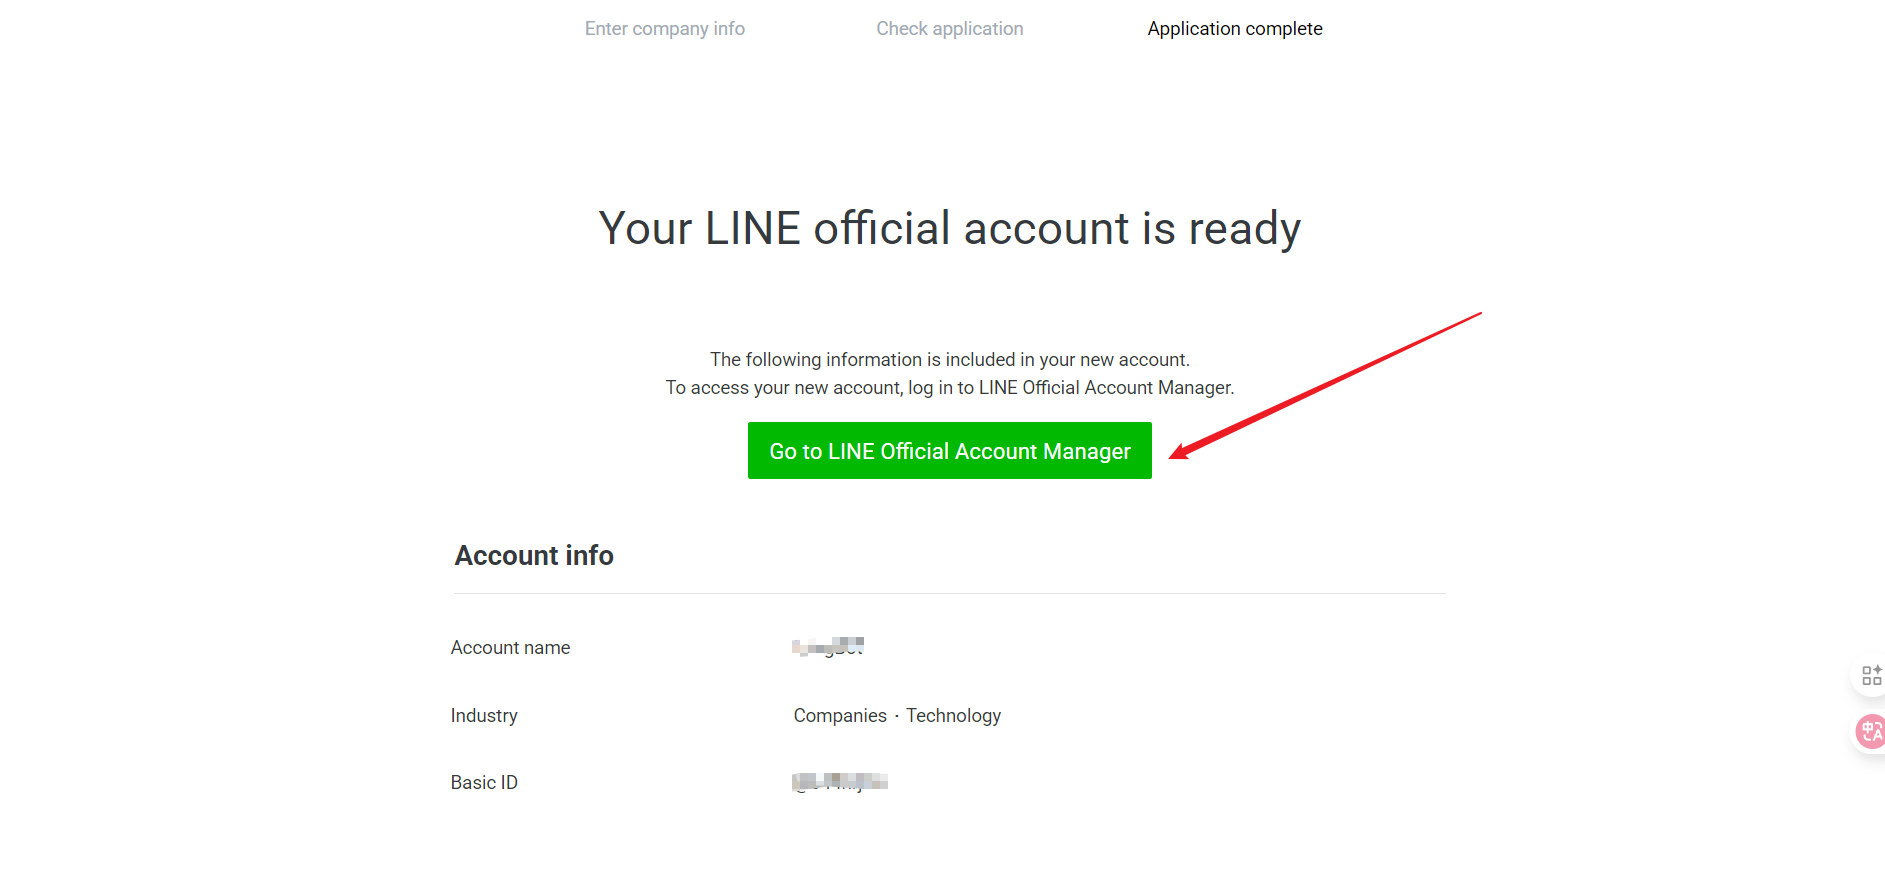
Get Configuration Information
After creation, you will obtain the following important information, please record it:- Channel Secret
Page after clicking use
- Select Settings
- Click Message API
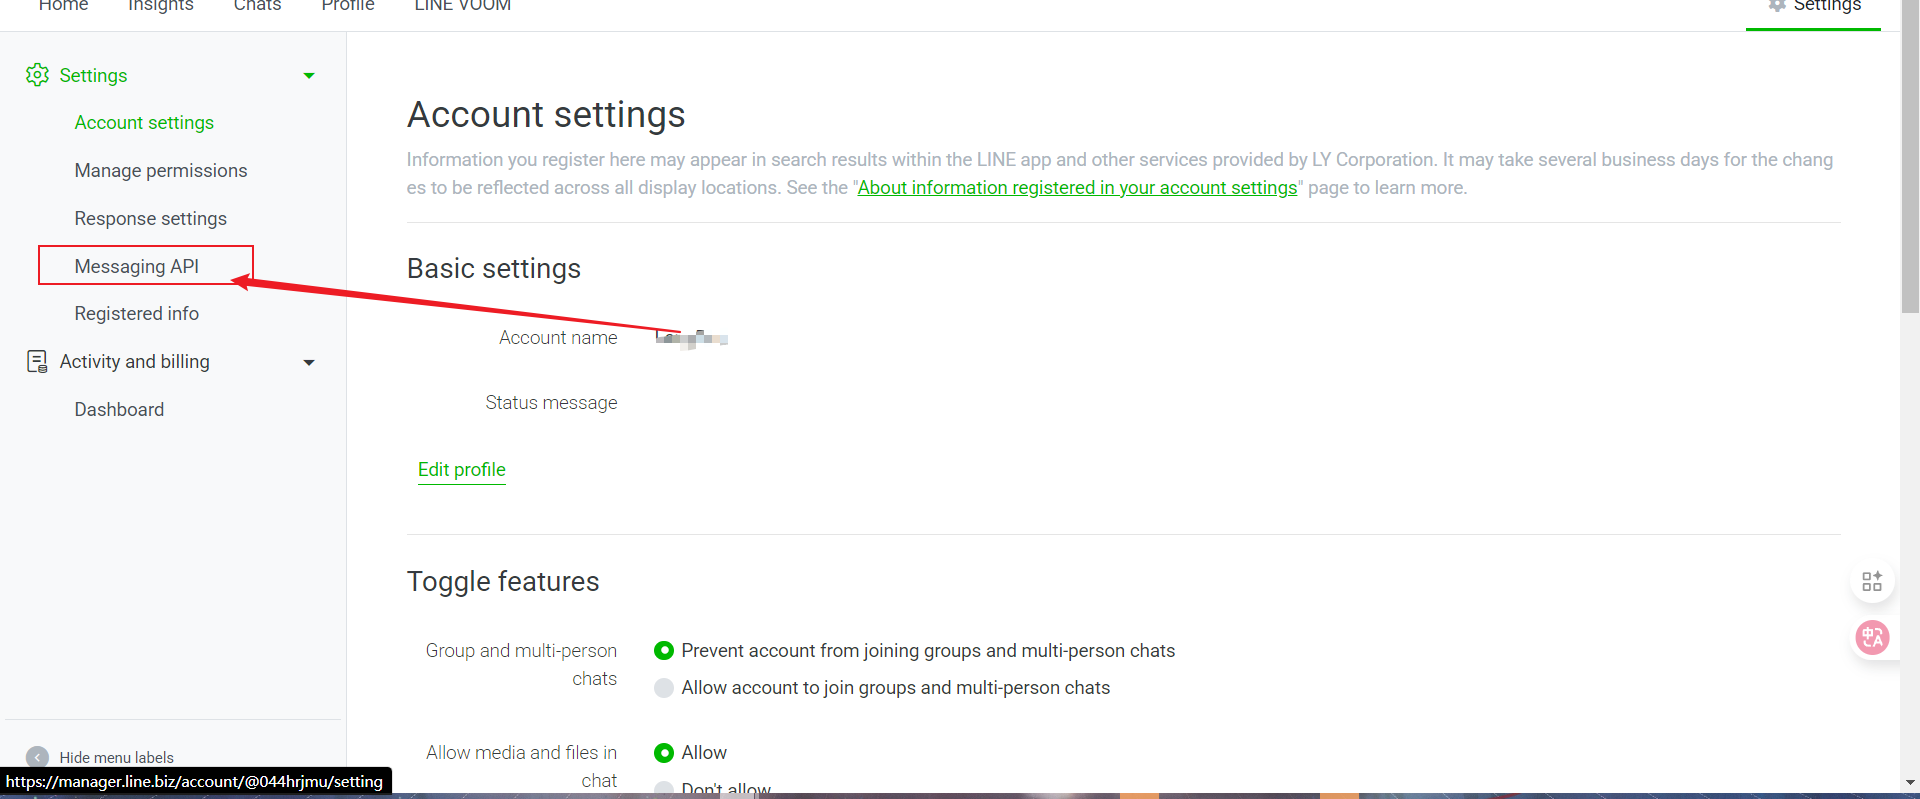
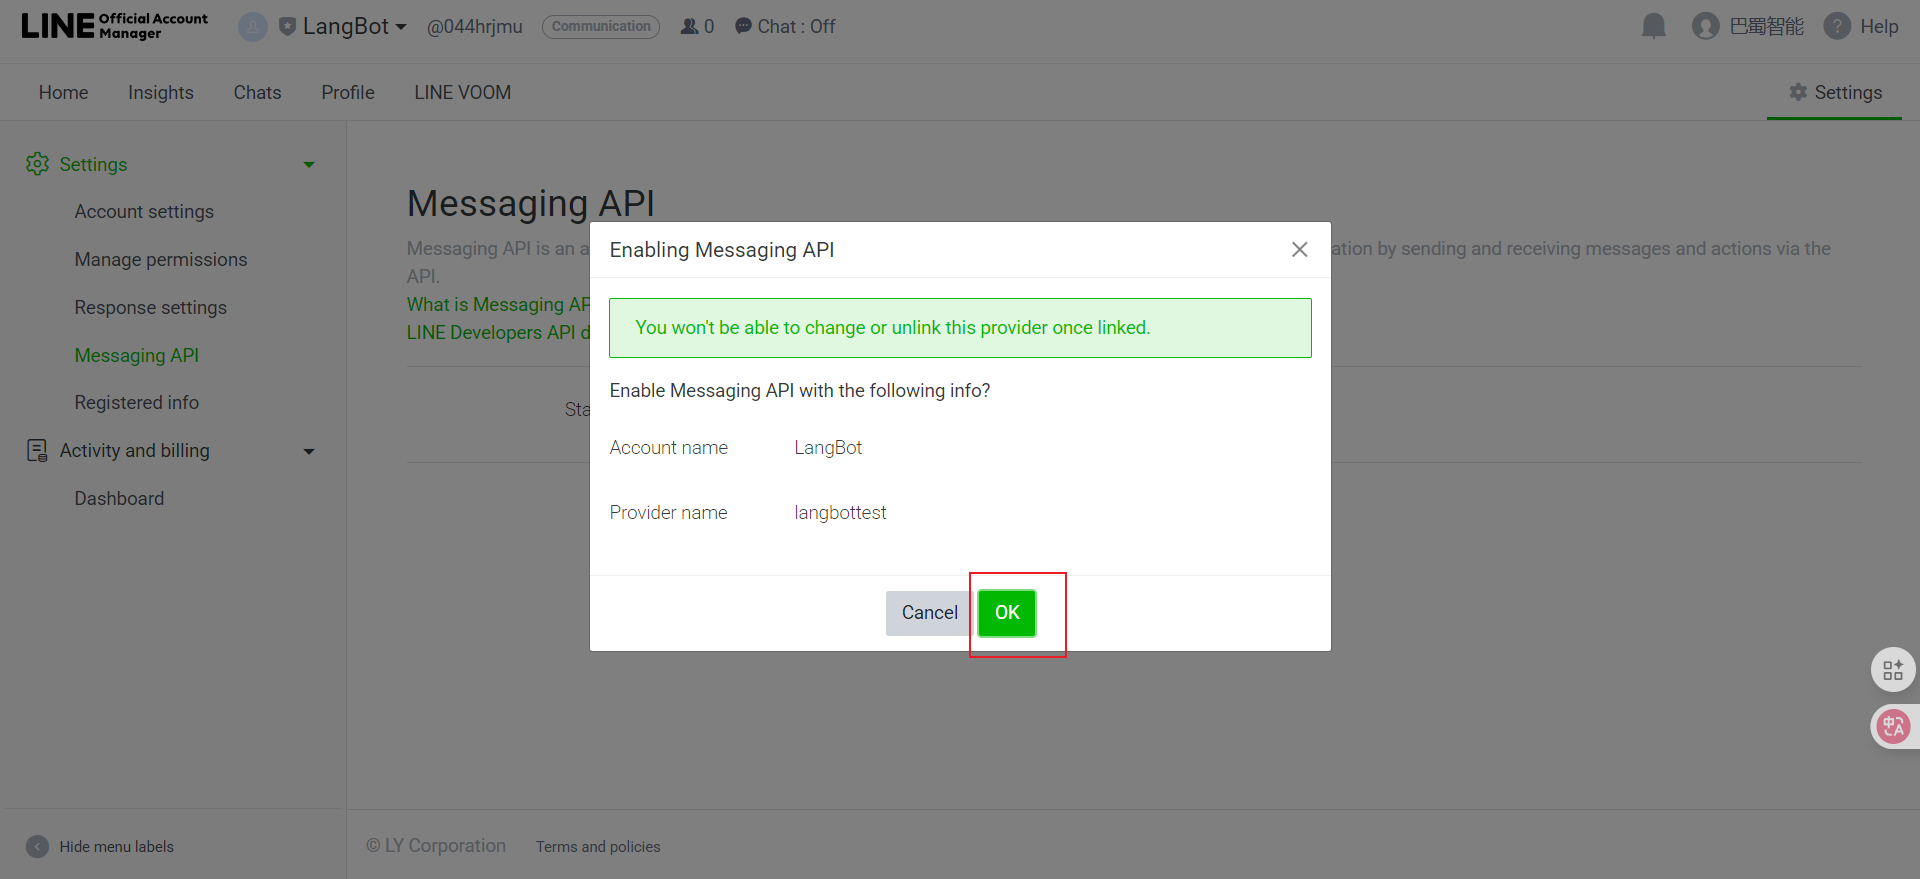
- Enable Message API
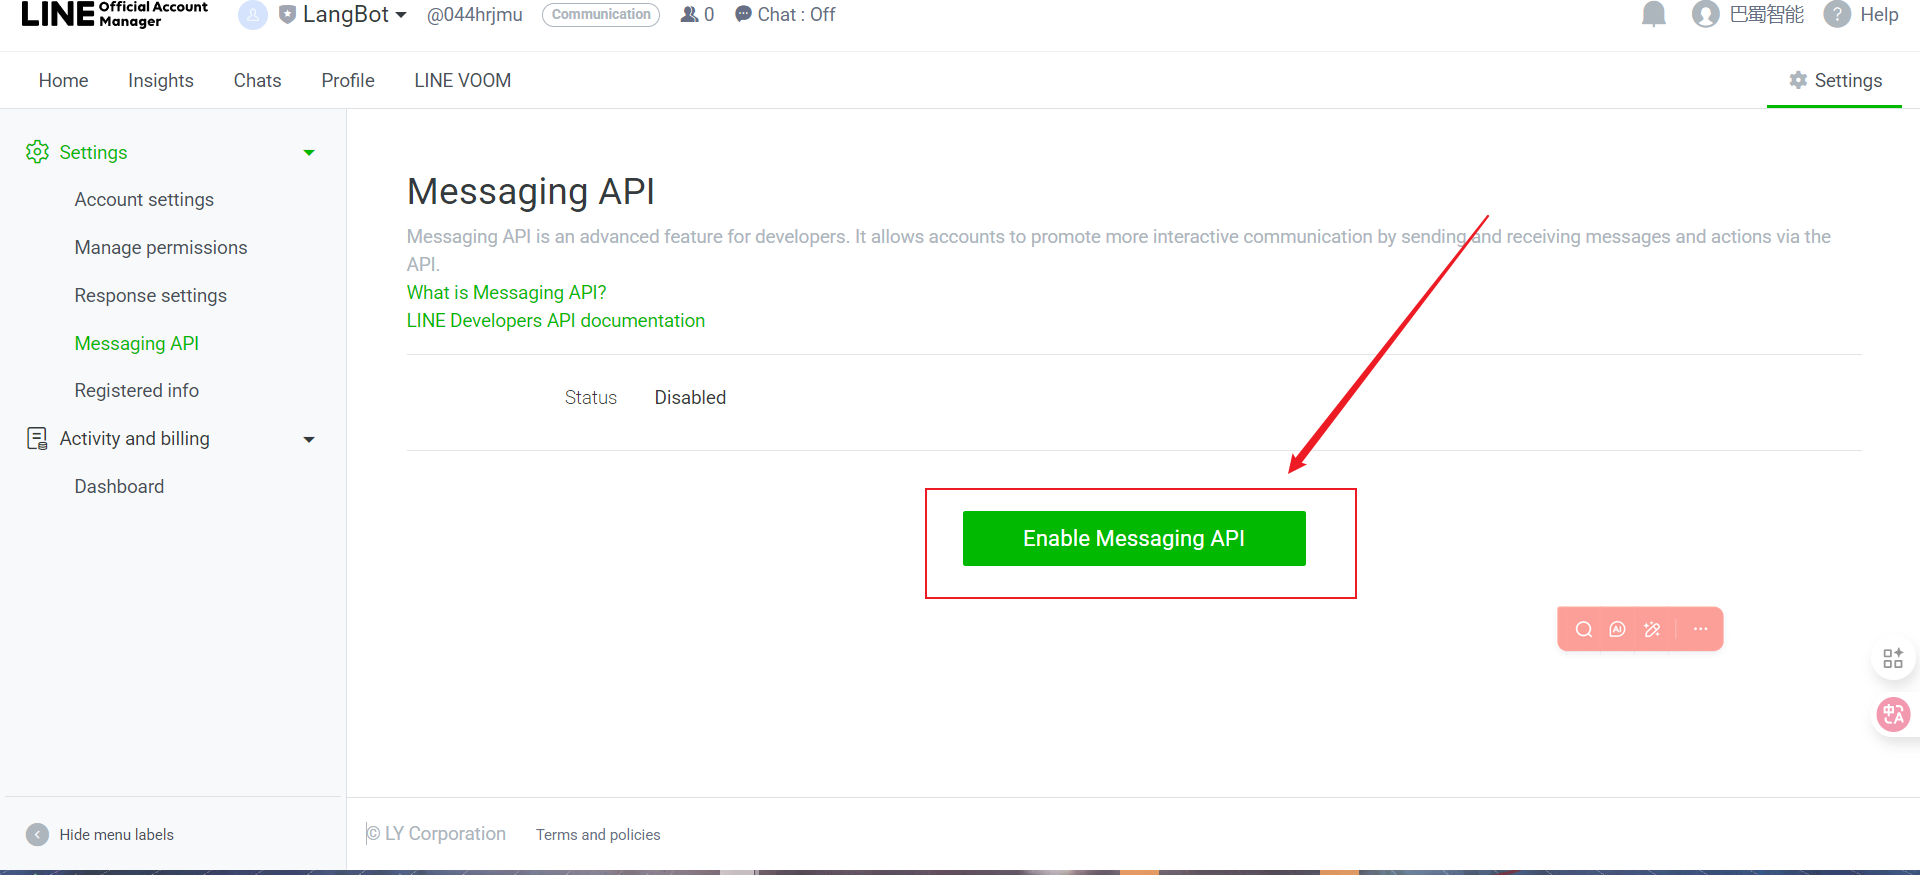
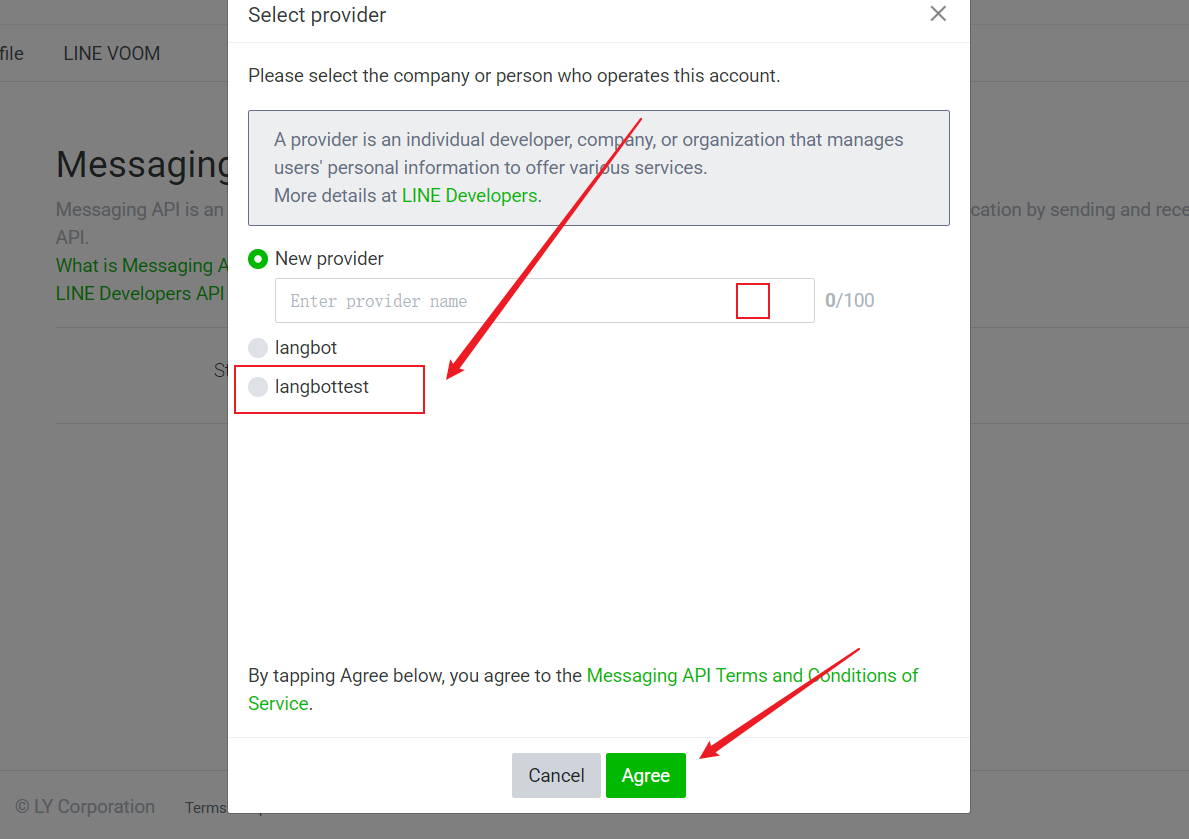
- Select the Provider you just created and click Agree
- For privacy terms, simply click OK

- Click OK to complete creation
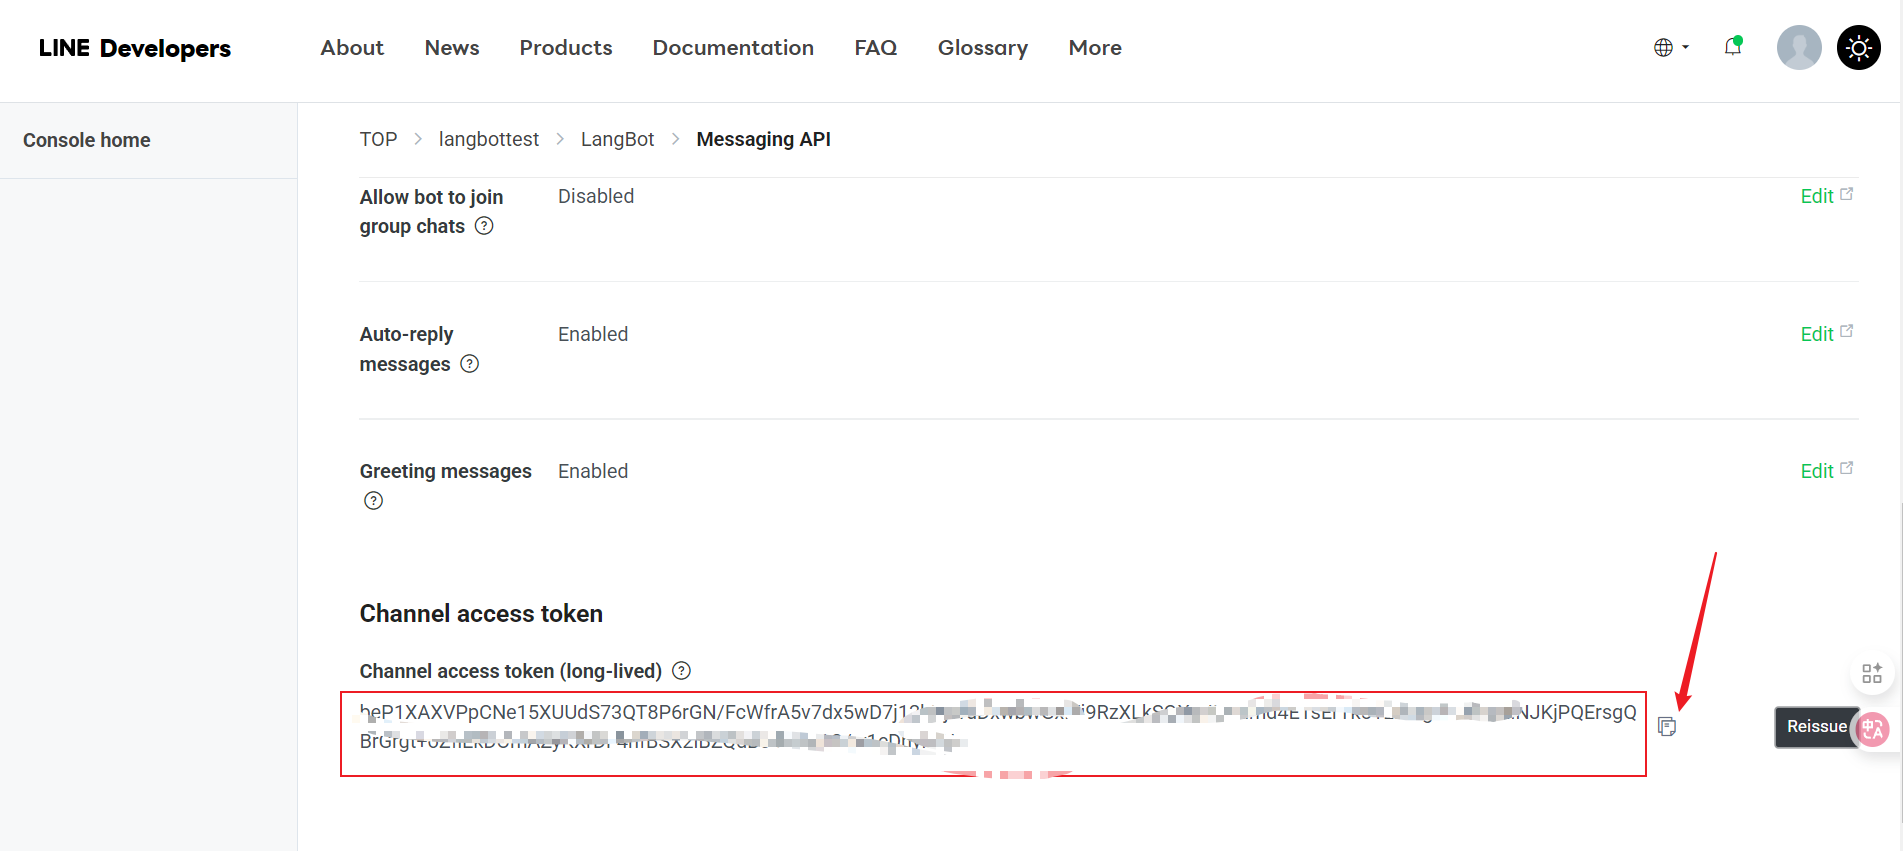
- Copy it

- Channel Access Token (need to click the “Issue” button to generate)
- Click console or directly visit Console

- Select the Provider you created and click Message API
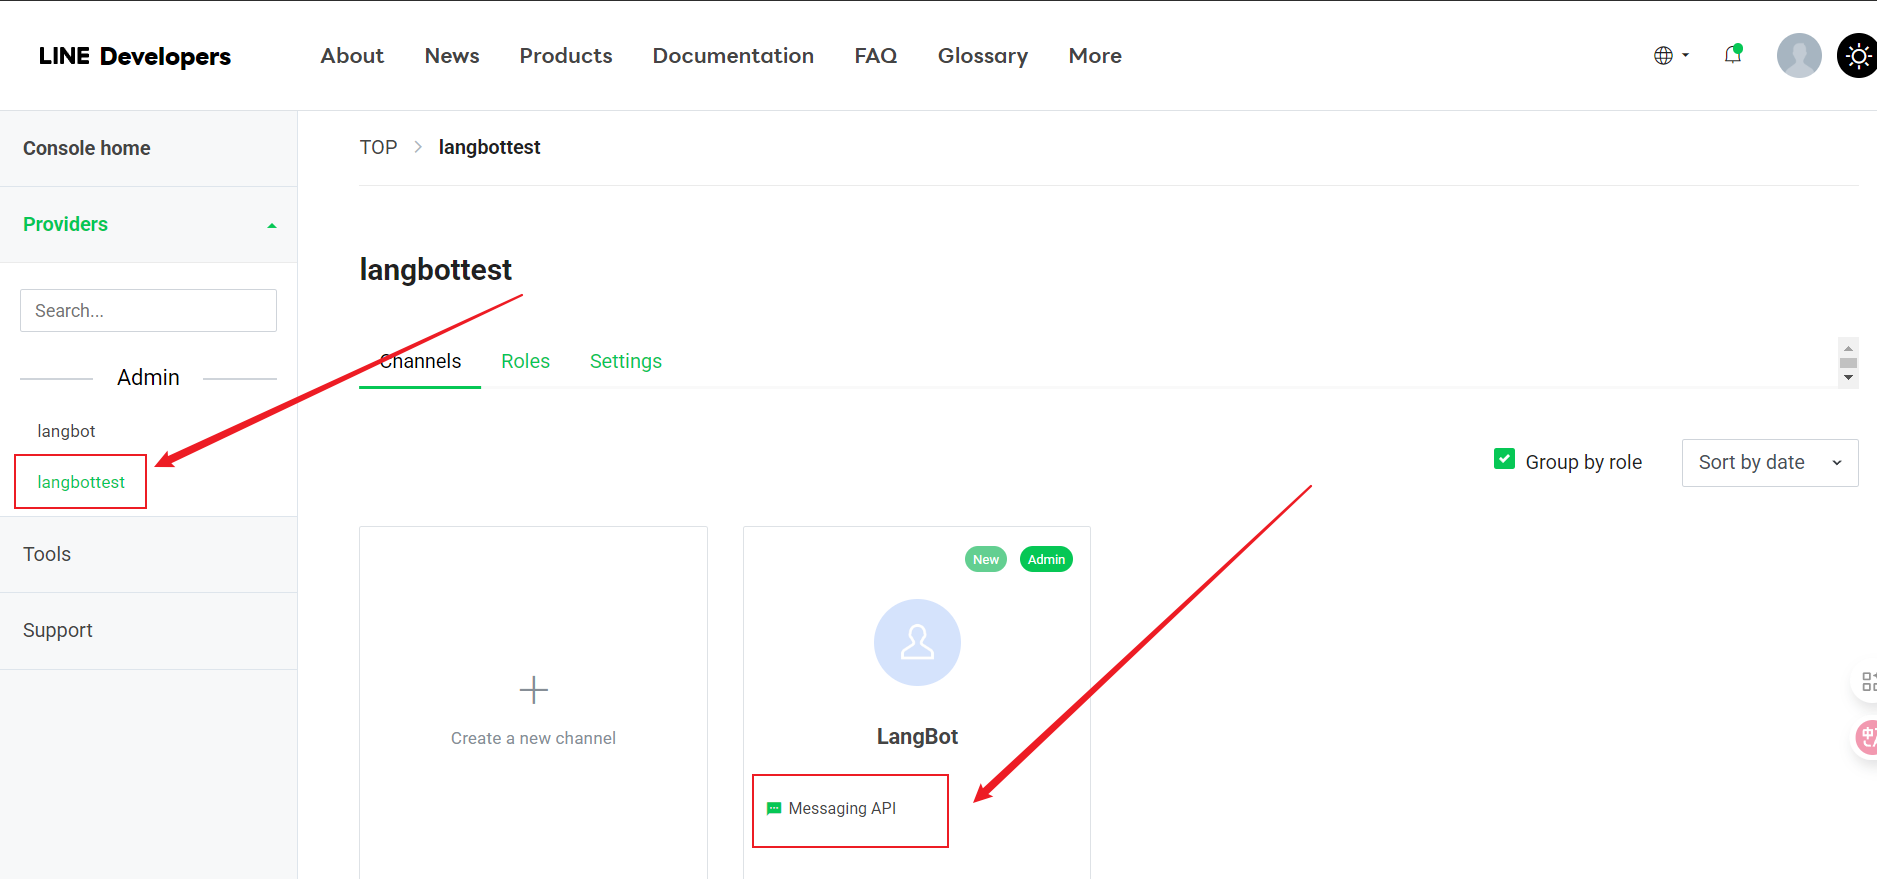
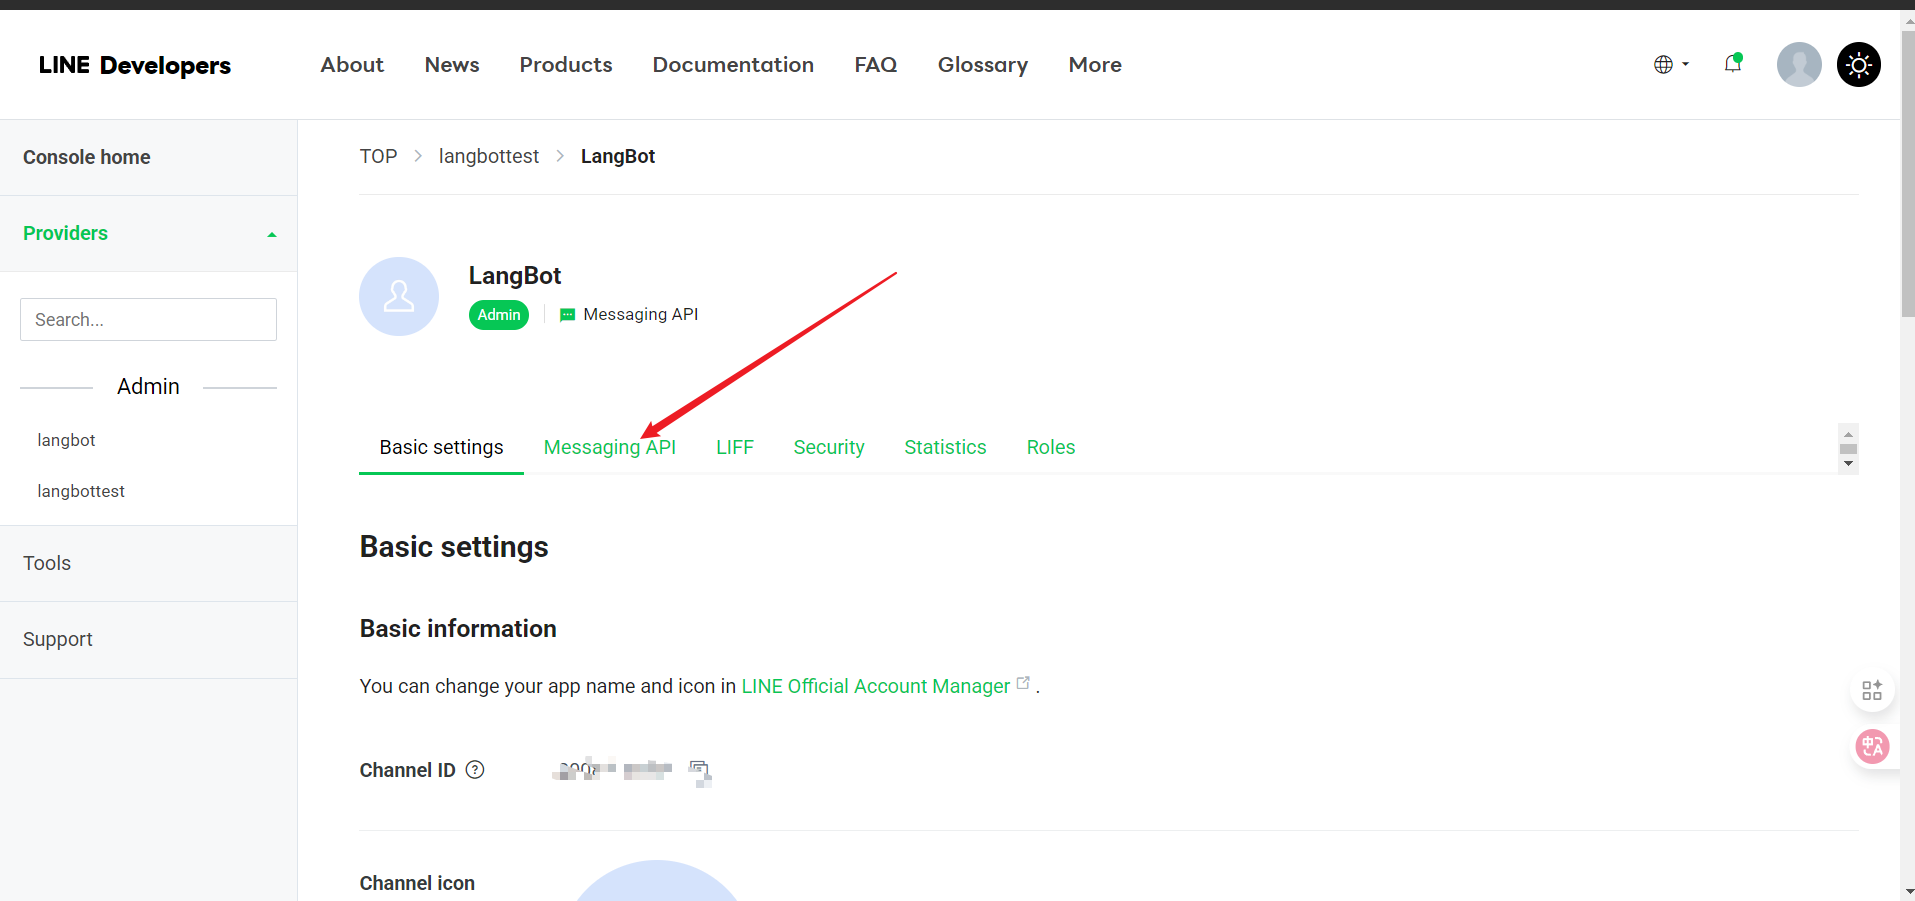
- Click Message API
- Scroll to the bottom, click Issue
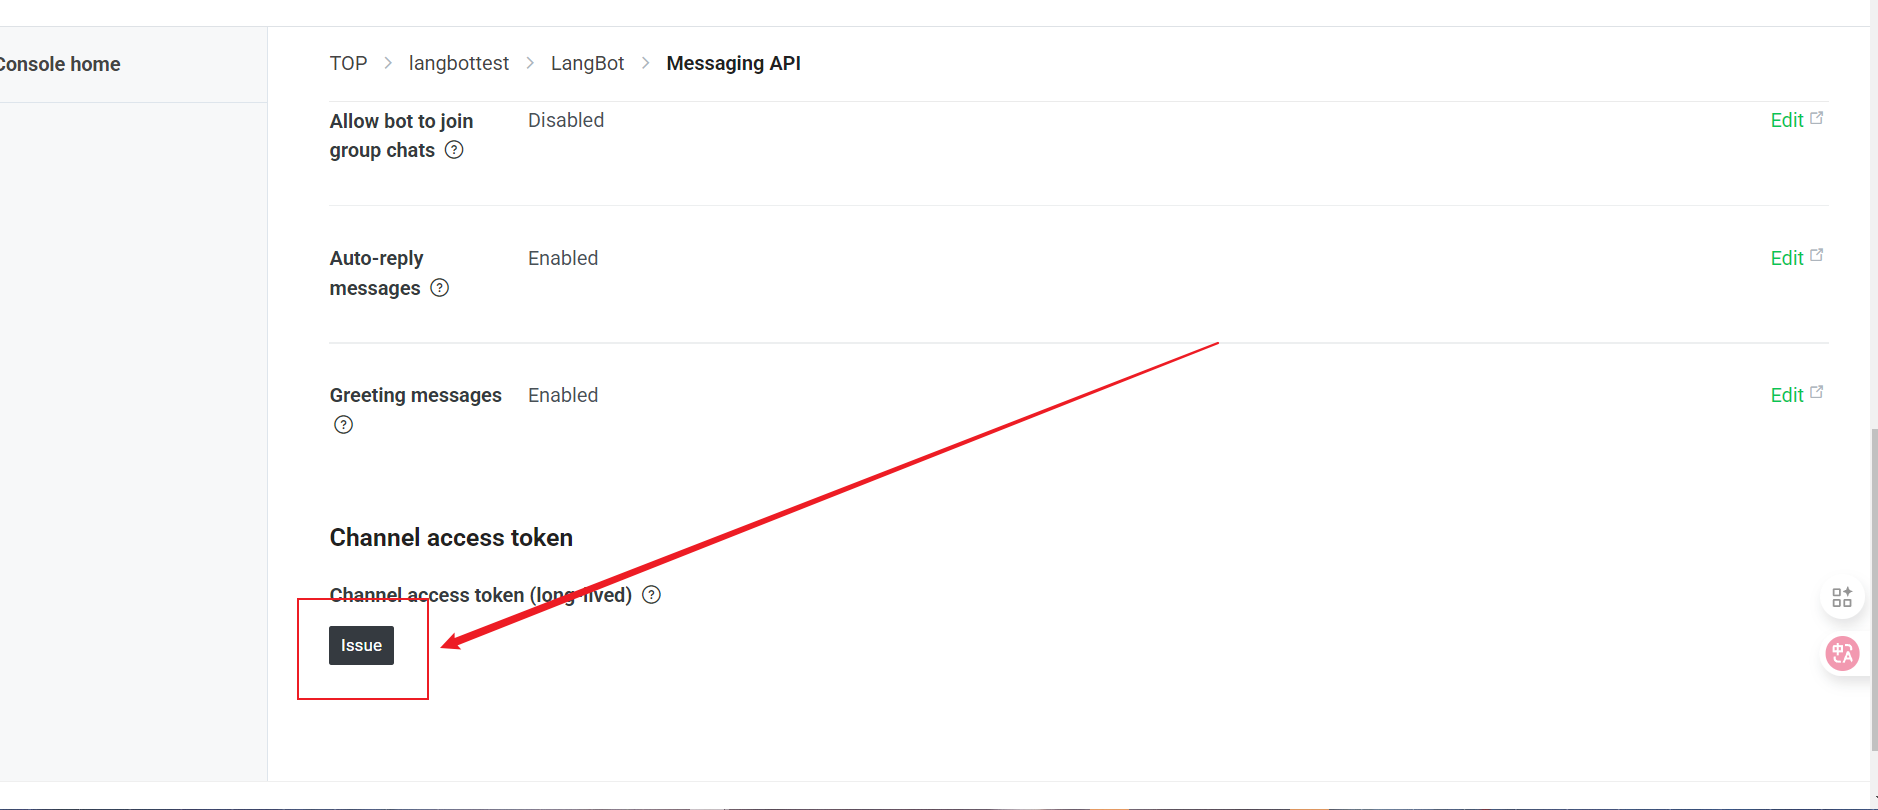
- Click the icon to copy
Connecting to LangBot
Next, open the LangBot configuration page:-
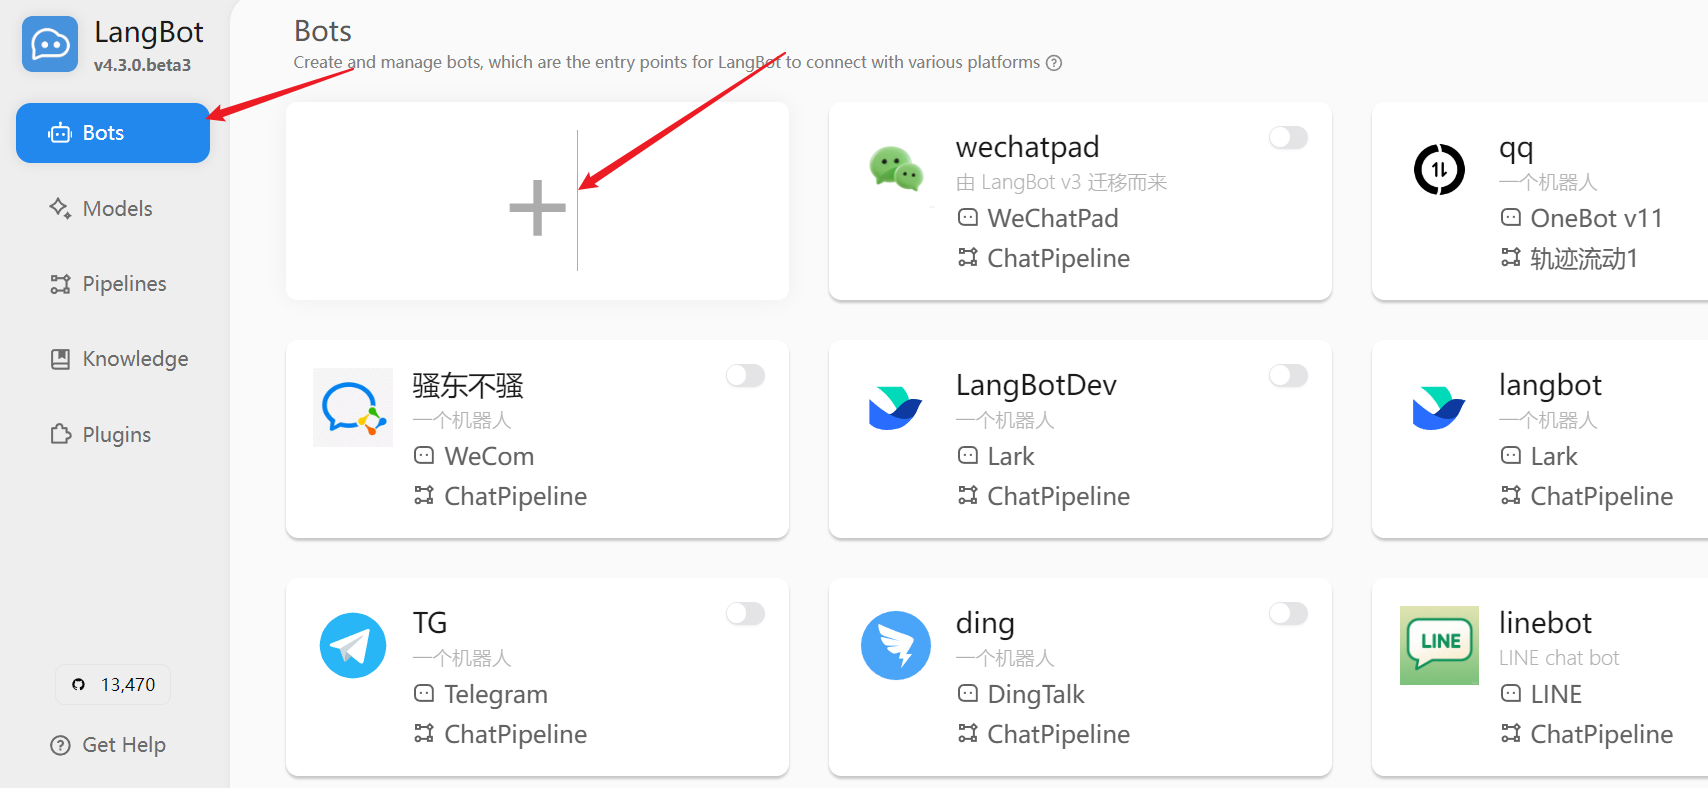
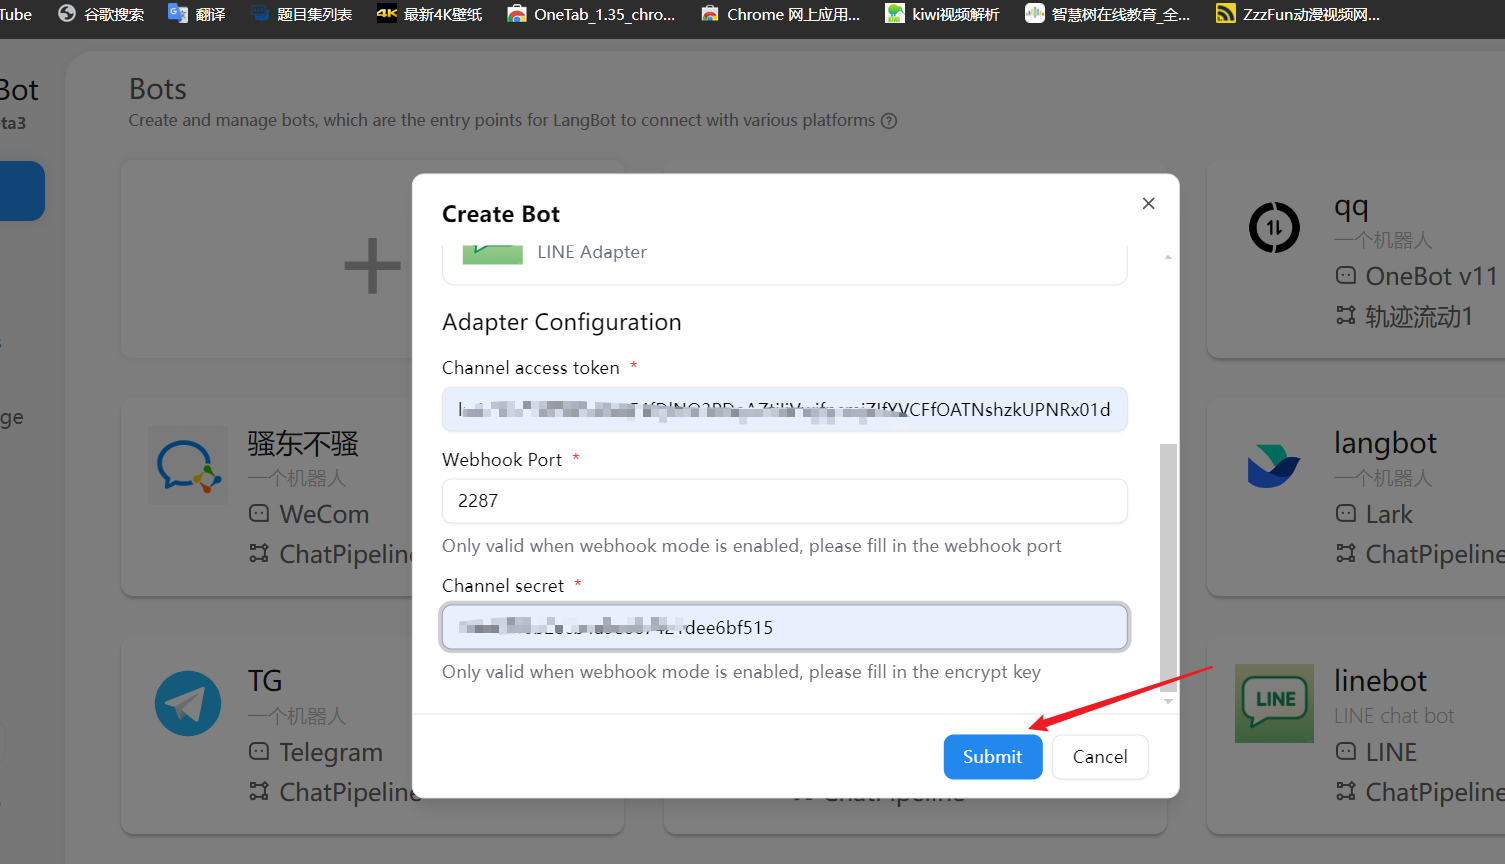
Click “Bots”, then click “Add”
-
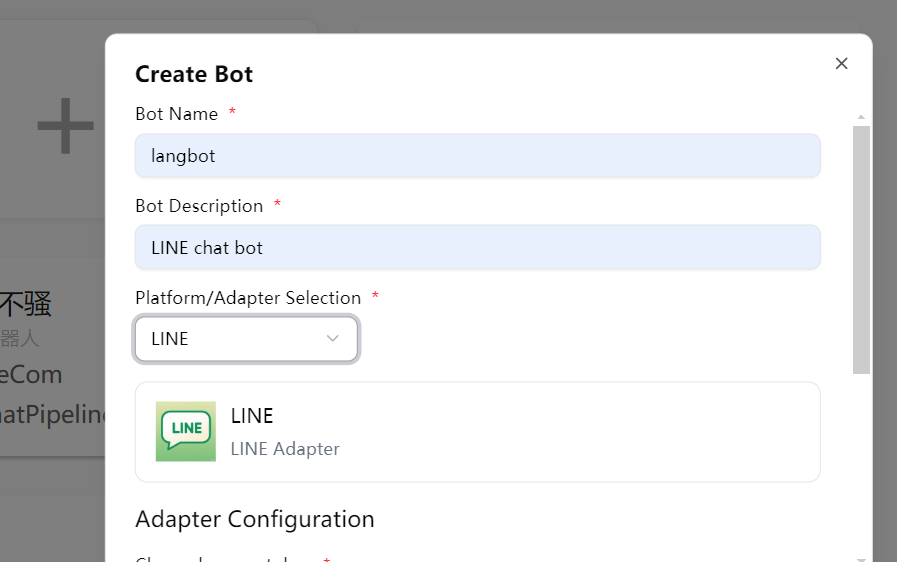
Select “LINE” in “Platform/Adapter Selection”
-
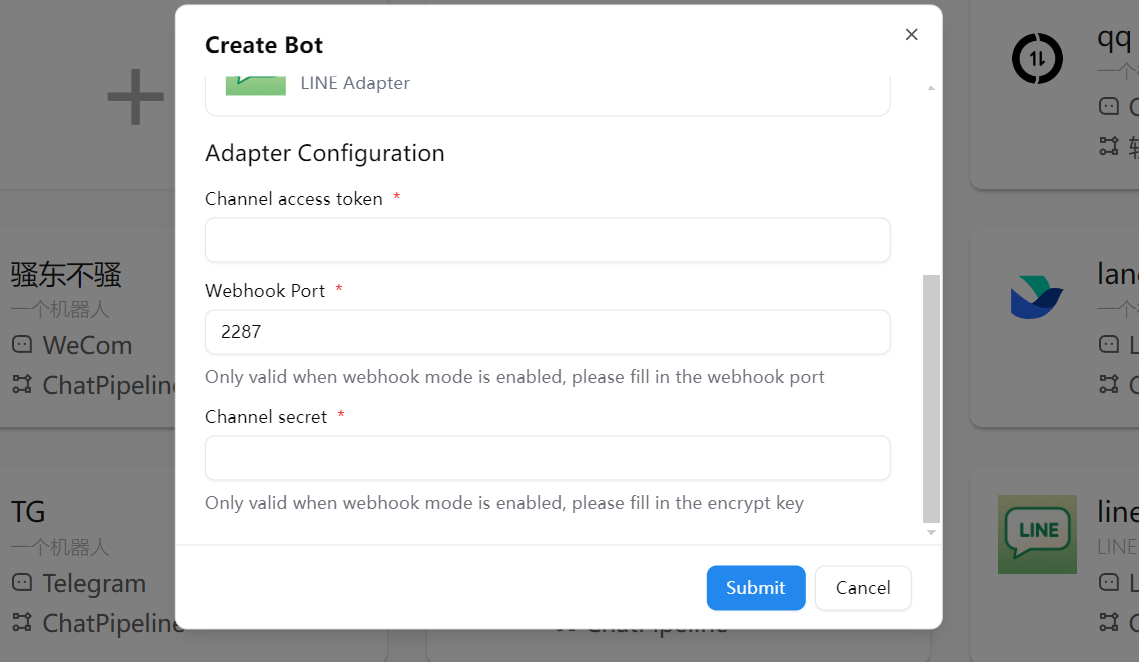
Fill in the configuration information:
- Channel Secret: The Channel secret you obtained earlier
- Channel Access Token: The Channel access token you obtained earlier
-
Click “Save” to complete the configuration
Configure Webhook
We recommend that you first refer to Configure HTTP Reverse Proxy to configure the LangBot callback address.
-
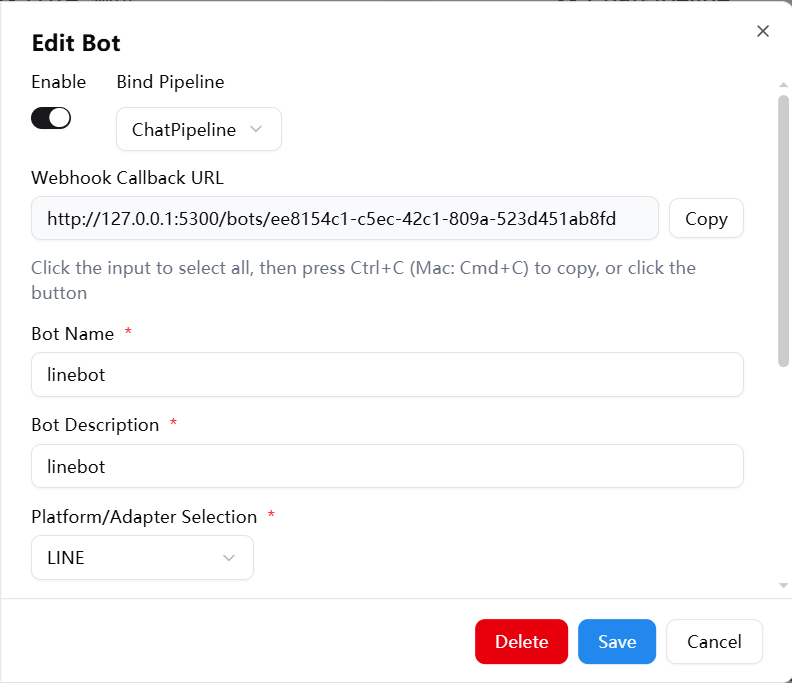
Get the Webhook callback URL from the LangBot configuration page
-
Click console or directly visit Console
-
Select the Provider you created and click Message API
-
Click Message API
-
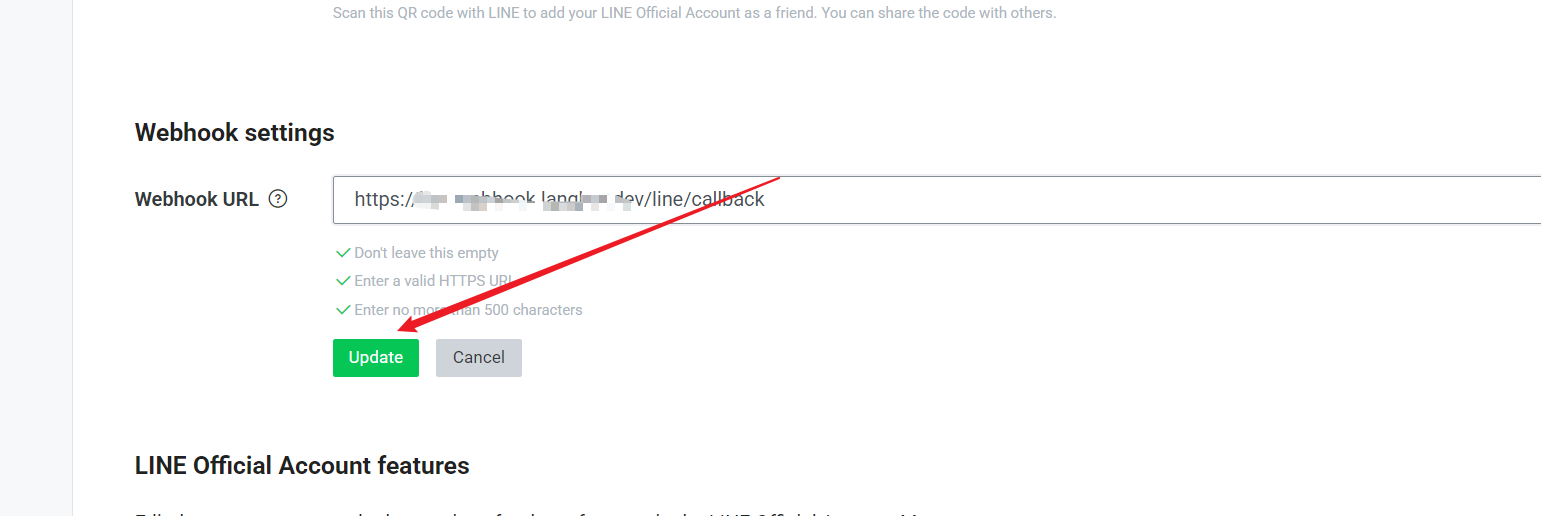
Click Edit to fill in the connection

-
Enter the connection (must be an HTTPS connection, which means you need an SSL certificate), click Update
-
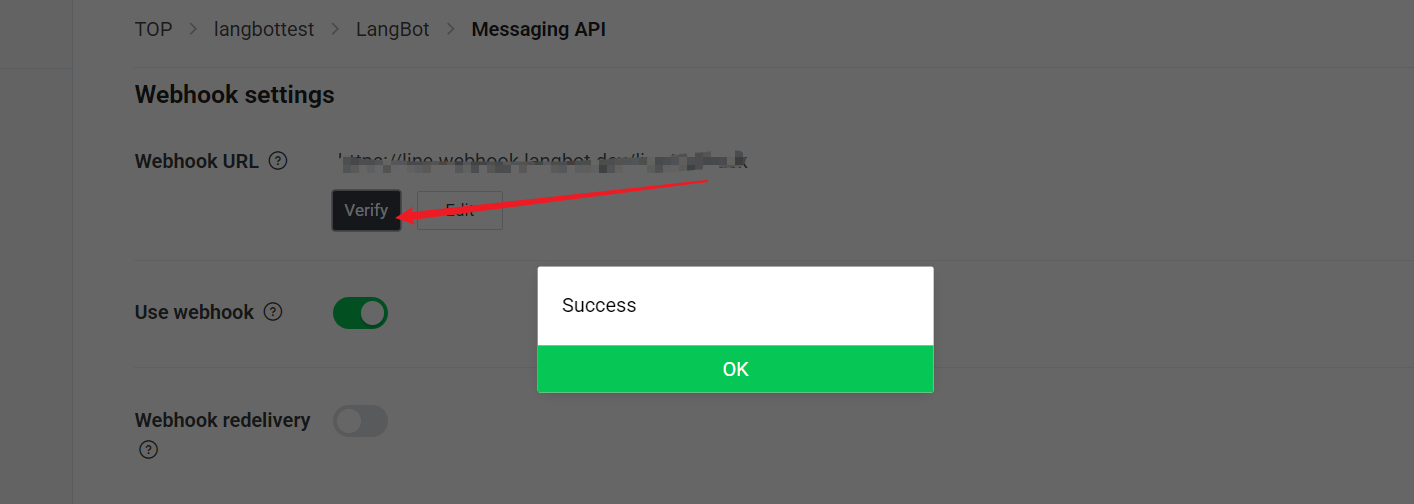
Select Use Webhook
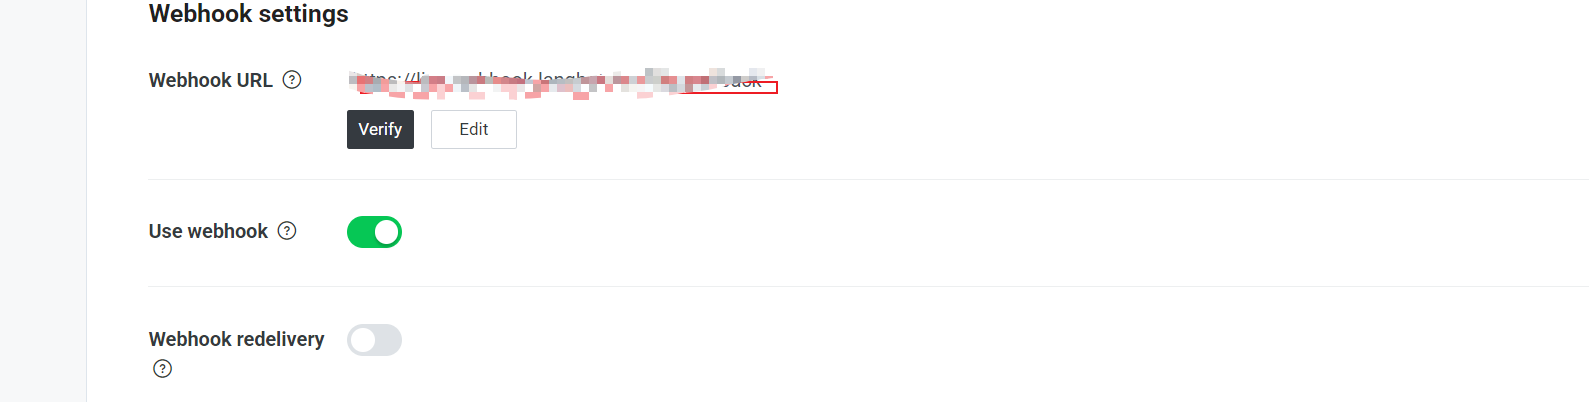
- Click the “Verify” button to test if the connection is successful
Feature Configuration
In the LINE developer console, you can further configure the bot’s features:- In the “Messaging API” tab, find the “LINE Official Account Features” section
- Enable or disable the following features as needed:
- Auto-reply messages
- Welcome messages when adding friends
- Group and multi-person chat
- Greeting when the bot joins a group
Usage
After configuration, users can interact with your LINE bot through the following methods:- Scan the QR code provided in the LINE developer console to add the bot as a friend
- Send messages in the chat, and the bot will process and reply through LangBot
Common Issues
Webhook Verification Failed
- Ensure your server can be accessed via HTTPS
- Check if the Webhook URL is correct
- Confirm that the LangBot service is running properly
Unable to Receive Messages
- Check if the Channel Access Token is valid
- Confirm that the “Use Webhook” option is enabled
- Check the LangBot logs for error messages
Permission Issues
- Ensure you have enabled the necessary permissions for the bot in the LINE developer console
- For some advanced features, a LINE Premium account may be required