Deploy LangBot with one click using aaPanel.
If you already have aaPanel installed, please update to version 9.2.0 or higher
Installing aaPanel
Recommended server systems (from aaPanel): Debian 12, Ubuntu 22, etc.
This document assumes you have a server with a public IPv4 address. If you’re using a home machine without a public IP, you can access the relevant pages through the internal network mentioned below.
Open aaPanel, use the Linux panel installation script provided by aaPanel official, and select the corresponding script based on your system.
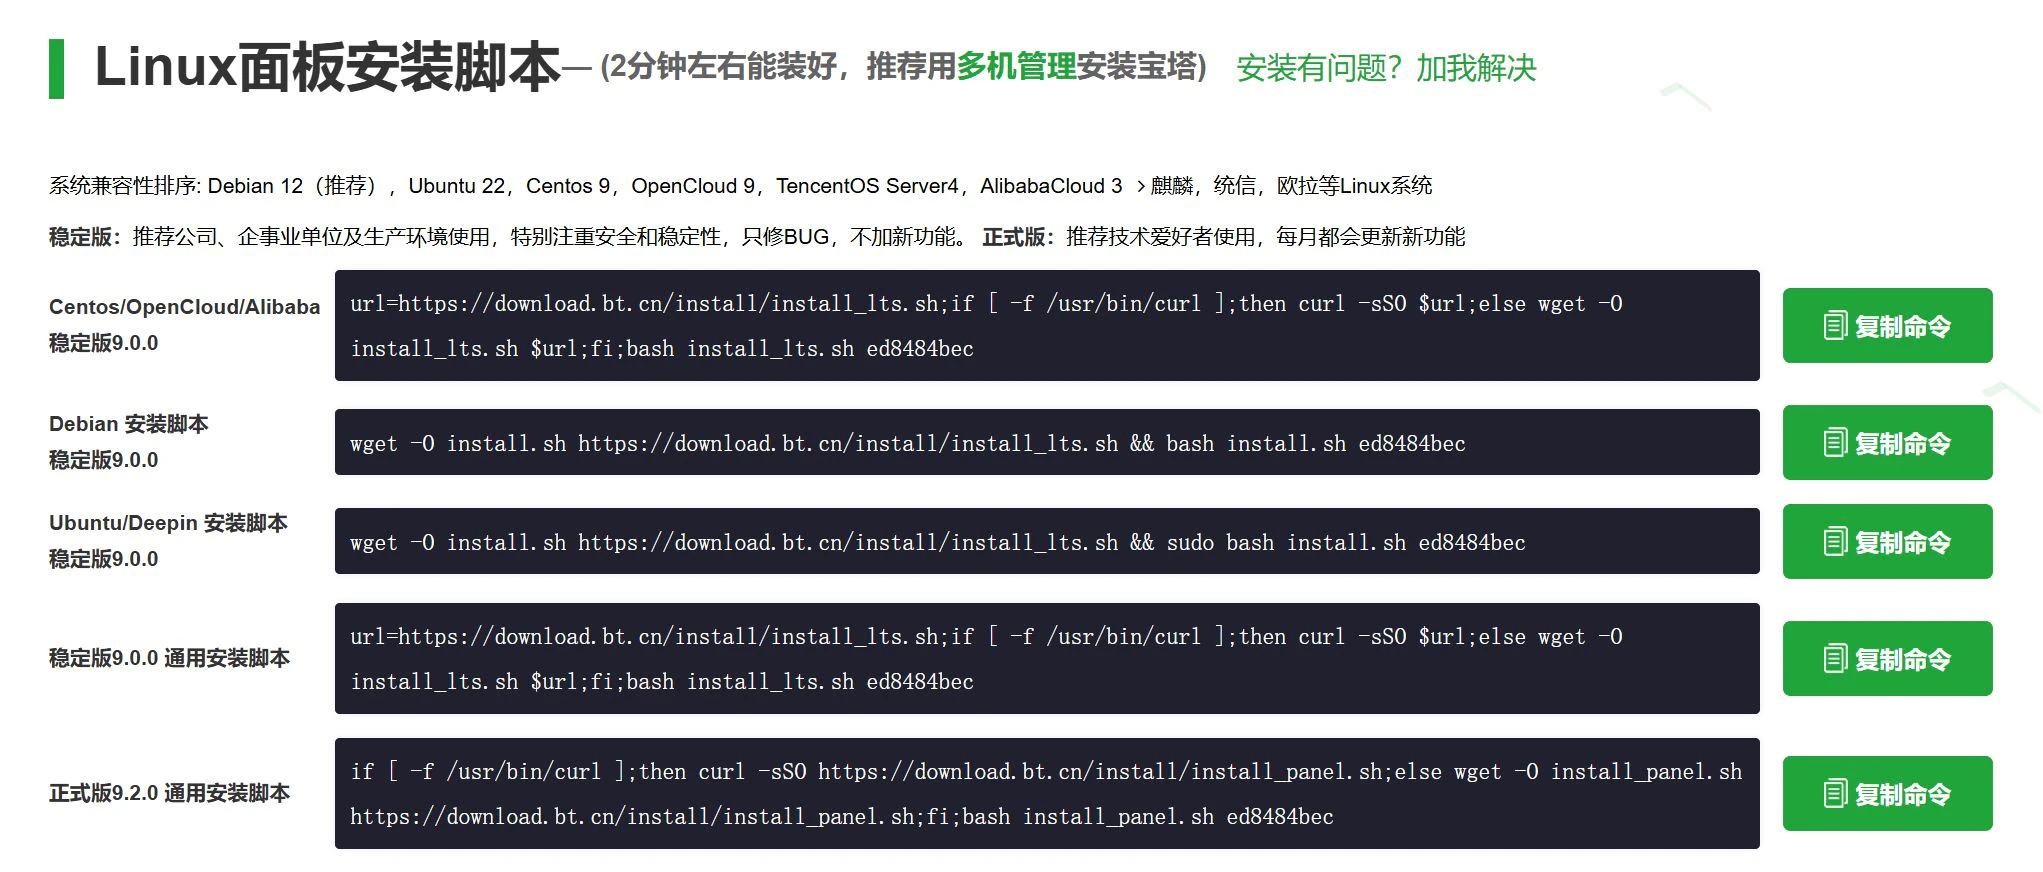 Copy the corresponding script and paste it into your server to execute.
Installing LangBot
After waiting for a while, aaPanel installation will be complete.
You’ll see a message similar to this, copy the external panel address and open it in your browser.
 When you first open it, you should see a popup for
 Recommended Installation Suite. You can skip this by closing it.
Then click on docker in the sidebar. If it’s your first time, you’ll be prompted to install Docker and Docker Compose services. Click “Install Now” if prompted, or ignore if already installed.
Then go to Docker -> App Store, search for LangBot (note the case sensitivity), click Install, and use the default configuration.
After a short wait, you’ll see a container named langbot_XXXX showing as Running.
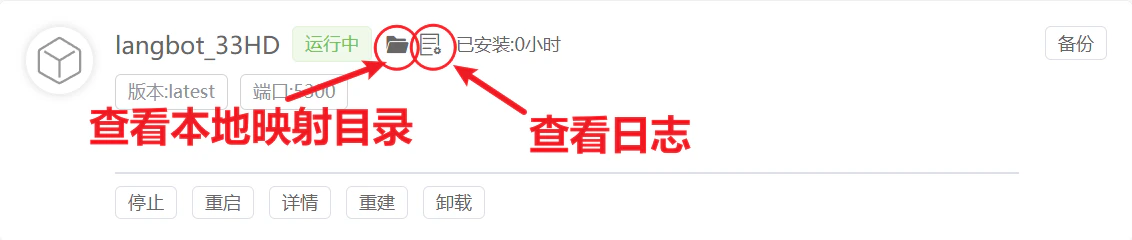 Click the red circle in the image above to view the running logs.
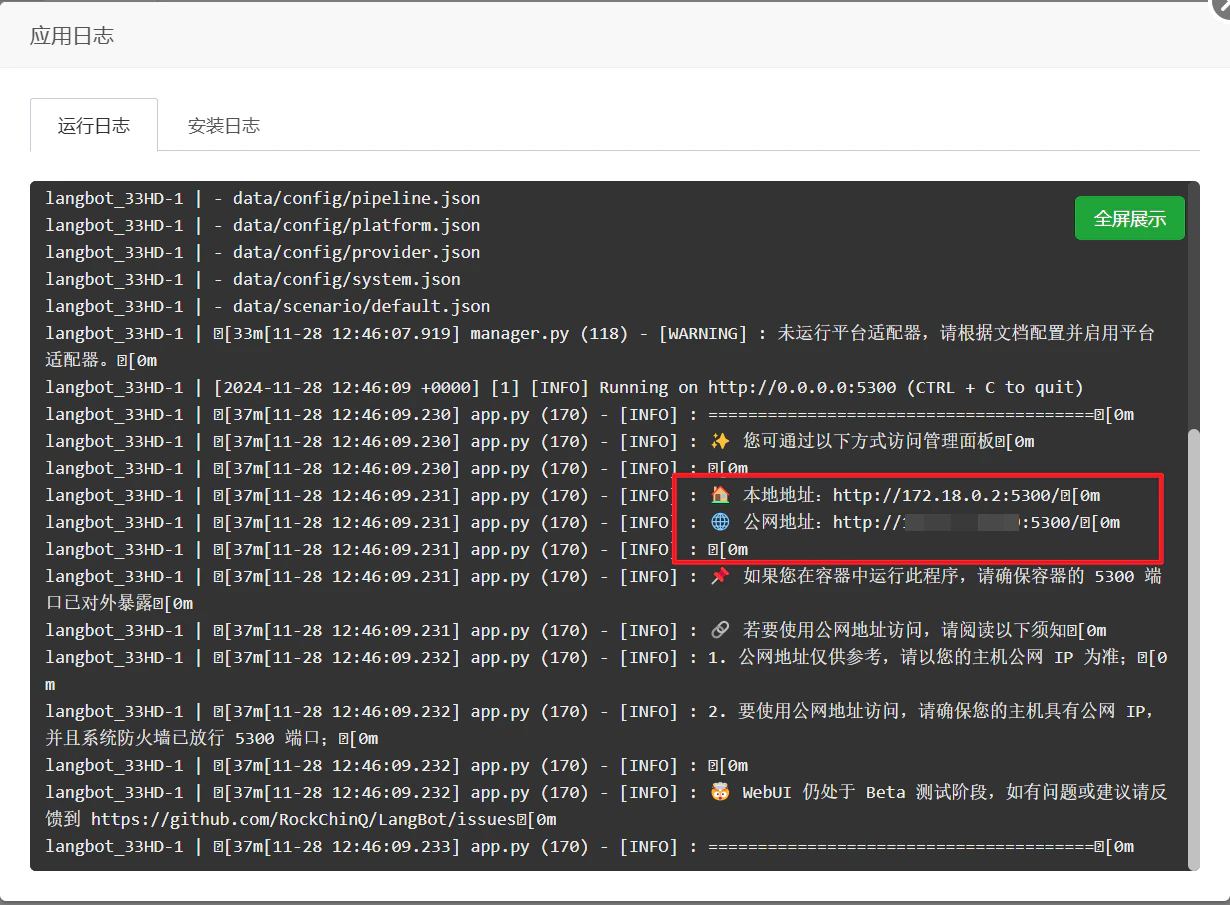 You can see the external and internal access paths for the WebUI configuration page (visual configuration page). Copy the public address, for example
 http://xxx.xxx.xxx.xxx:5300 (where xxx.xxx.xxx.xxx is your aaPanel IP, and 5300 is the port number, which may vary as shown in the image).
After opening it, enter your admin email and password, then click initialize.
You can then proceed with configuration in the visual interface.
If you prefer to directly modify JSON configuration files, you can look at the local mapping directory shown in the image above. Go to the installation directory, where the data folder is used to store configuration files, and the plugins folder is used for plugin-related files.
Next, please continue reading the Configure Message Platform page.