Using QQ Official Bot API (Using webhook method)
This article only provides the deployment of test bots. For the official launch of bots, please follow the release process.
WARNING
QQ Official has issued an announcement prohibiting unauthorized access to AIGC features. Please use with caution.
Register QQ Bot (Test Bot)
Configure Basic Bot Information
Go to the QQ Open Platform, find Application Management at the bottom, click Create Bot, fill in the basic information, and then enter the bot page, as shown:
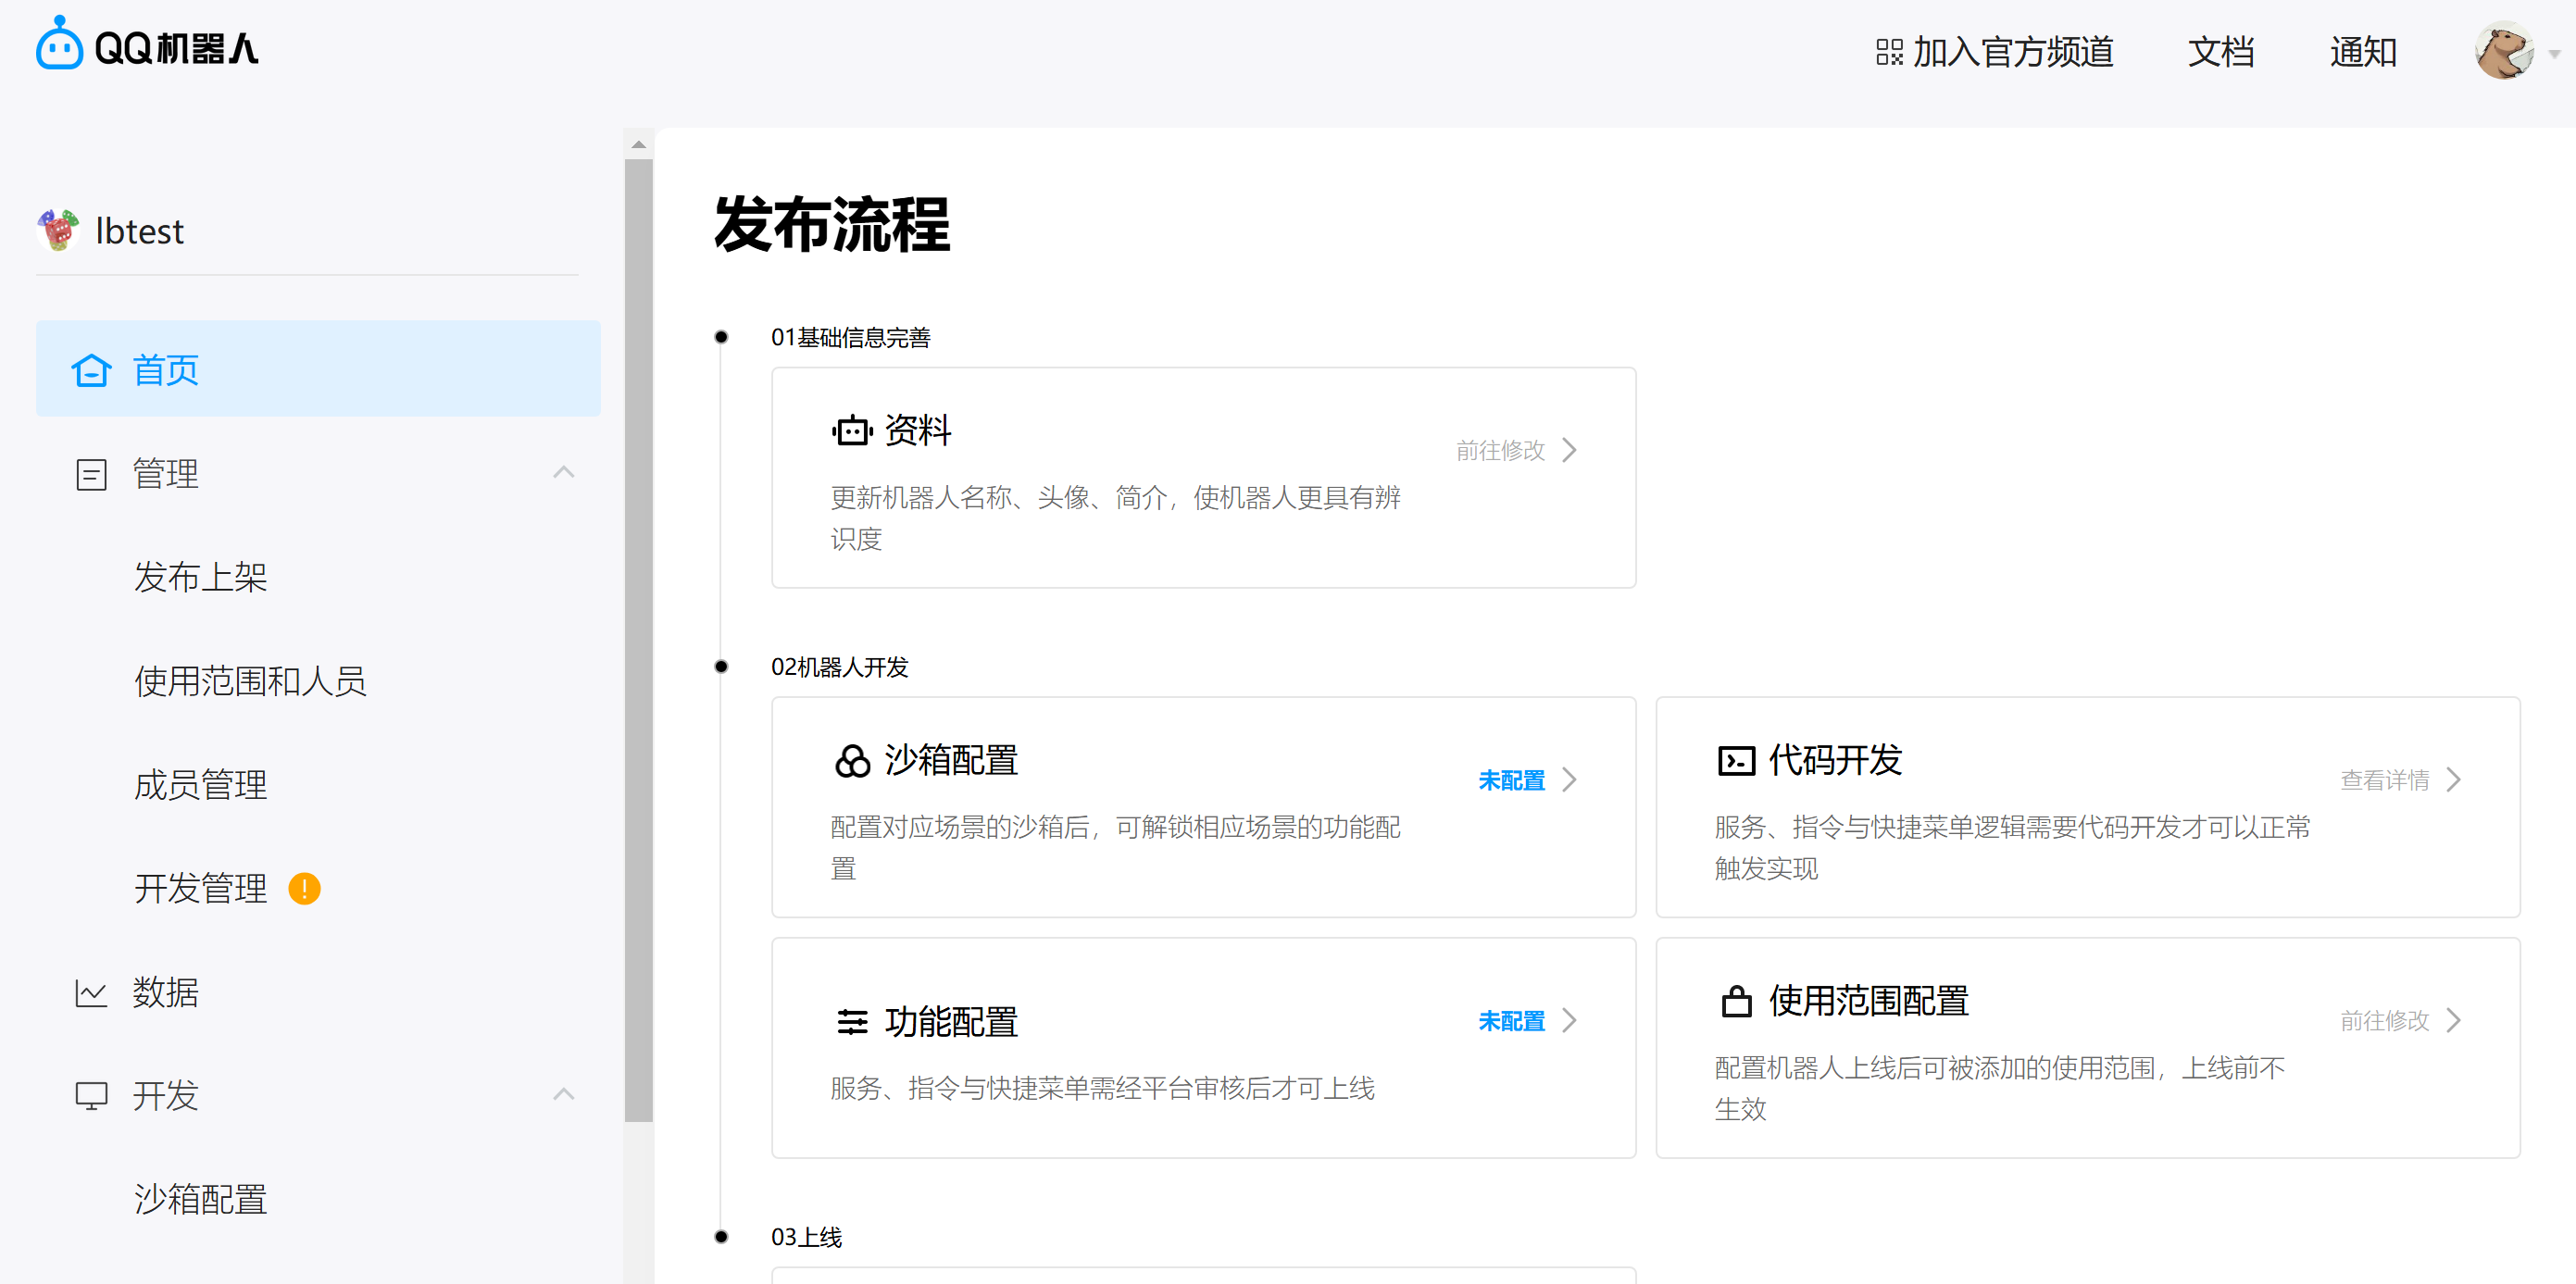
The Release Process in the Home option is the step to launch the bot. Since you are deploying a test version bot, you only need to complete the Information and Sandbox Configuration sections.
First fill in the information, then click on Sandbox Configuration.
Configure Sandbox Settings
Click on Sandbox Configuration. If you want to deploy in a QQ group, follow the requirements under QQ Group ID to select a group chat, and add users with private chat permissions in the message list configuration.
If you want to deploy in a QQ channel, follow the requirements under Channel ID to select a channel ID, with bot type 0.
Configure Development Management
Click on Development Management.
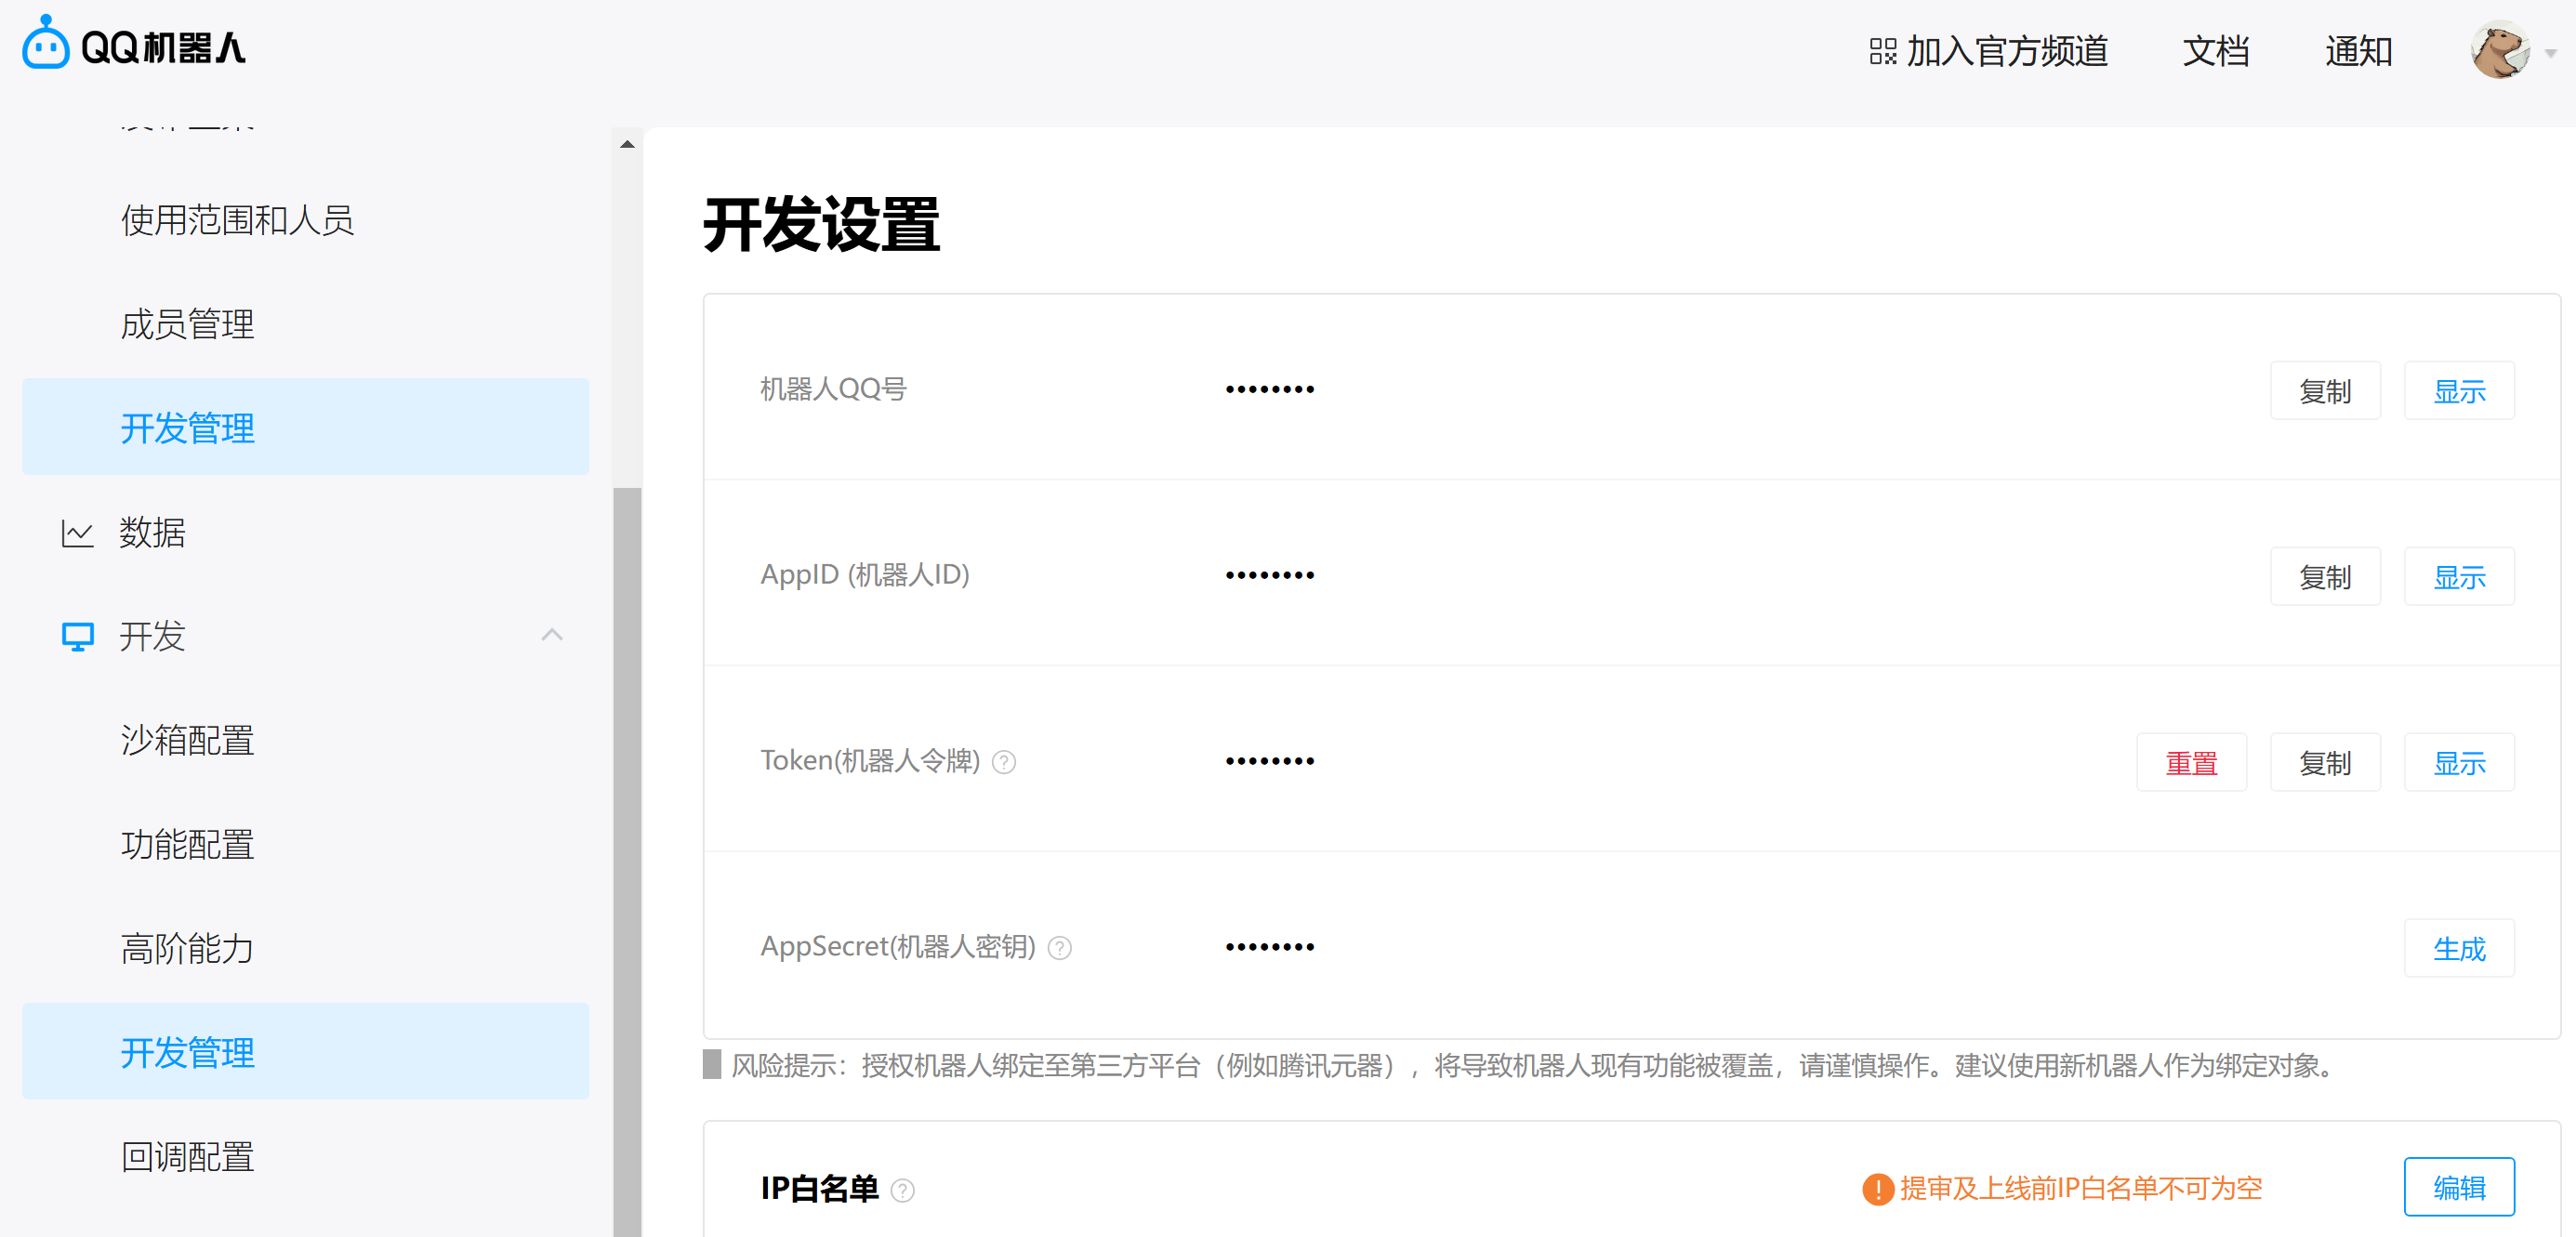
Record the AppID, Token, and AppSecret, and add the IP address of the server where LangBot is located to the IP whitelist.
Connect to LangBot
Next, open the LangBot configuration page
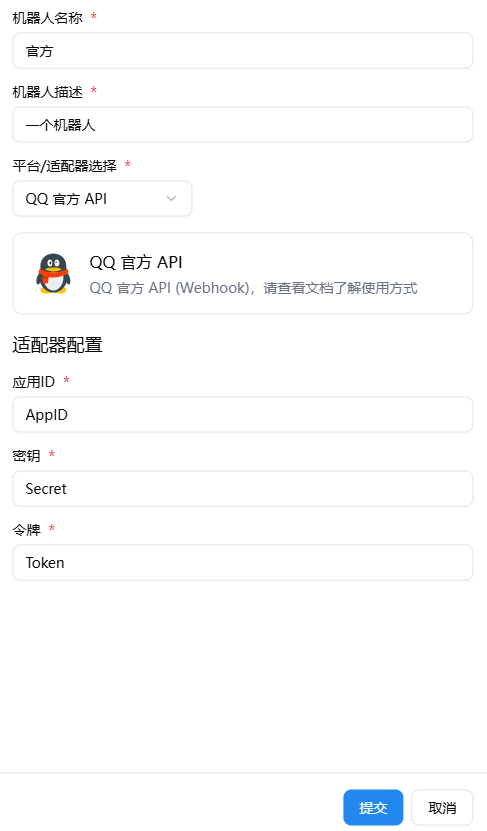
Click on Bots, then click Add
Select QQ Official API for Platform/Adapter Selection
Configure Callback Address
LangBot must be deployed on a server with a public IP address, and HTTPS must be successfully enabled. Please follow the documentation Configure HTTP Reverse Proxy and SSL for configuration.
Subsequent Configuration
If Caddy fails to start, please read the Caddy documentation or join the LangBot community group for help.
Here are some possible issues:
- Port 443 is not open
- The domain is not resolved to your machine
- Caddyfile was not saved successfully
Set Management Portal Callback Address
First start LangBot.
Click on Callback Configuration in the bot management portal, check all events under Add Event.
Go to the LangBot configuration page, enable and select the corresponding QQ bot, copy the Webhook callback address from the corresponding bot configuration page, replace the IP address and port with the domain name configured in Caddy, and enter it in the request address.
As shown in the image: 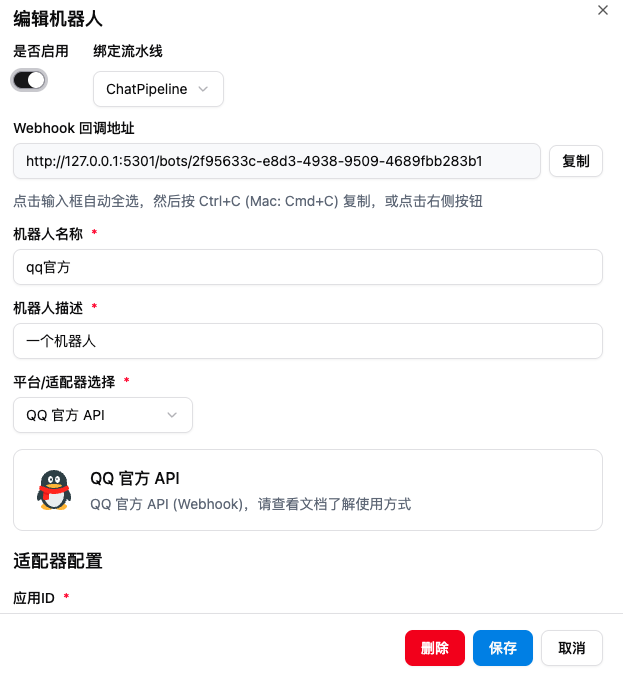
For example, if the domain is testlb.com, then enter testlb.com/bots/xxxxxx-xxxxxx in the request address, and click to confirm the configuration. If the callback address is saved successfully, it means the deployment is successful. If you see Verification Failed, please carefully check if the above configuration items are filled in correctly.
Publication Method
Enter the release process in Home and follow the process to publish and launch the bot.