> ## Documentation Index
> Fetch the complete documentation index at: https://docs.langbot.app/llms.txt
> Use this file to discover all available pages before exploring further.
# Integrating LangBot with New API
New API is a next-generation large model gateway and AI asset management system, designed to address issues such as fragmented access to multiple AI service providers, difficulty in cost control, and insufficient service stability. Its core advantages are focused on three aspects:
1. **Multi-provider compatibility**: It has integrated **over 30 AI service providers** and achieved **100% OpenAI compatibility** (that is, it supports calling models from other service providers in the OpenAI interface format, reducing development costs);
2. **High availability**: It promises **99.9% service availability** to meet enterprise-level stability requirements;
3. **Ease of use and controllability**: It supports "one-click deployment" for quick access, and also provides a "flexible billing" function to help users control AI usage costs, while taking into account "security and stability" features.
## 1. Deploy New API Locally (Docker Container Method)
> For more deployment methods, refer to the [New API Deployment Guide](https://docs.newapi.pro/installation/)
This deployment method uses an SQLite database (lightweight, no additional deployment required).
Enter in the command line:
```bash theme={null}
docker run --name new-api -d --restart always \
-p 3000:3000 \
-e TZ=Asia/Shanghai \
-v ./new-api/data:/data \
calciumion/new-api:latest
```
> ⚠️ Note:
>
> * Replace `./new-api/data` with the actual folder you want to use.
After deployment, open `http://server-IP:3000` to configure New API.
## 2. Connect LangBot to Local New API
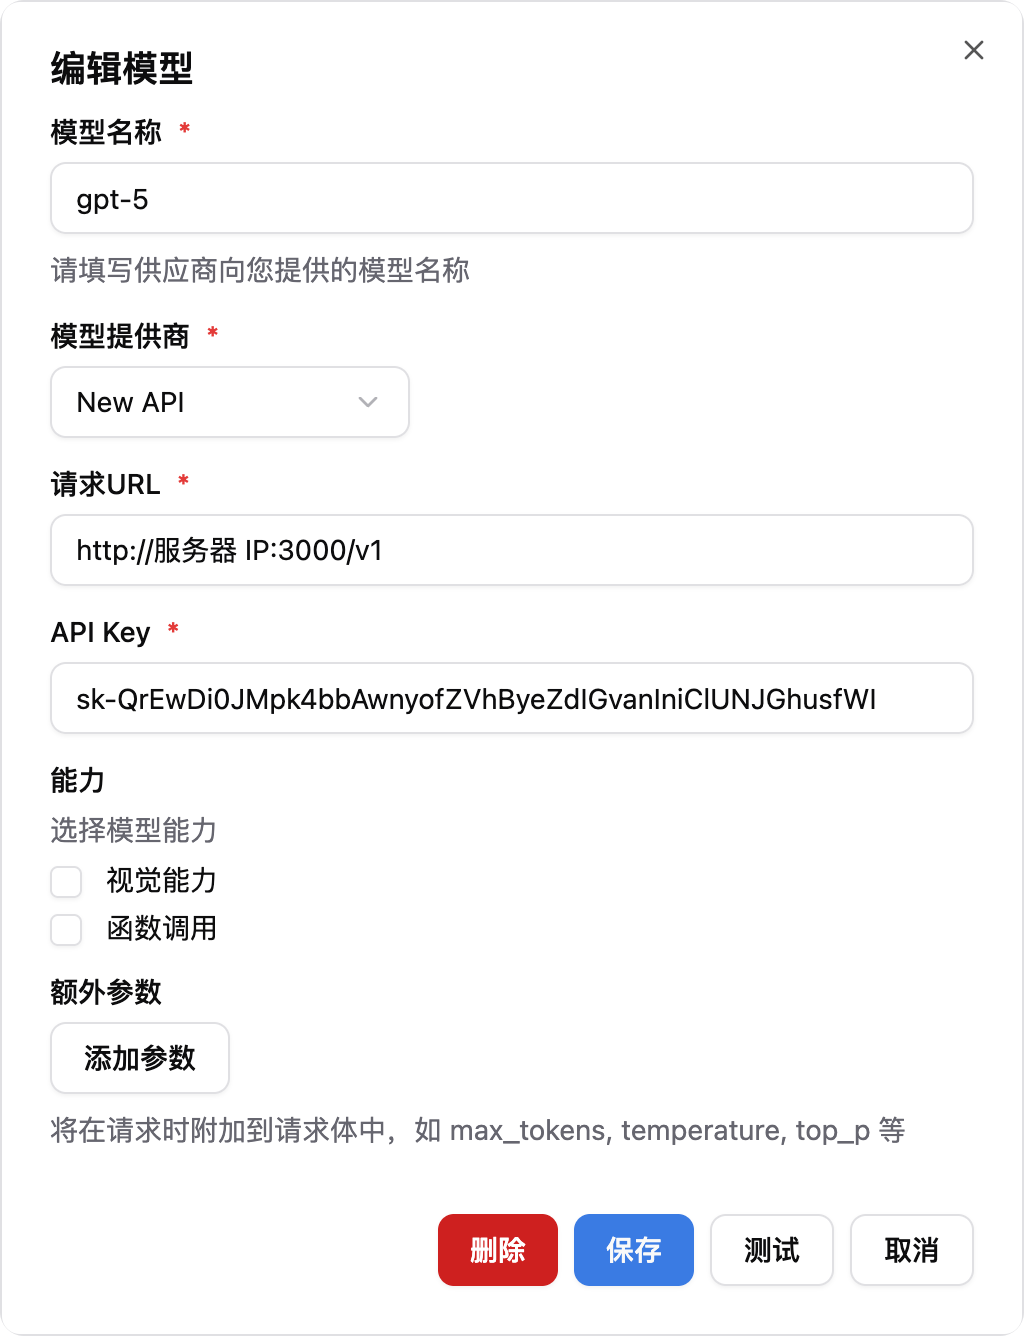
1. **Add New API Model**
* Model Name: Enter the model name configured in New API
* Model Provider: Select New API
* Request URL: Enter `http://server-IP:3000/v1`
* API Key: Enter the token created in New API
 2. **Select the newly configured model in the pipeline**
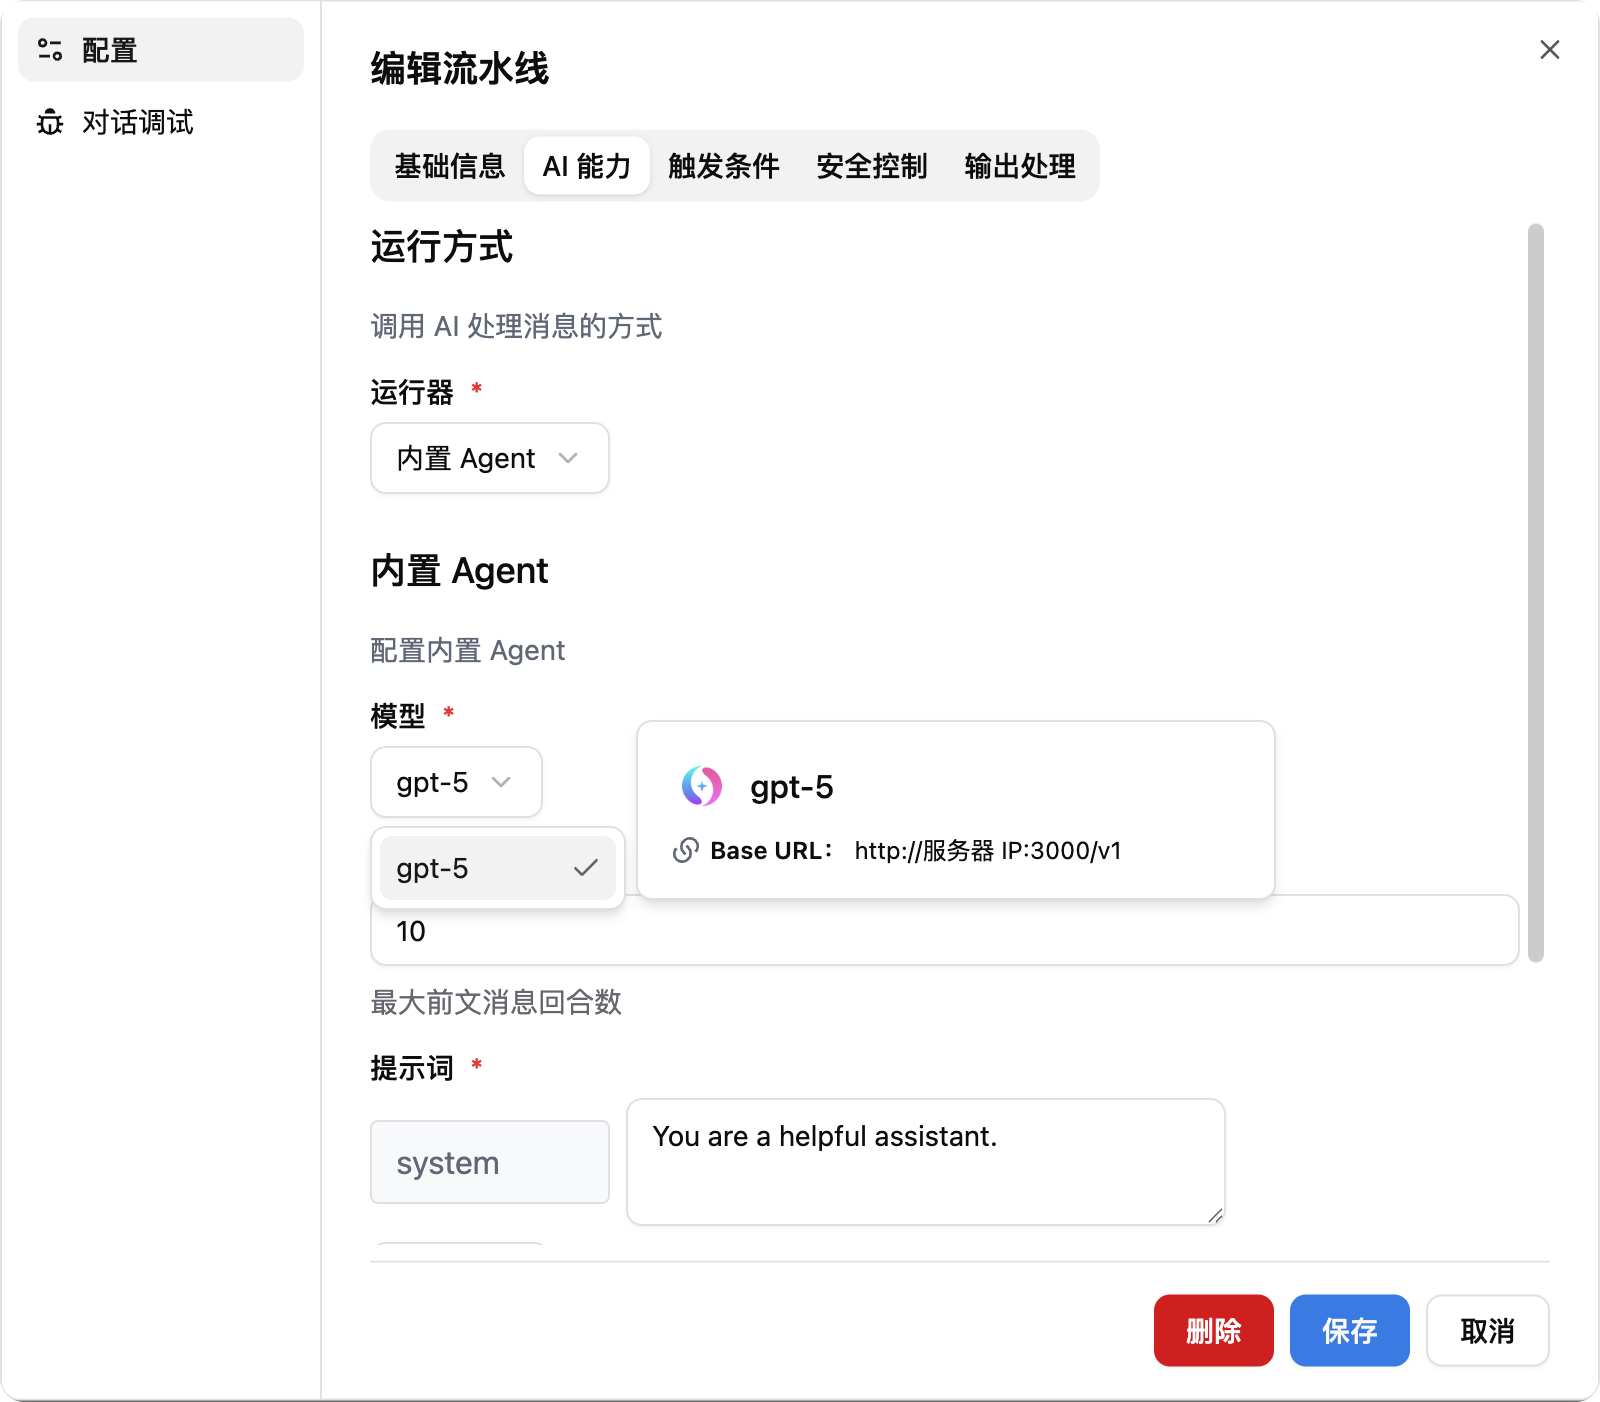 3. Now you can use the models in New API.