> ## Documentation Index
> Fetch the complete documentation index at: https://docs.langbot.app/llms.txt
> Use this file to discover all available pages before exploring further.
# WeCom
> Connect WeCom (Enterprise WeChat) to LangBot. Deploy an LLM AI bot for your enterprise messaging.
Deploy the WeCom (Enterprise WeChat) bot to integrate with LangBot.
* The WeCom callback address requires a public IP and domain name. We recommend you first follow [Configure HTTP Reverse Proxy](/en/workshop/production/proxy-and-ssl) to configure the LangBot callback address.
**No public server?** [LangBot Cloud](https://space.langbot.app/cloud) includes built-in domain and HTTPS — get WeCom working out of the box.
## Record Corporate ID
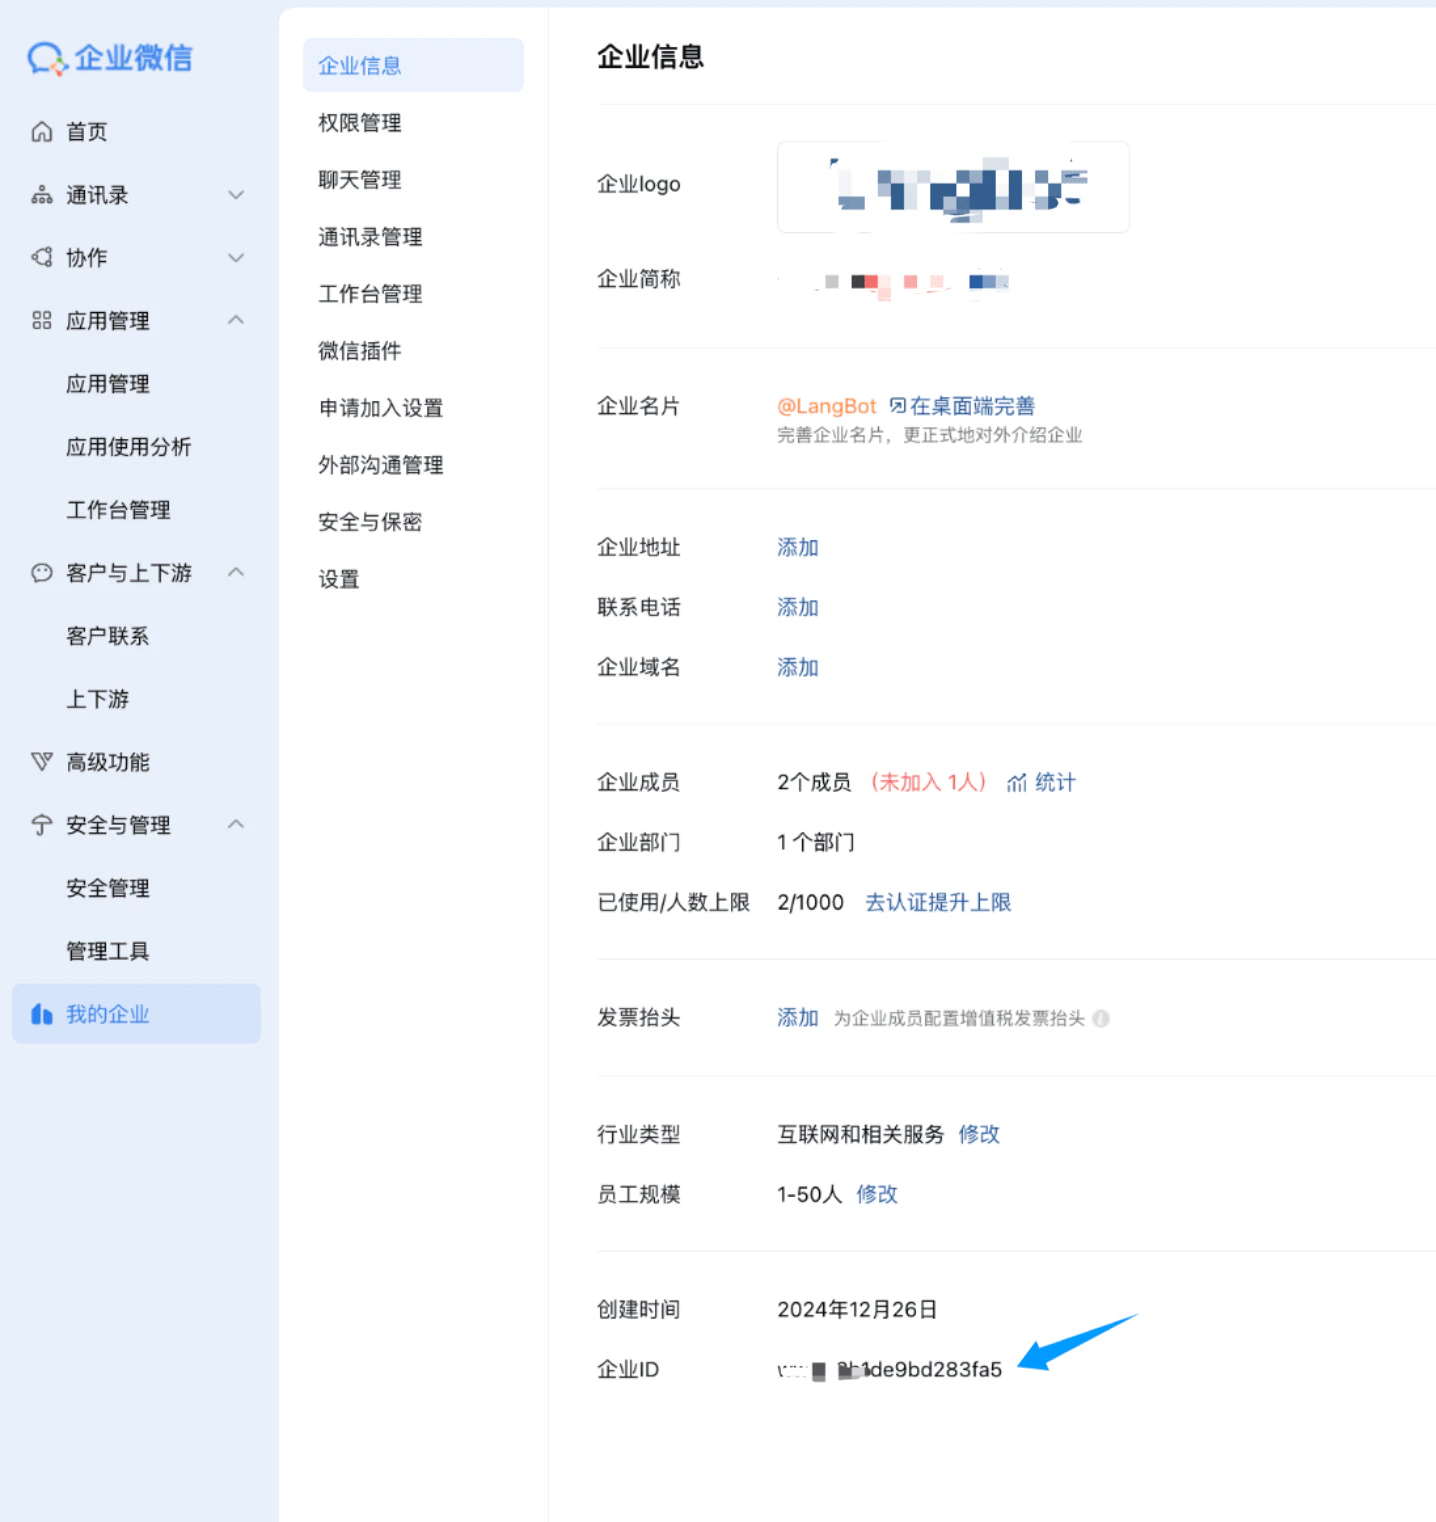
Open the [WeCom Admin Portal](https://work.weixin.qq.com/), click `My Enterprise`, and record the `Corporate ID` at the bottom.
 ## Create Bot
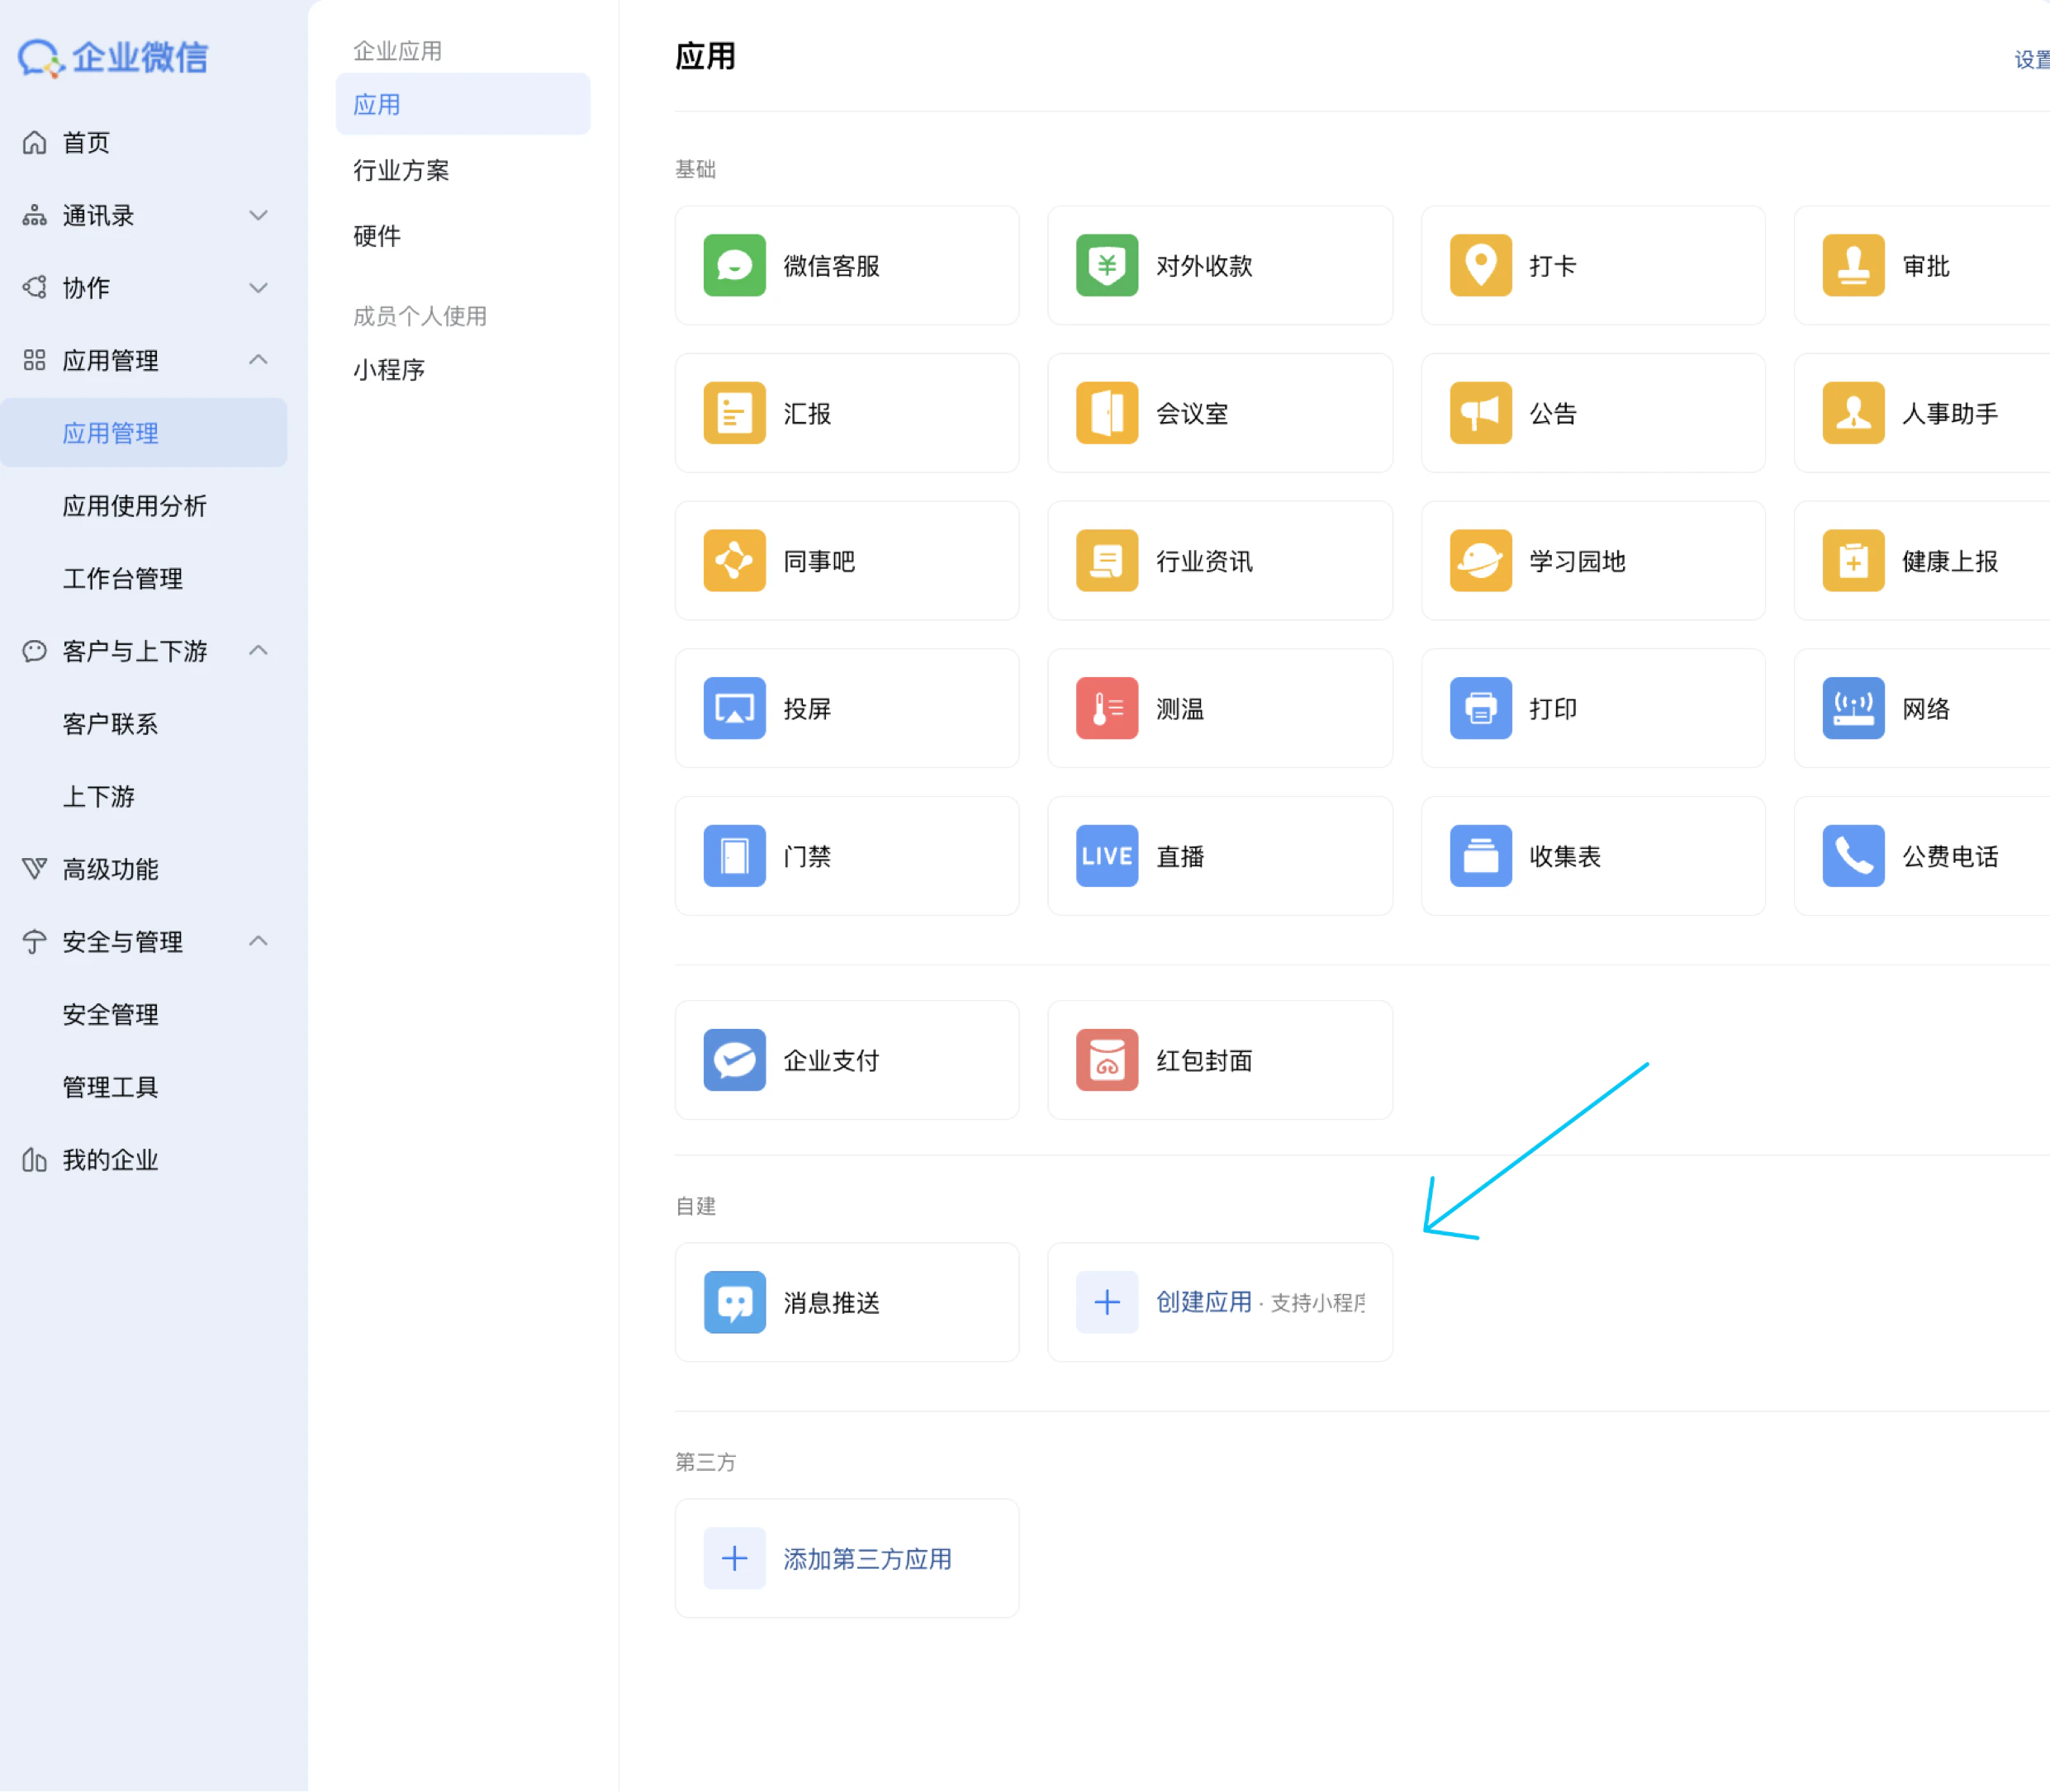
Click `App Management`, then `Build Your Own`, and click `Create App`.
## Create Bot
Click `App Management`, then `Build Your Own`, and click `Create App`.
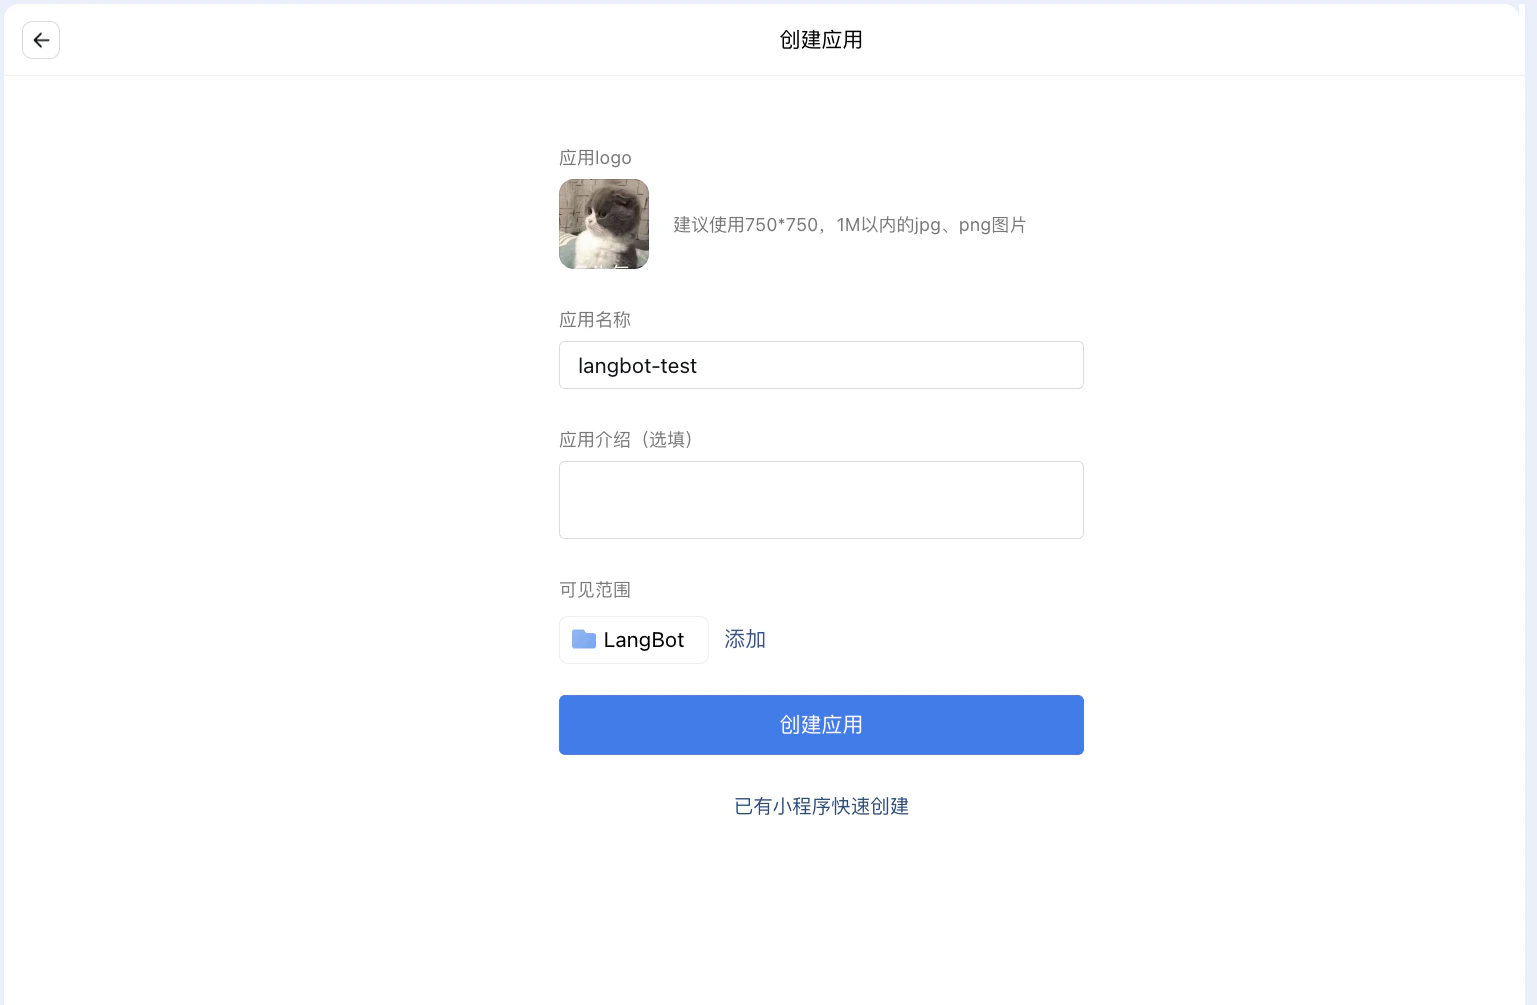
 Fill in the basic information for the bot:
 View and record the bot's secret:
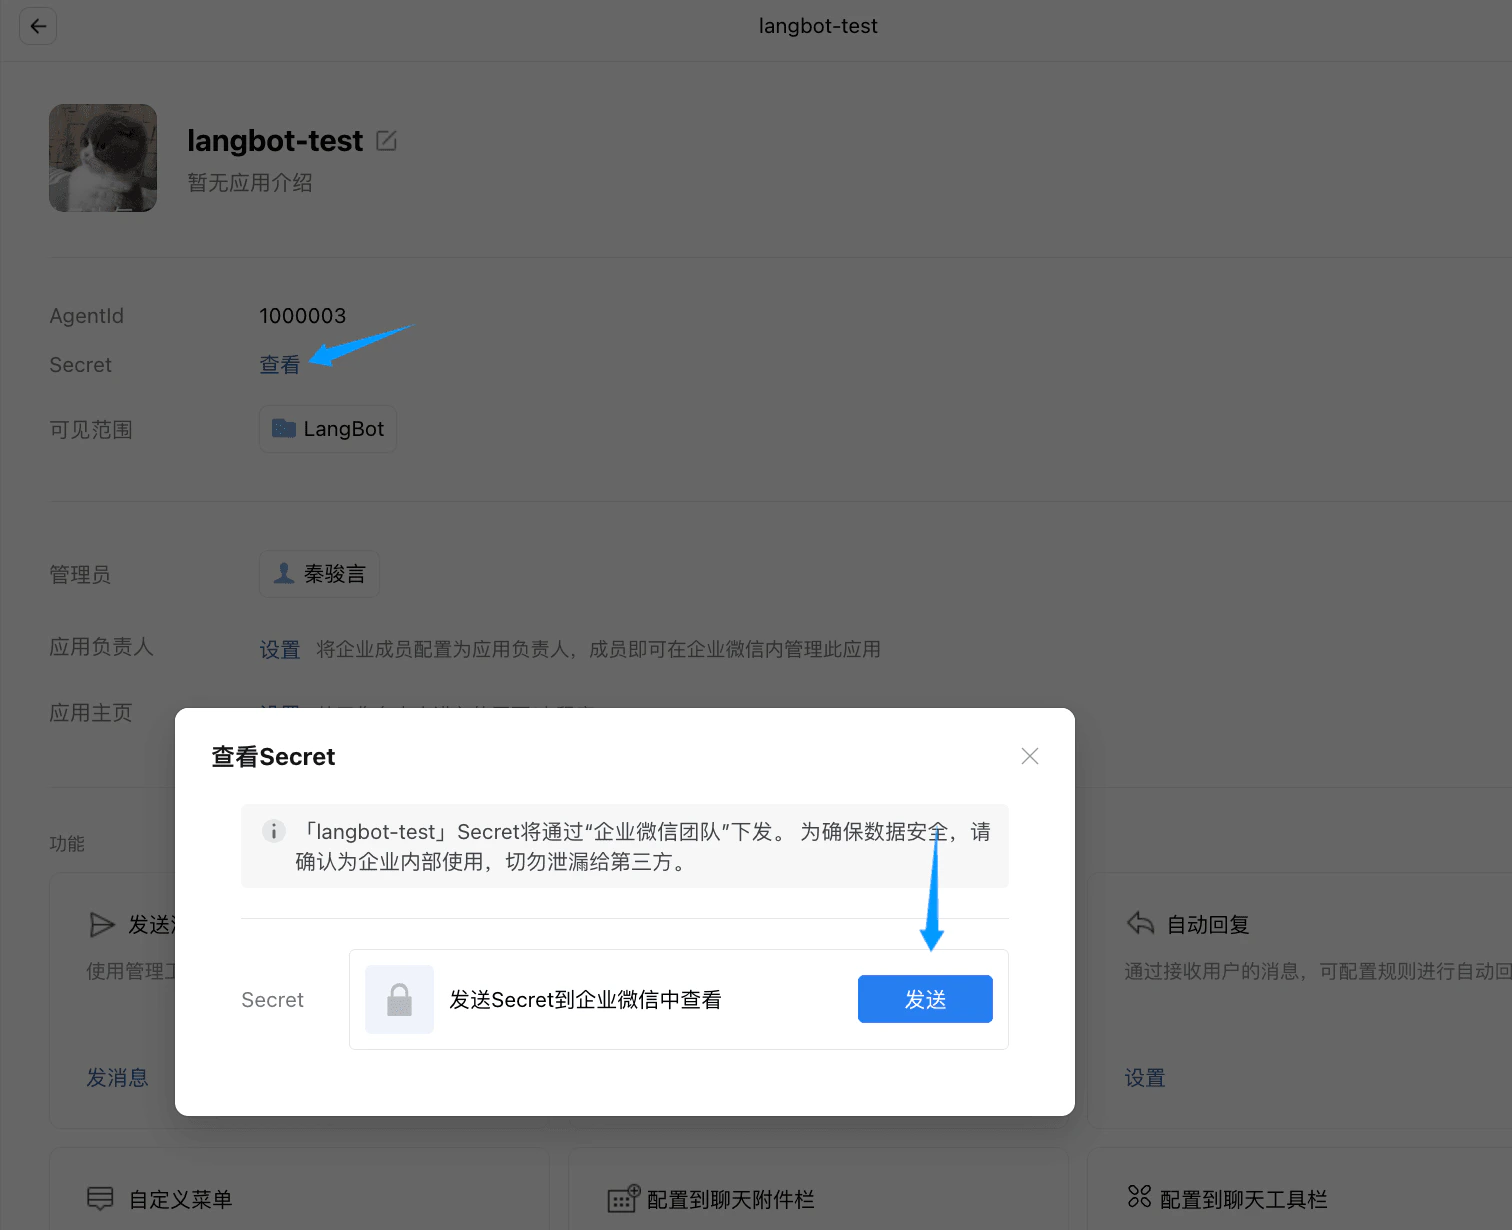 Get it from the WeCom client as prompted.
## Enable Contact Sync Permission
* This feature has not been implemented yet as LangBot is still under development.
* This field can be filled with any random characters, but **cannot be empty**.
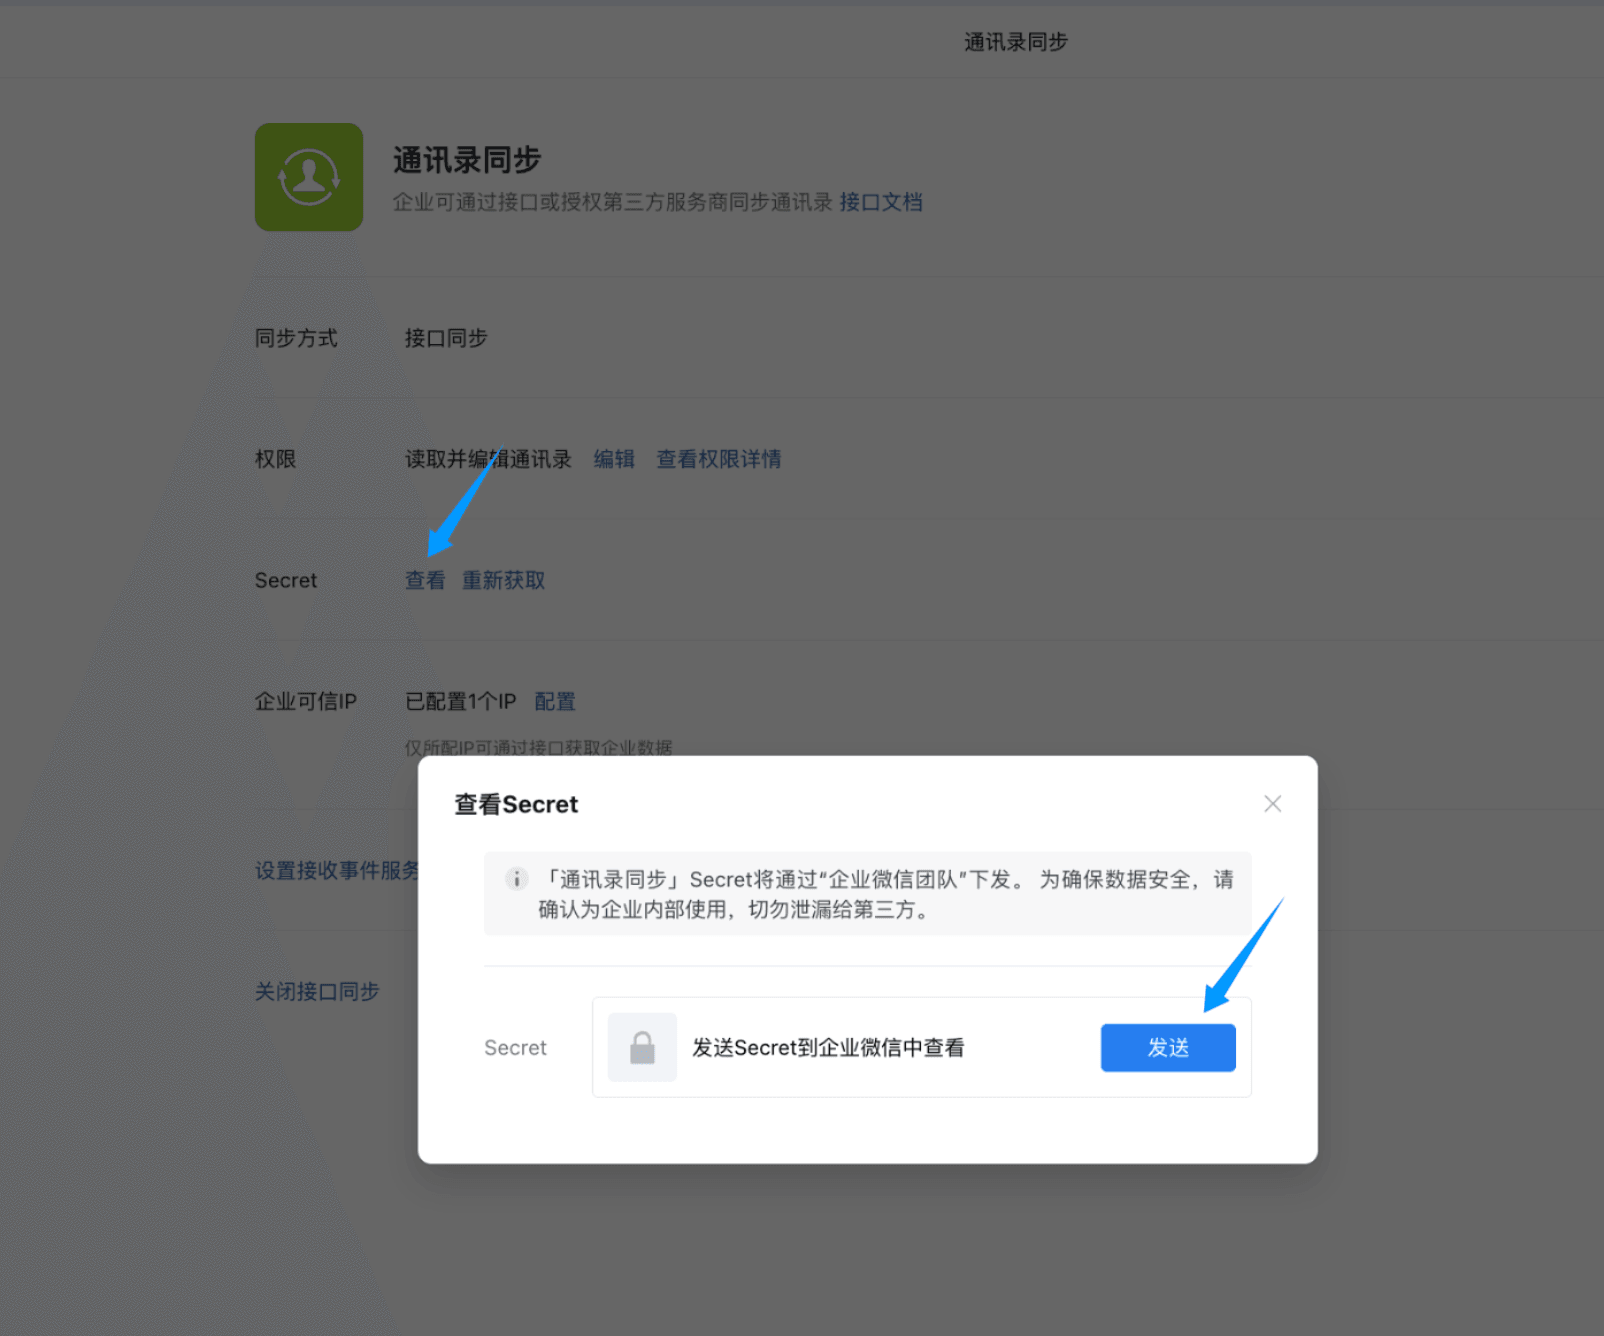
Click `Security and Management`, then `Management Tools`, `Contact Sync`; configure the trusted IP by adding the IP address of the server where LangBot is deployed.
Click `View Secret` and record it - this is the contacts\_secret (Contact Sync Secret).
Get it from the WeCom client as prompted.
## Enable Contact Sync Permission
* This feature has not been implemented yet as LangBot is still under development.
* This field can be filled with any random characters, but **cannot be empty**.
Click `Security and Management`, then `Management Tools`, `Contact Sync`; configure the trusted IP by adding the IP address of the server where LangBot is deployed.
Click `View Secret` and record it - this is the contacts\_secret (Contact Sync Secret).
 ## Create Bot on LangBot
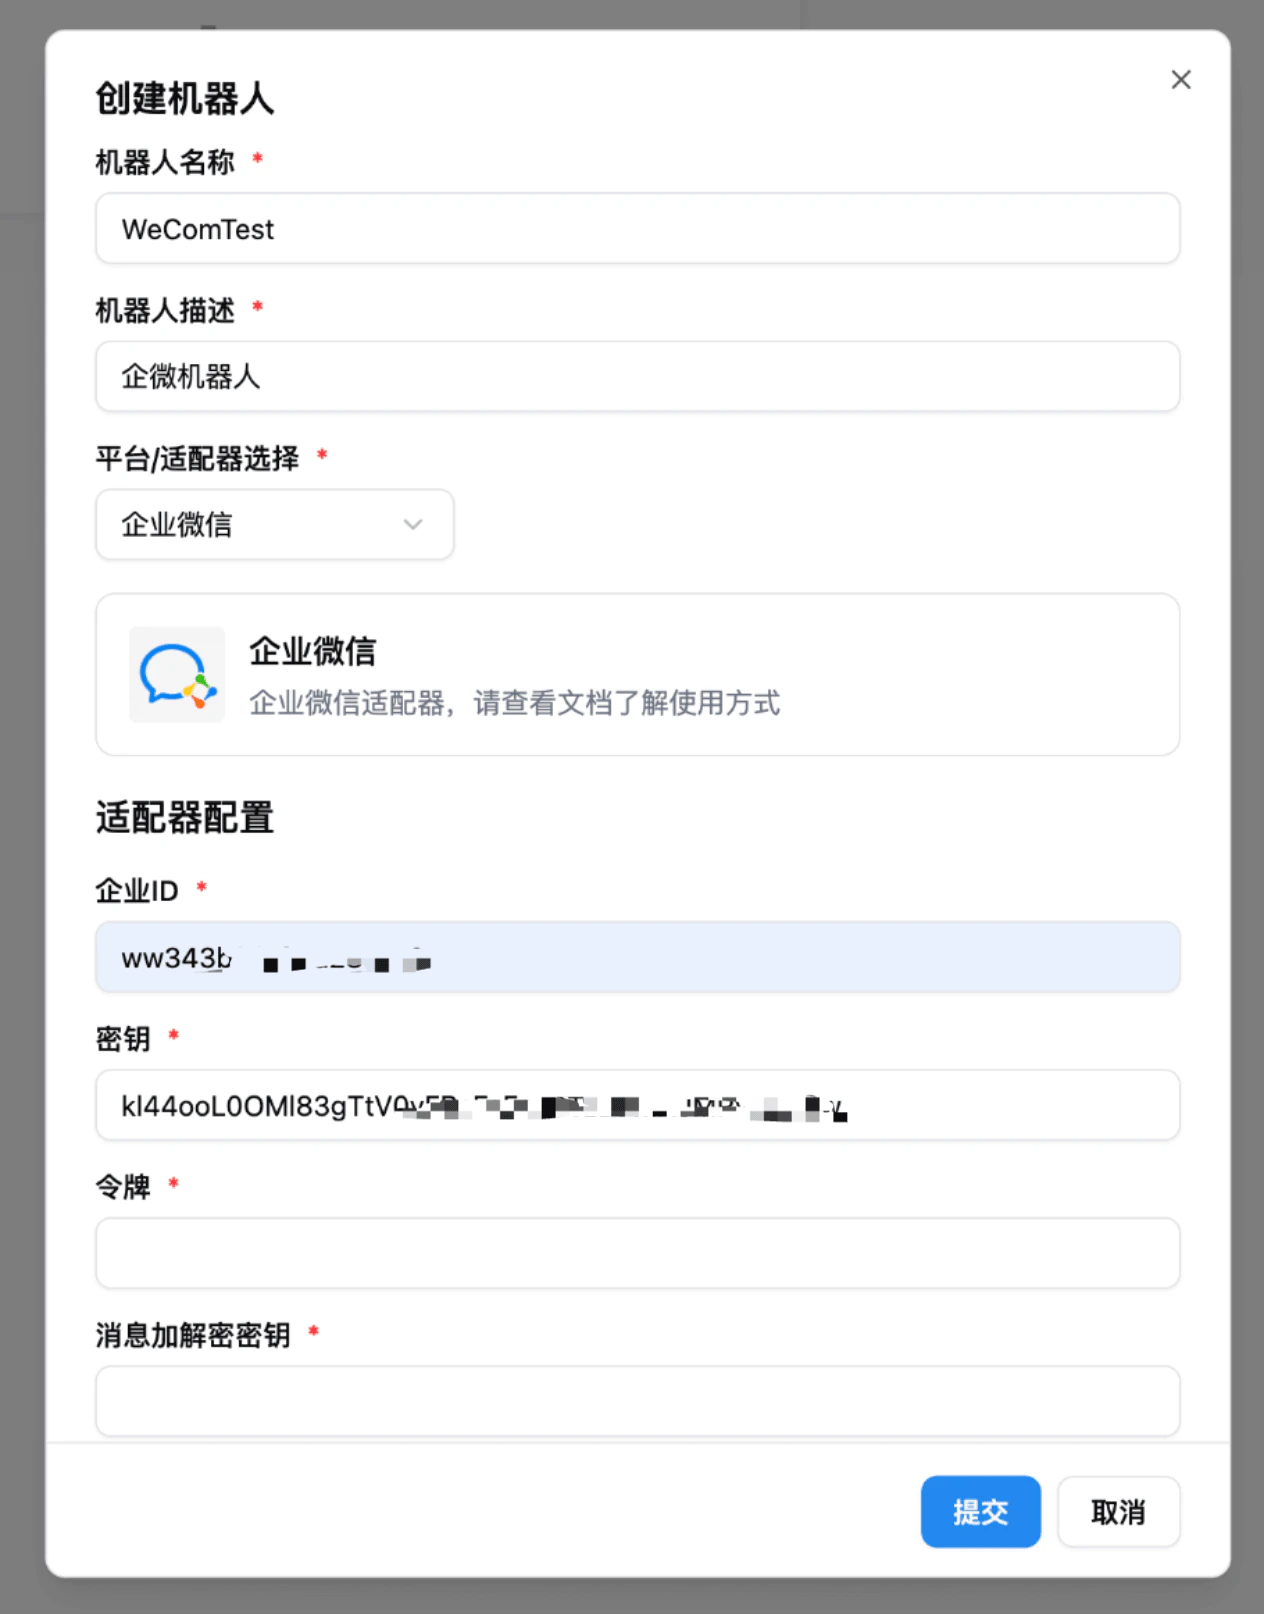
On the LangBot bot page, click `Create Bot`, enter a name, select `WeCom`, and fill in the Corporate ID, Bot Secret, and Contact Sync Secret.
## Create Bot on LangBot
On the LangBot bot page, click `Create Bot`, enter a name, select `WeCom`, and fill in the Corporate ID, Bot Secret, and Contact Sync Secret.
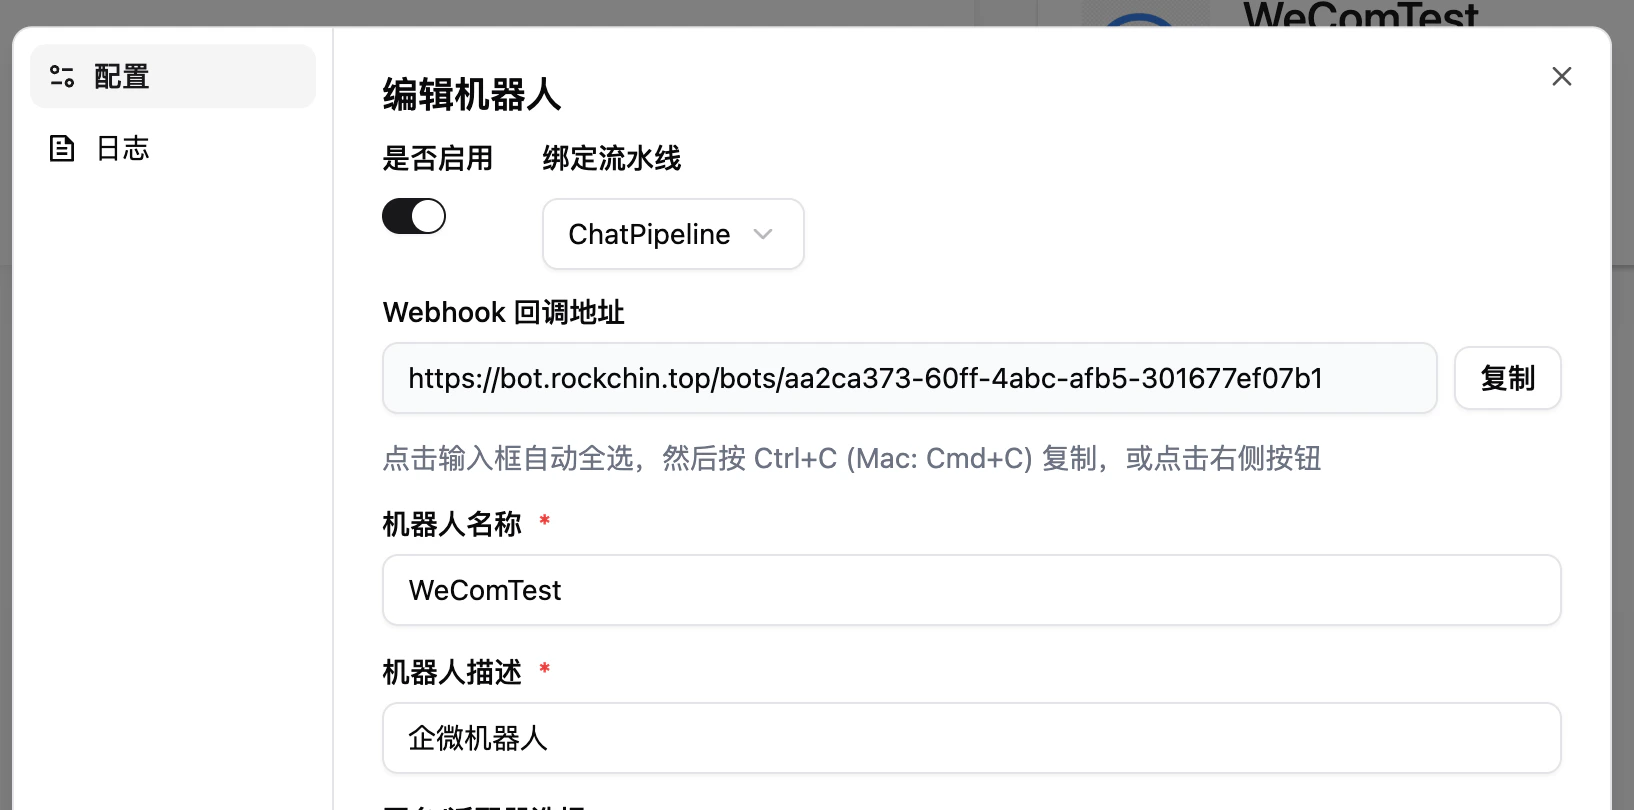
 Click submit to enter the bot edit page, then click enable. At this point you'll see the Webhook callback address—copy it:
 ## Set Callback Address
Return to the WeCom bot admin page, click `Receive Messages`, `Set API Reception`, and paste LangBot's Webhook callback address into the `URL` field:
## Set Callback Address
Return to the WeCom bot admin page, click `Receive Messages`, `Set API Reception`, and paste LangBot's Webhook callback address into the `URL` field:
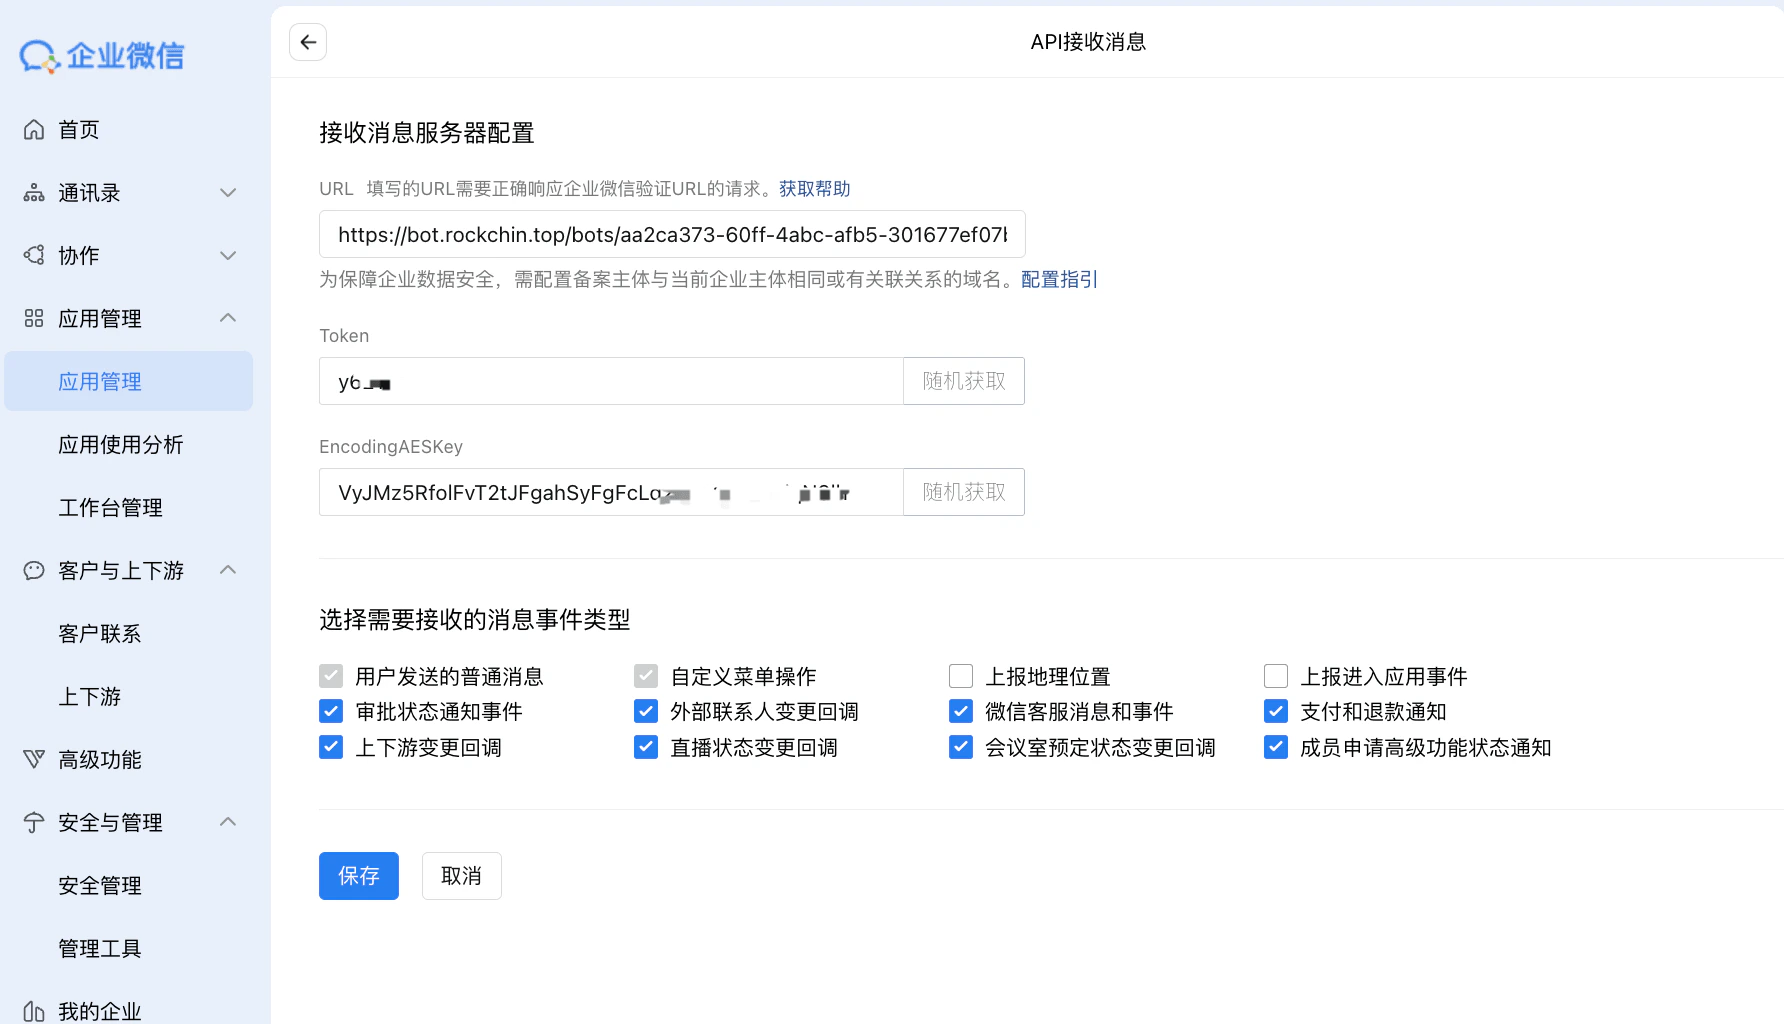 Click to randomly generate the Token and EncodingAESKey, and record them. **Keep this page open.** Go back to the LangBot WeCom bot configuration page, enter the Token and EncodingAESKey, and click Save.
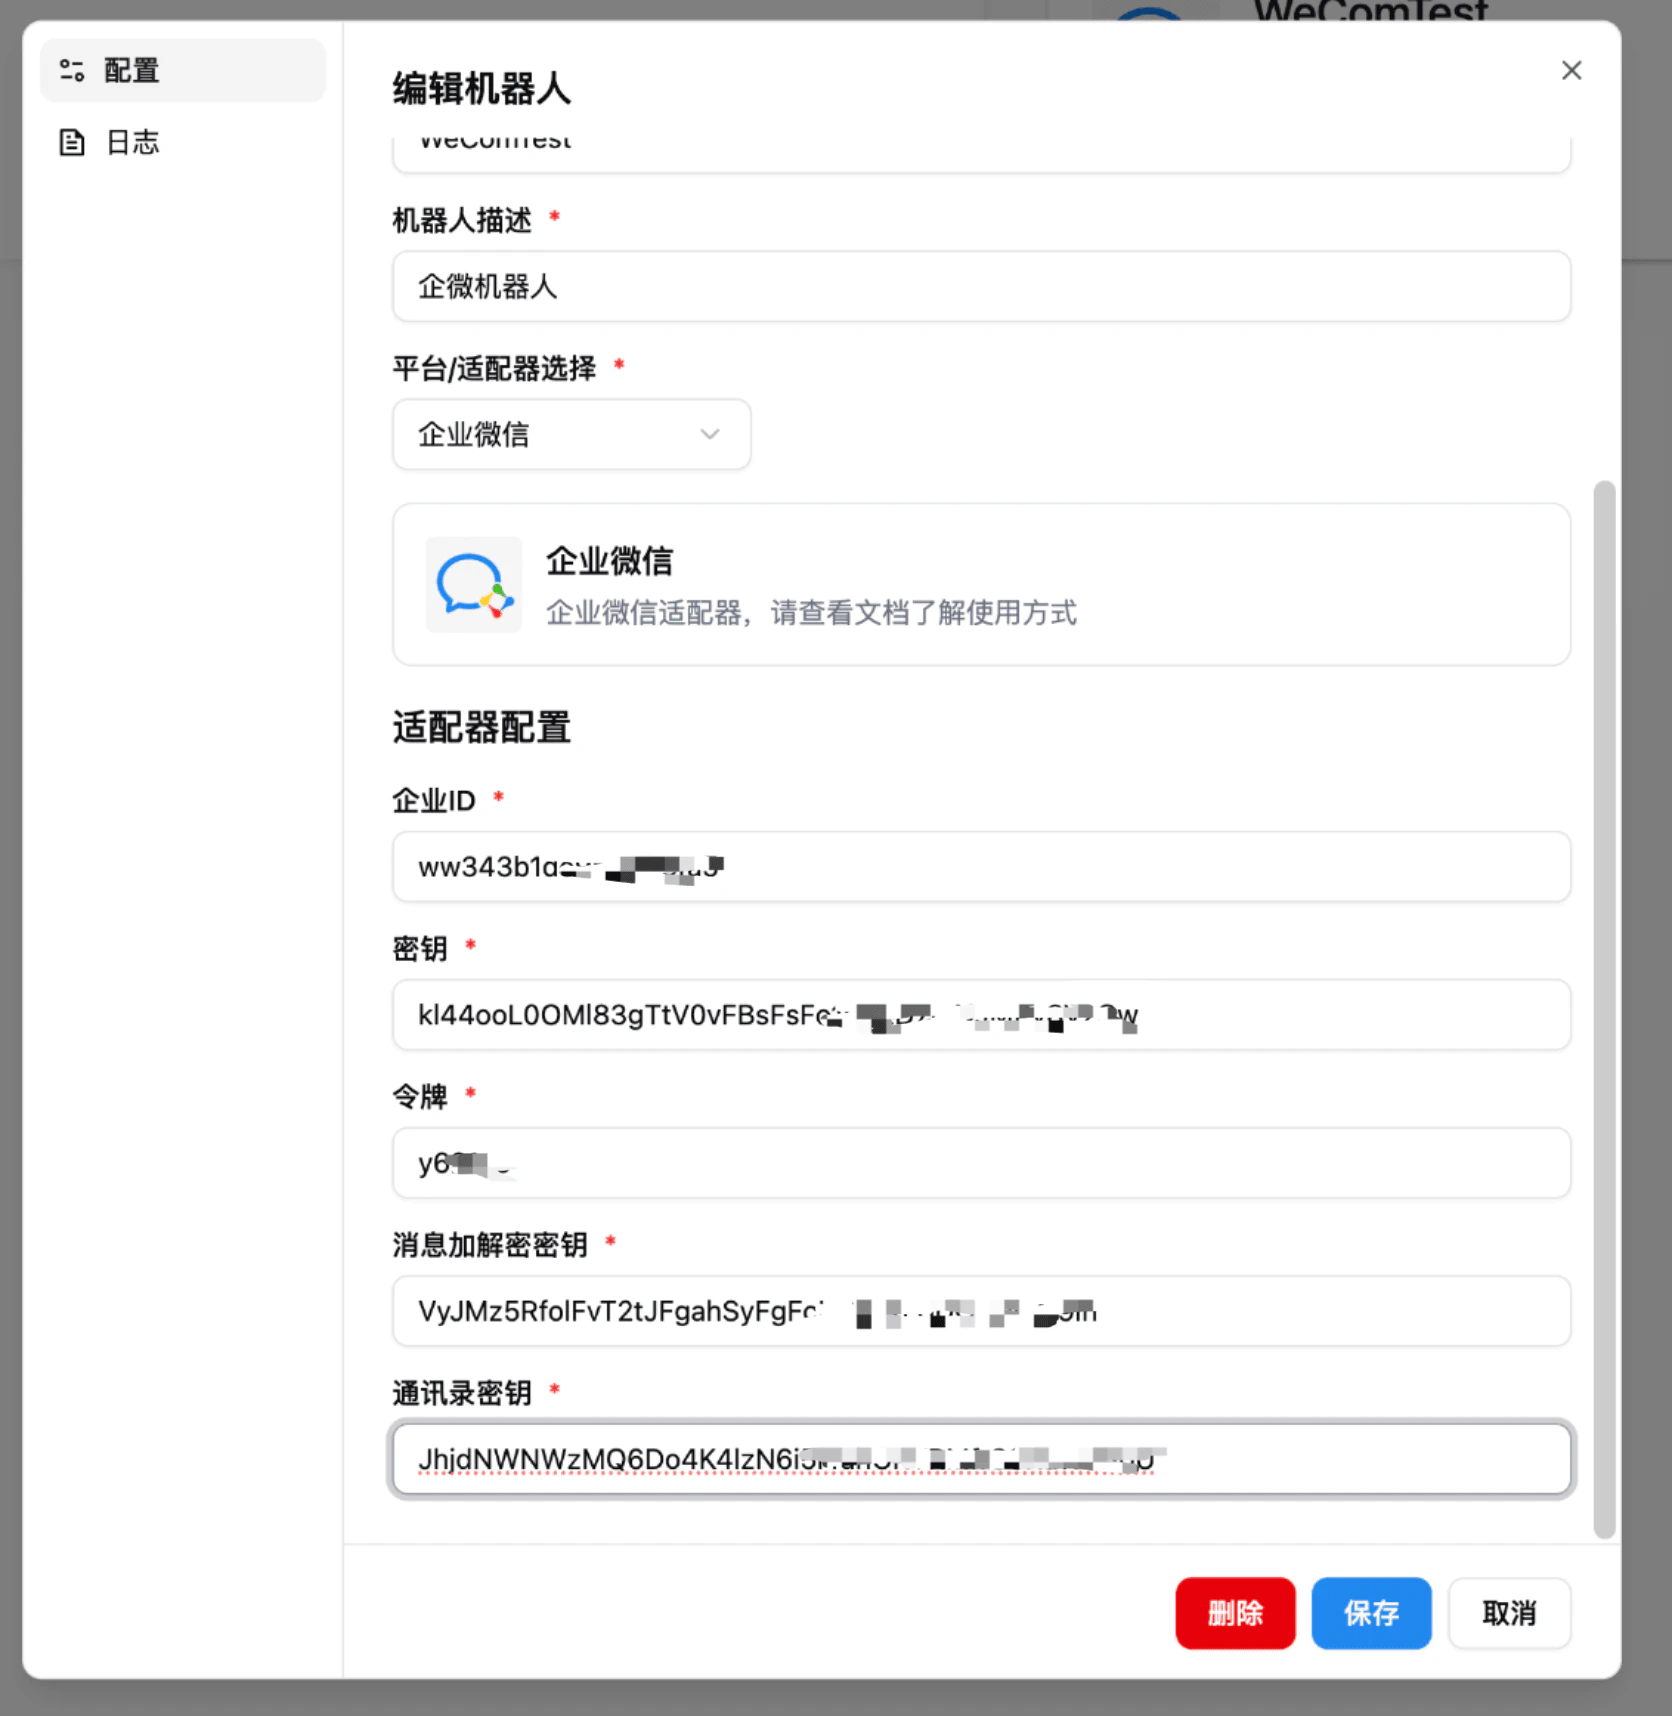 Return to the **page where you just filled in the Webhook callback address**, and click Save to complete the configuration. If you see **request URL failed**, please carefully double-check your configuration.
## Configure Corporate Trusted IP
Go back to this application's admin page, find `Enterprise Trusted IP` at the bottom, and add the IP address of your LangBot deployment server.
Return to the **page where you just filled in the Webhook callback address**, and click Save to complete the configuration. If you see **request URL failed**, please carefully double-check your configuration.
## Configure Corporate Trusted IP
Go back to this application's admin page, find `Enterprise Trusted IP` at the bottom, and add the IP address of your LangBot deployment server.
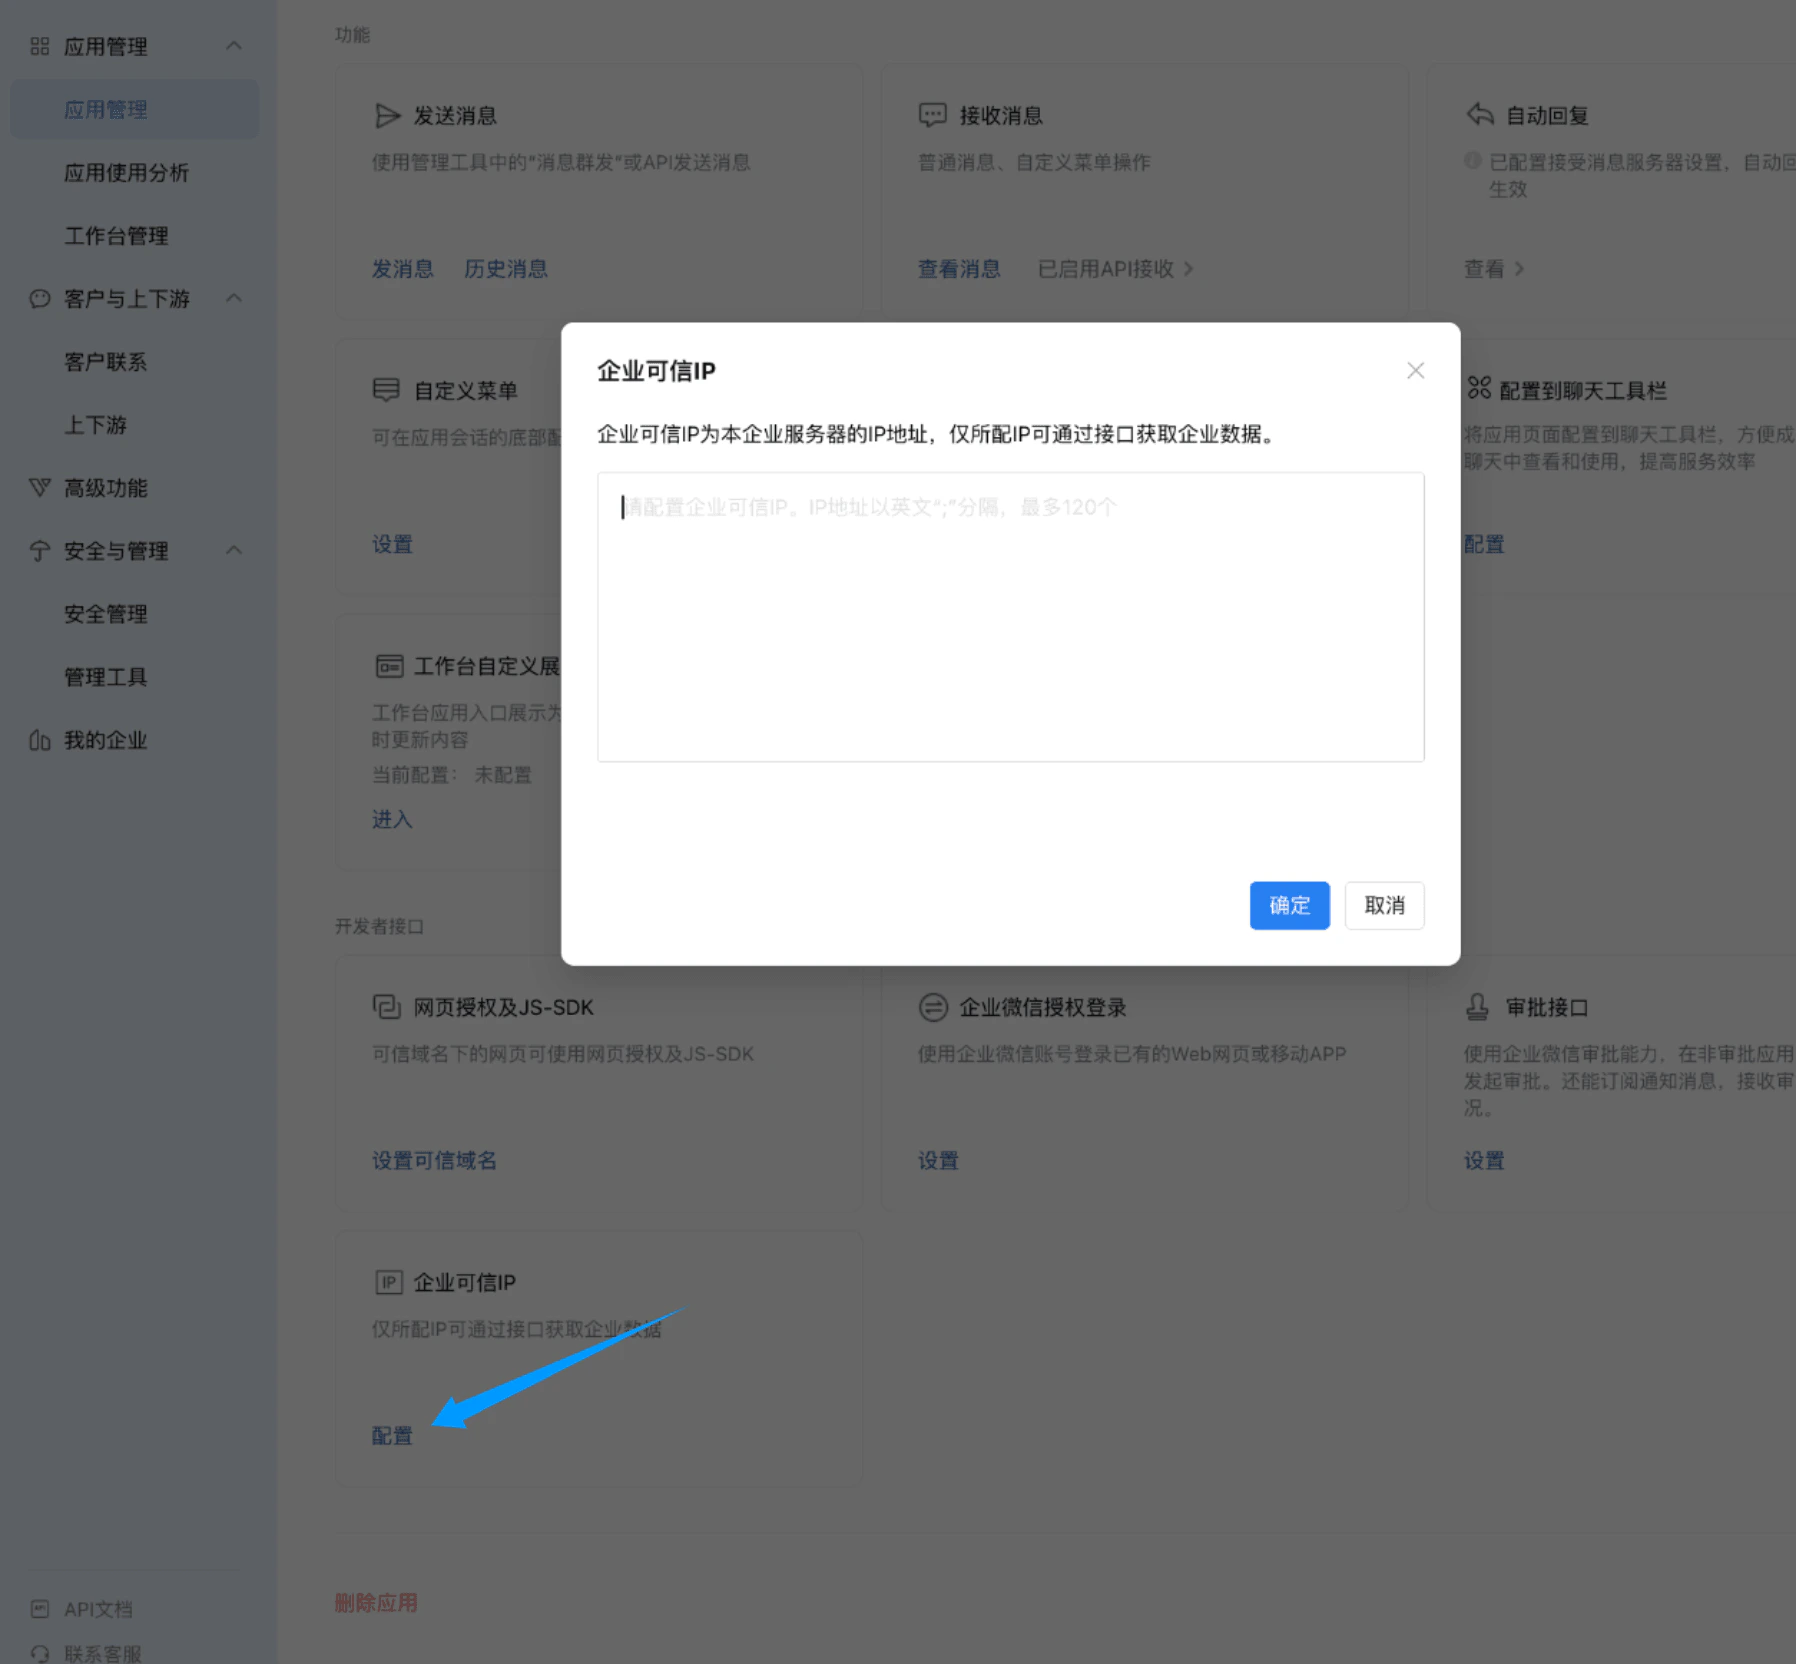 Click Save.
## FAQ
Q: Can't find the bot chat in WeCom?
A: Go to the app's detail page in WeCom admin, click `Features` > `Send Message` > `Send Message`, choose your own account, send a message, and you will see the bot in your chat window.
Click Save.
## FAQ
Q: Can't find the bot chat in WeCom?
A: Go to the app's detail page in WeCom admin, click `Features` > `Send Message` > `Send Message`, choose your own account, send a message, and you will see the bot in your chat window.