> ## Documentation Index
> Fetch the complete documentation index at: https://docs.langbot.app/llms.txt
> Use this file to discover all available pages before exploring further.
# LINE
> Build a LINE AI bot with LangBot. Connect large language models to LINE chats and official accounts.
This article explains how to connect LangBot with the LINE platform to implement LINE bot functionality.
## Creating a LINE Bot
### Register a LINE Developer Account
1. Visit the [LINE Developers website](https://developers.line.biz/) and log in with your LINE account
2. After logging in, enter the developer console
### Create Provider and Channel
> [Developer Console](https://developers.line.biz/console)
1. In the developer console, create a new Provider (if you don't have one)
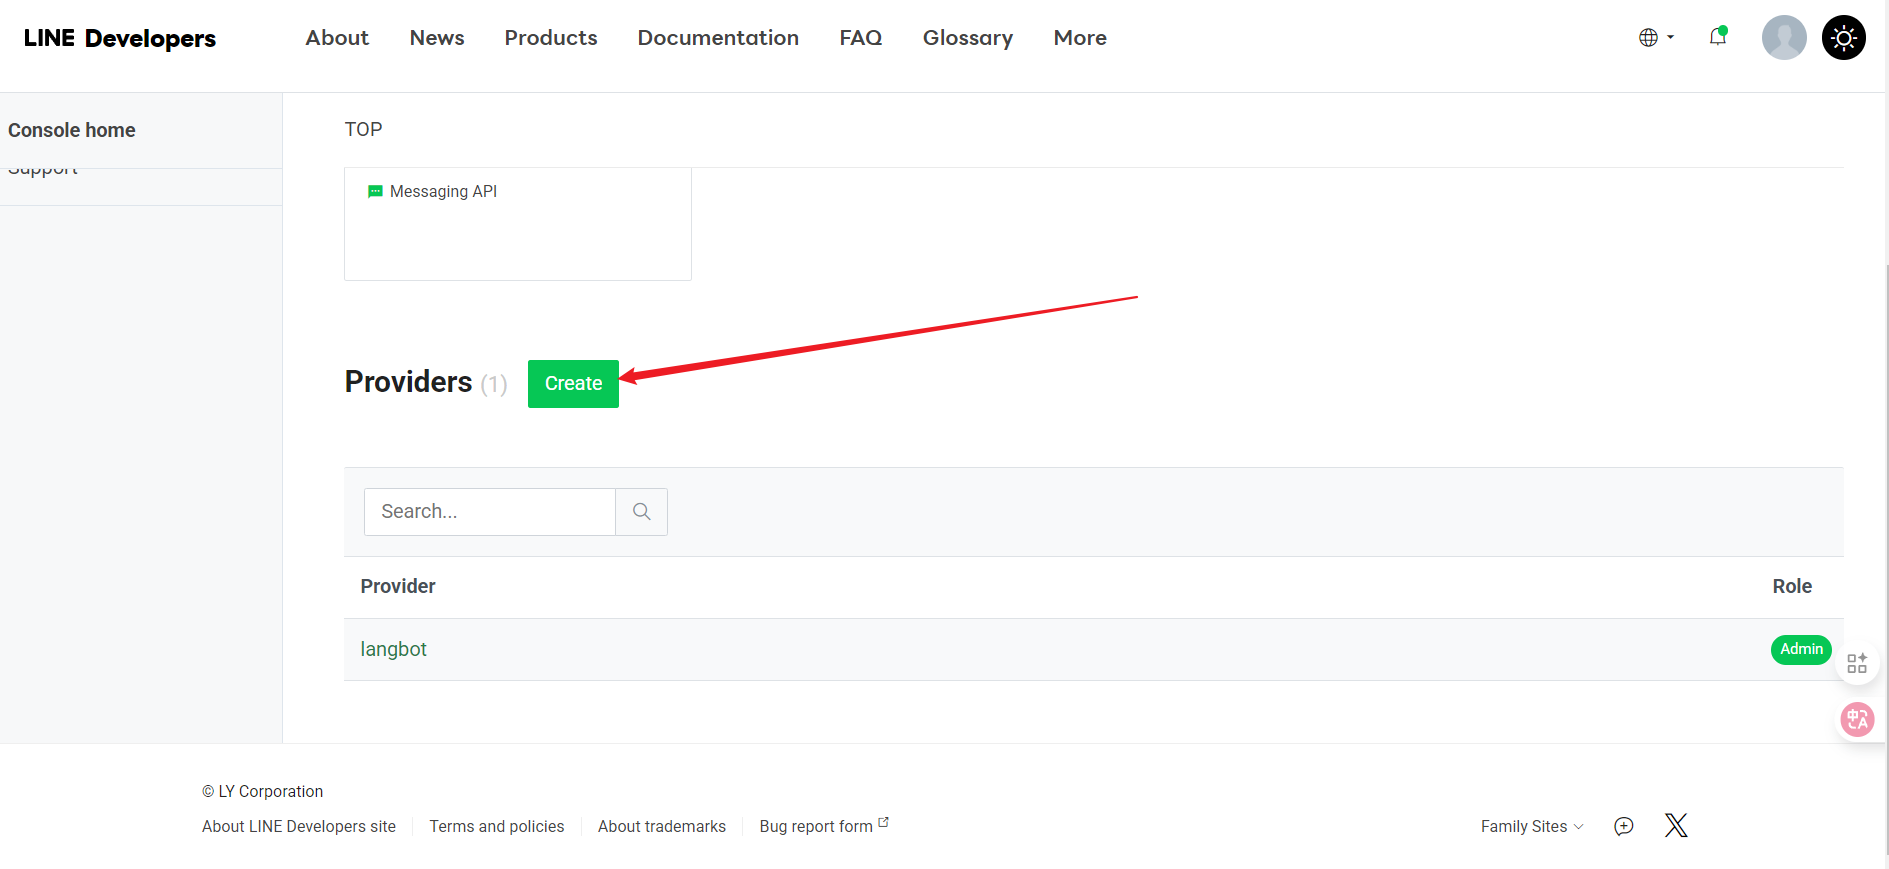
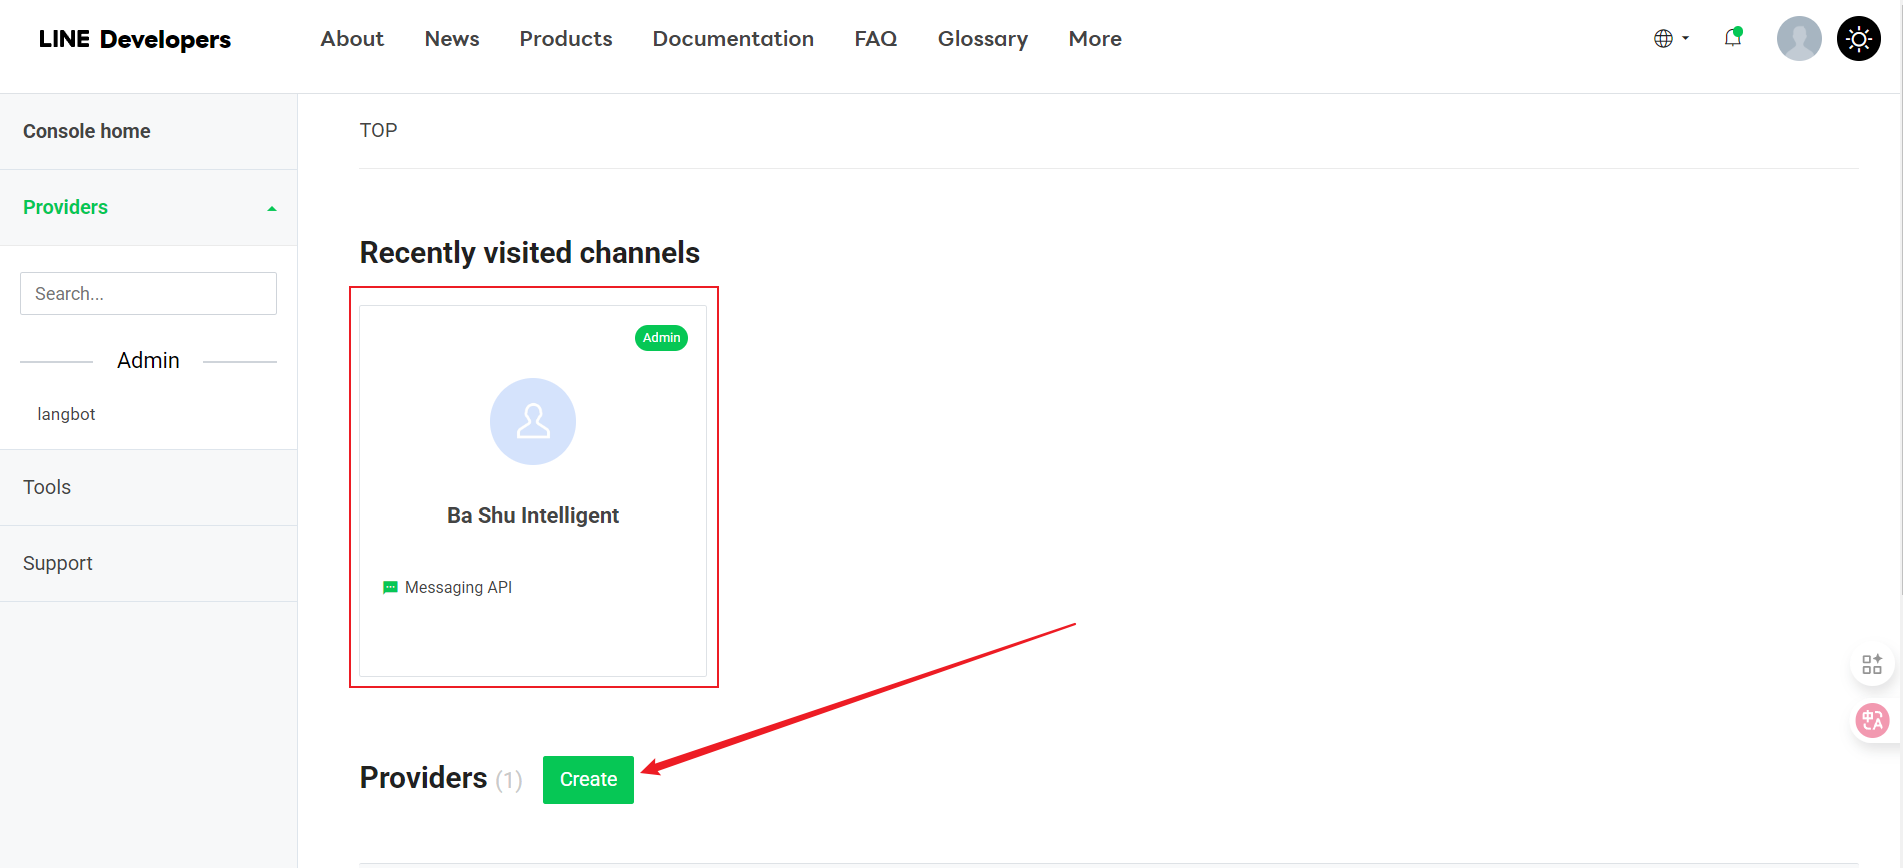 2. Under the Provider, click "Create"
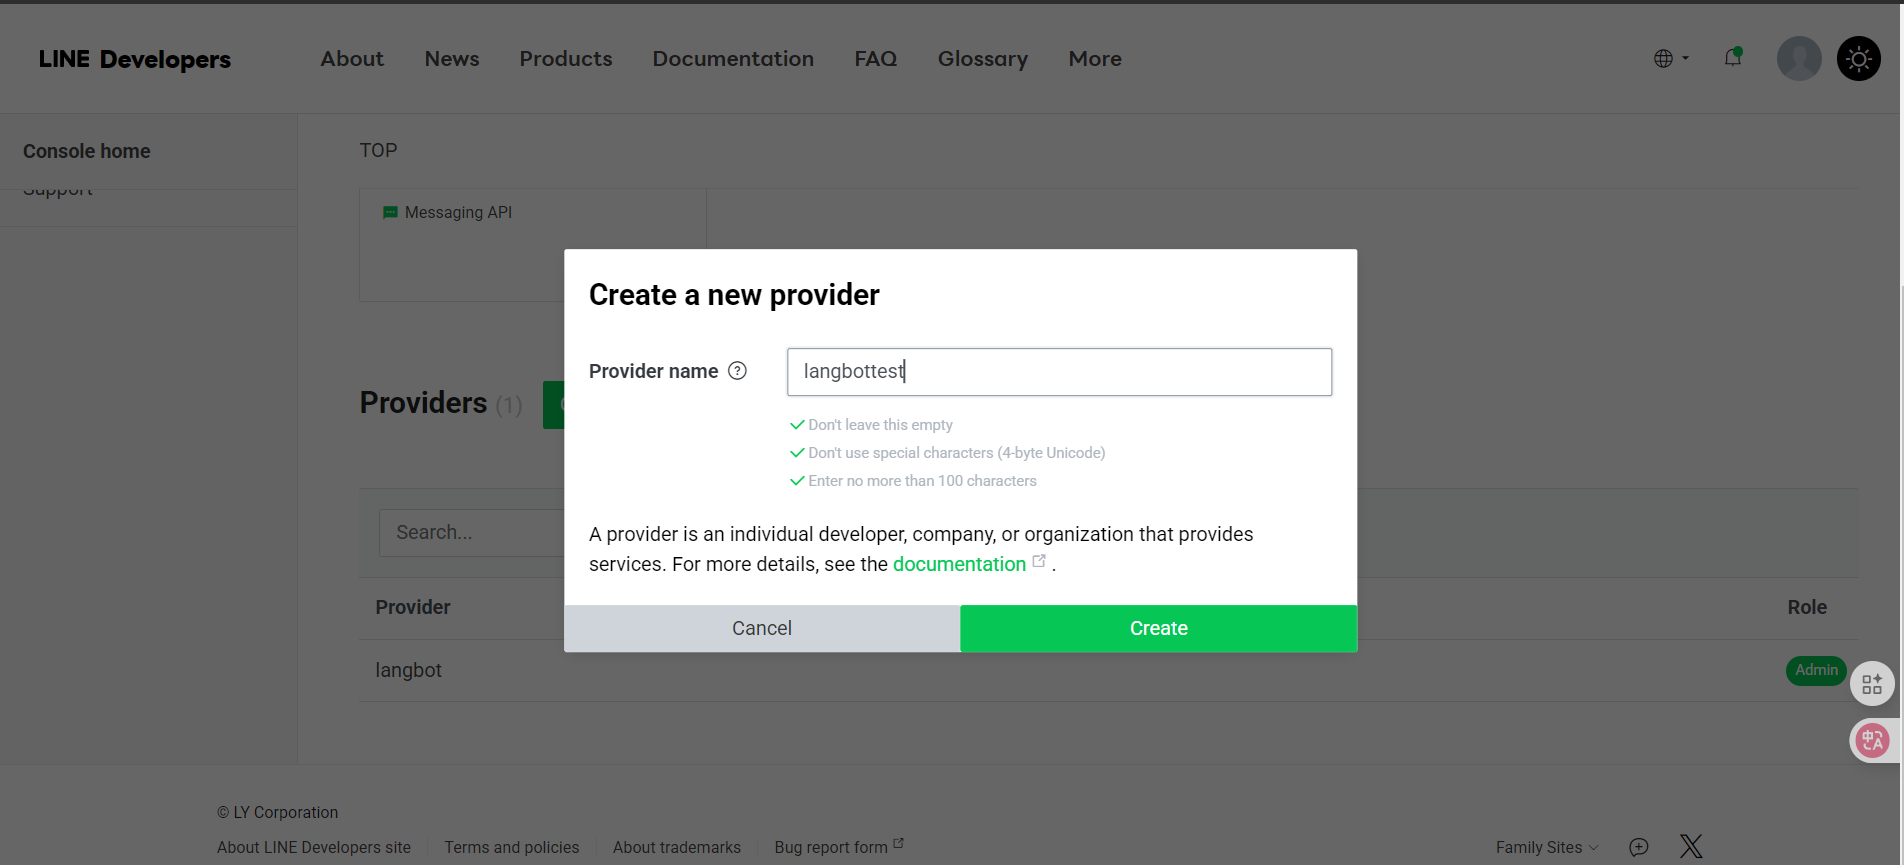
 3. Enter a name and click Create
 4. After being redirected, select Create a Message API
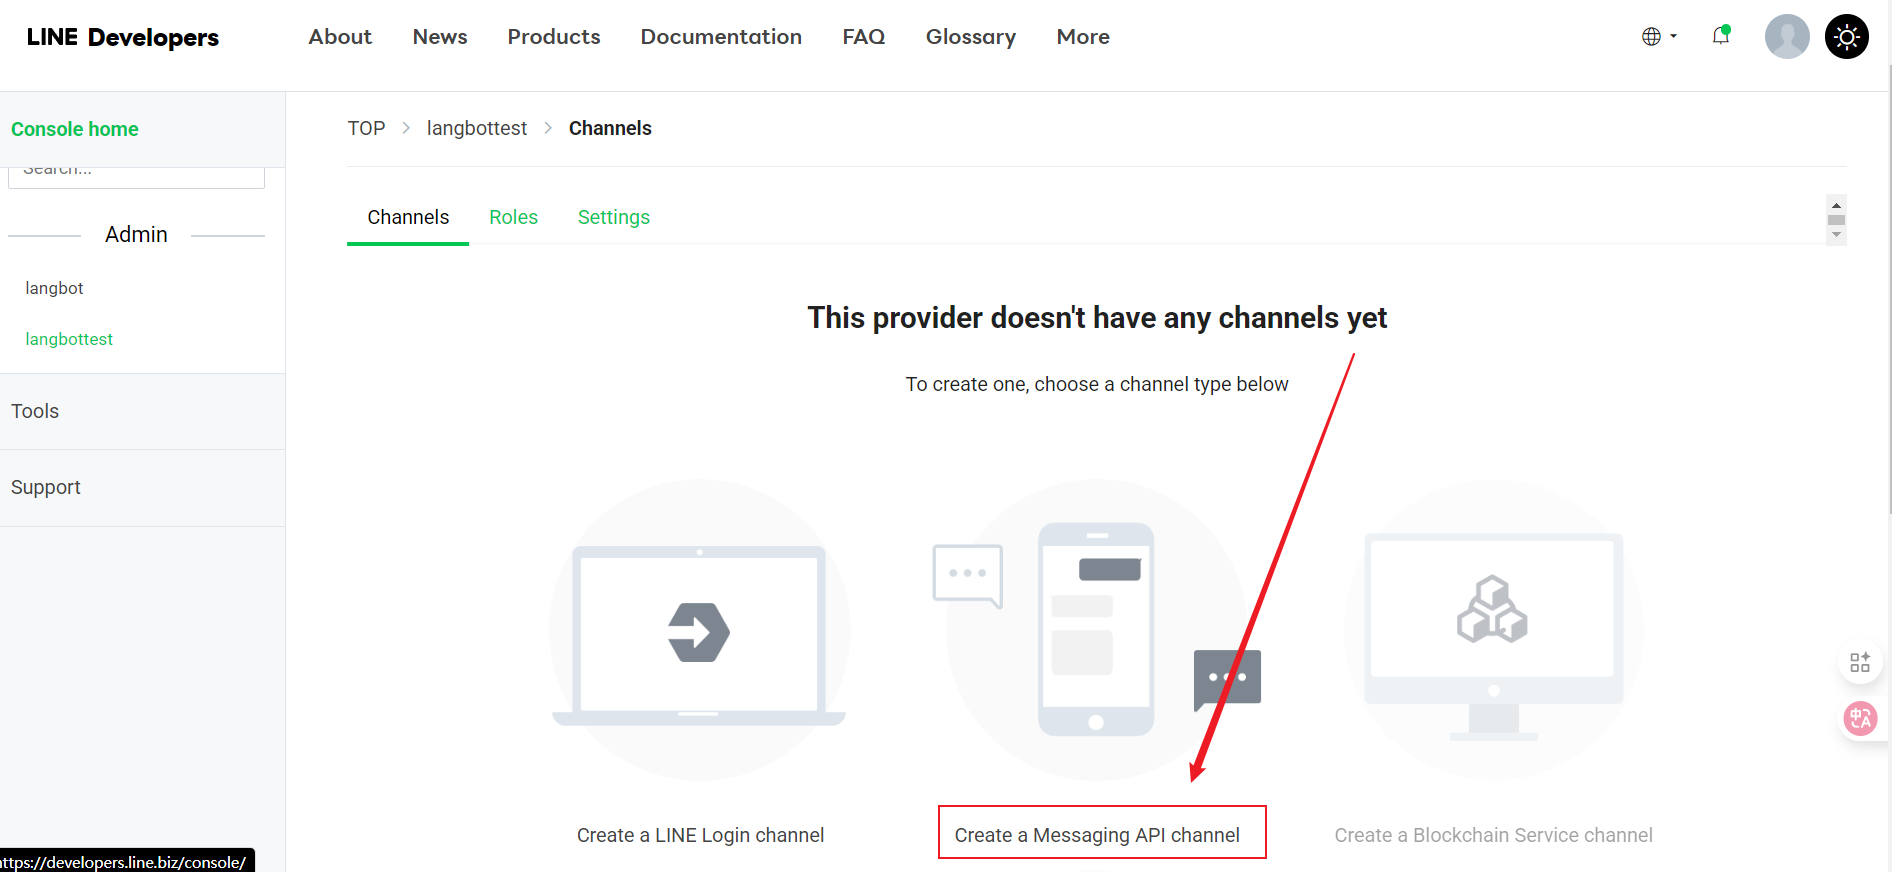 * Continue by clicking Create a Message API
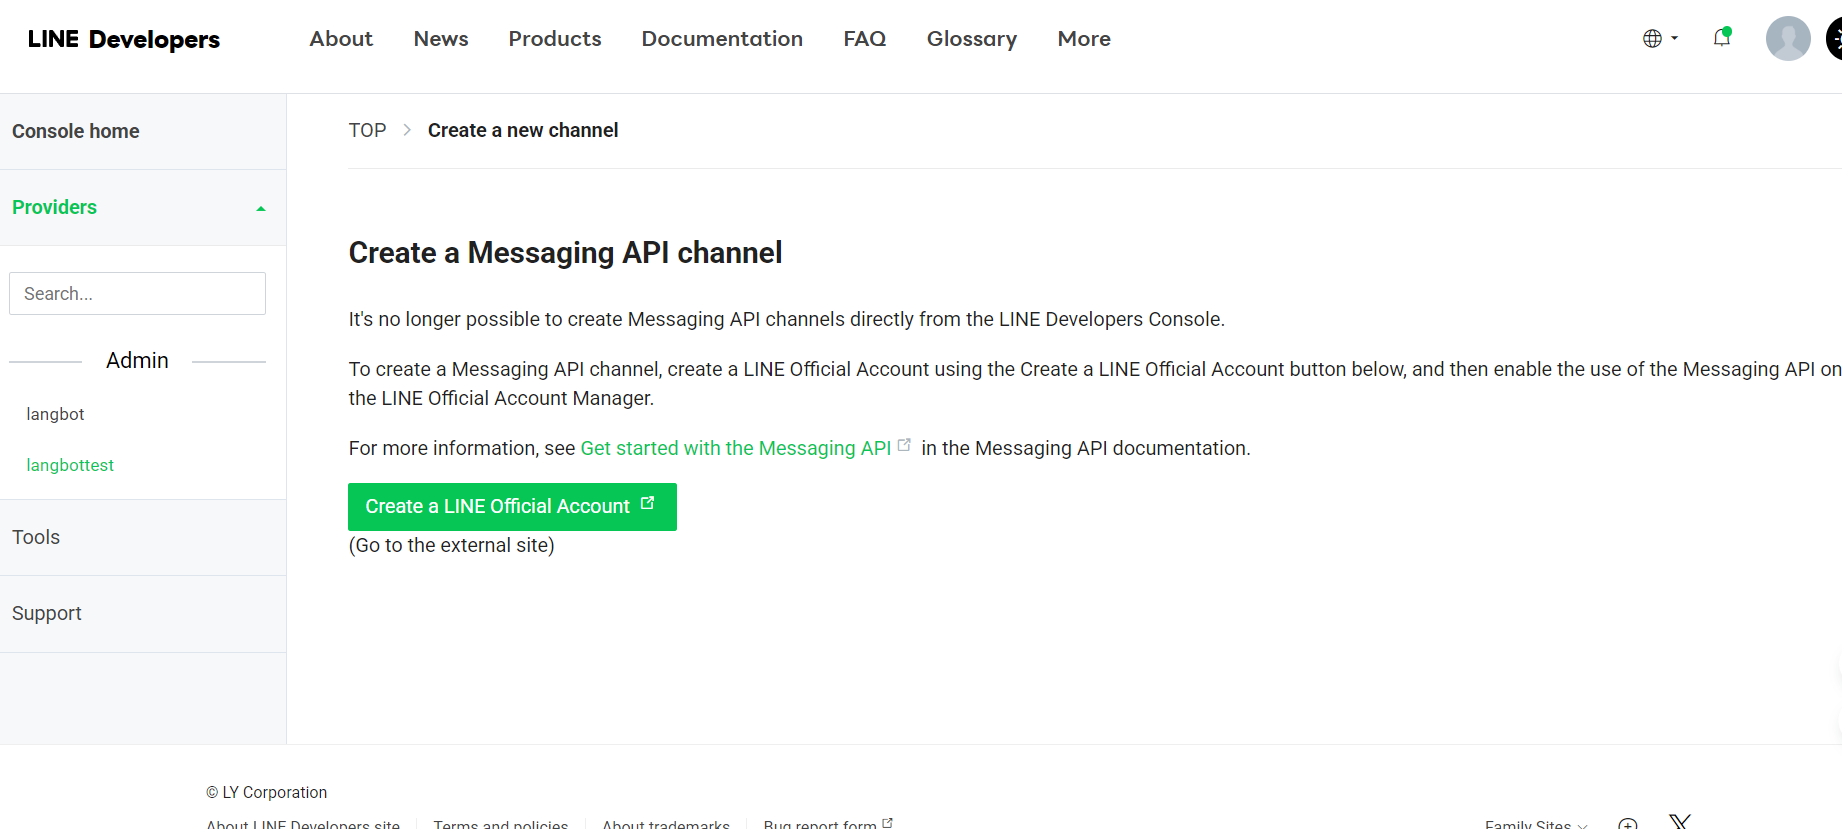 * After being redirected, fill in the basic information
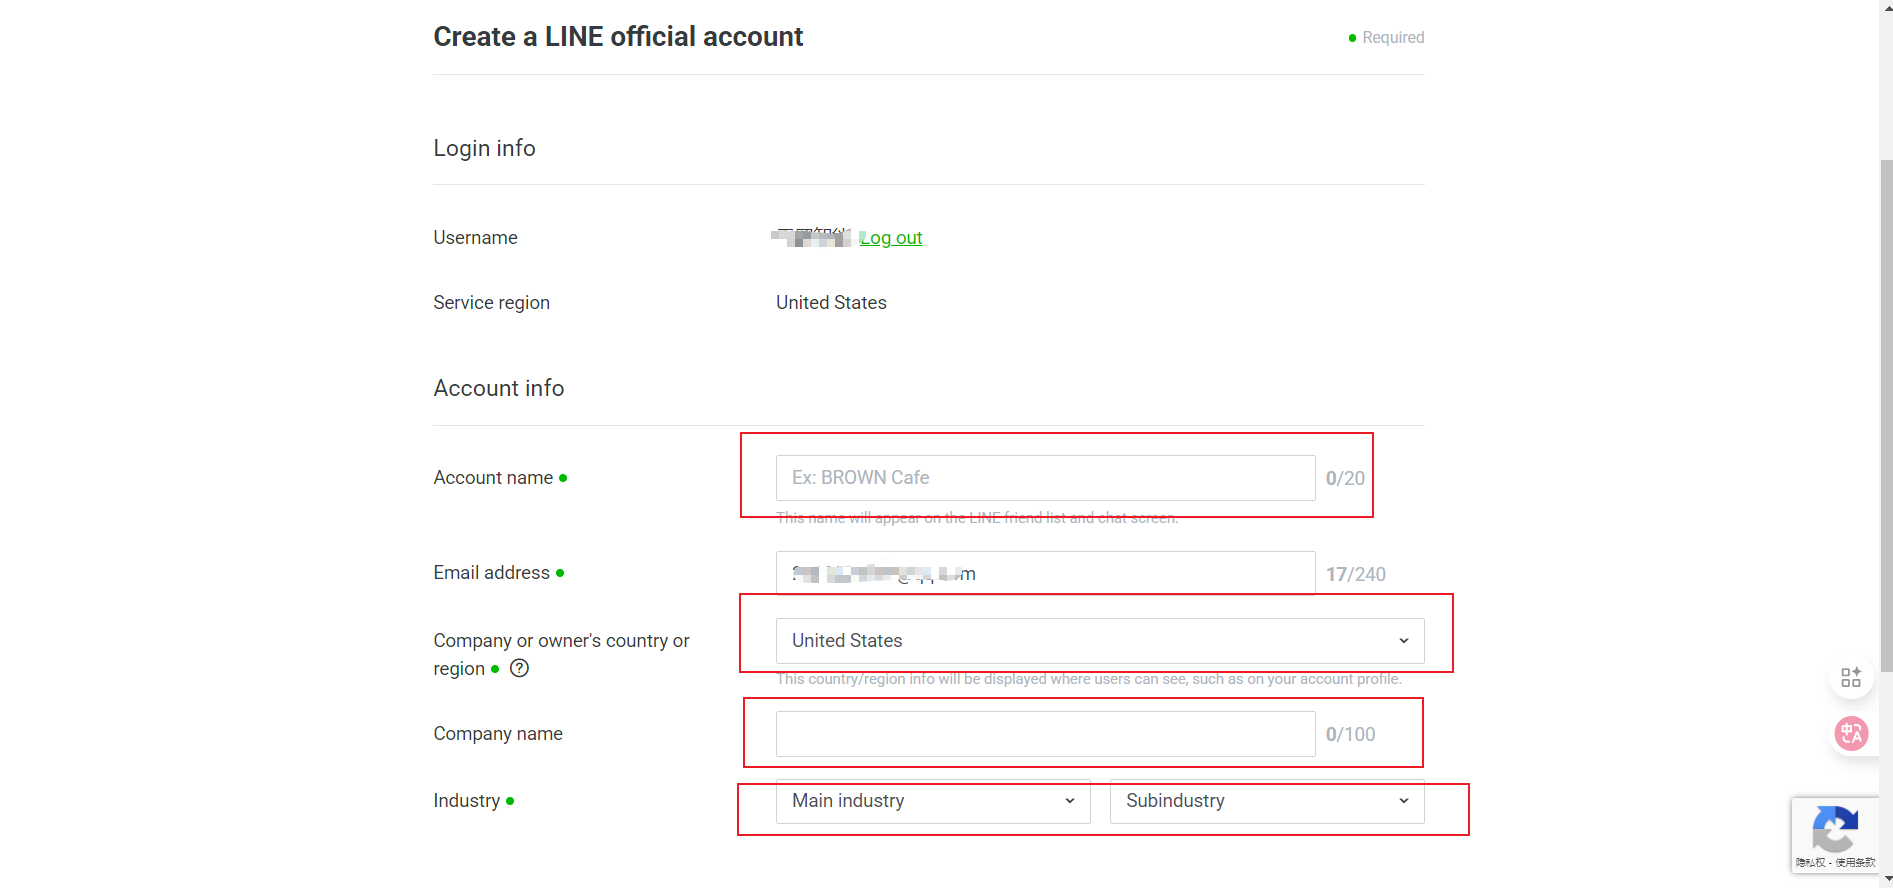 * Channel Name
* Channel Description
* Category
* Subcategory
* Email Address
5. After filling in all information, click "Continue" to create
* Channel Name
* Channel Description
* Category
* Subcategory
* Email Address
5. After filling in all information, click "Continue" to create
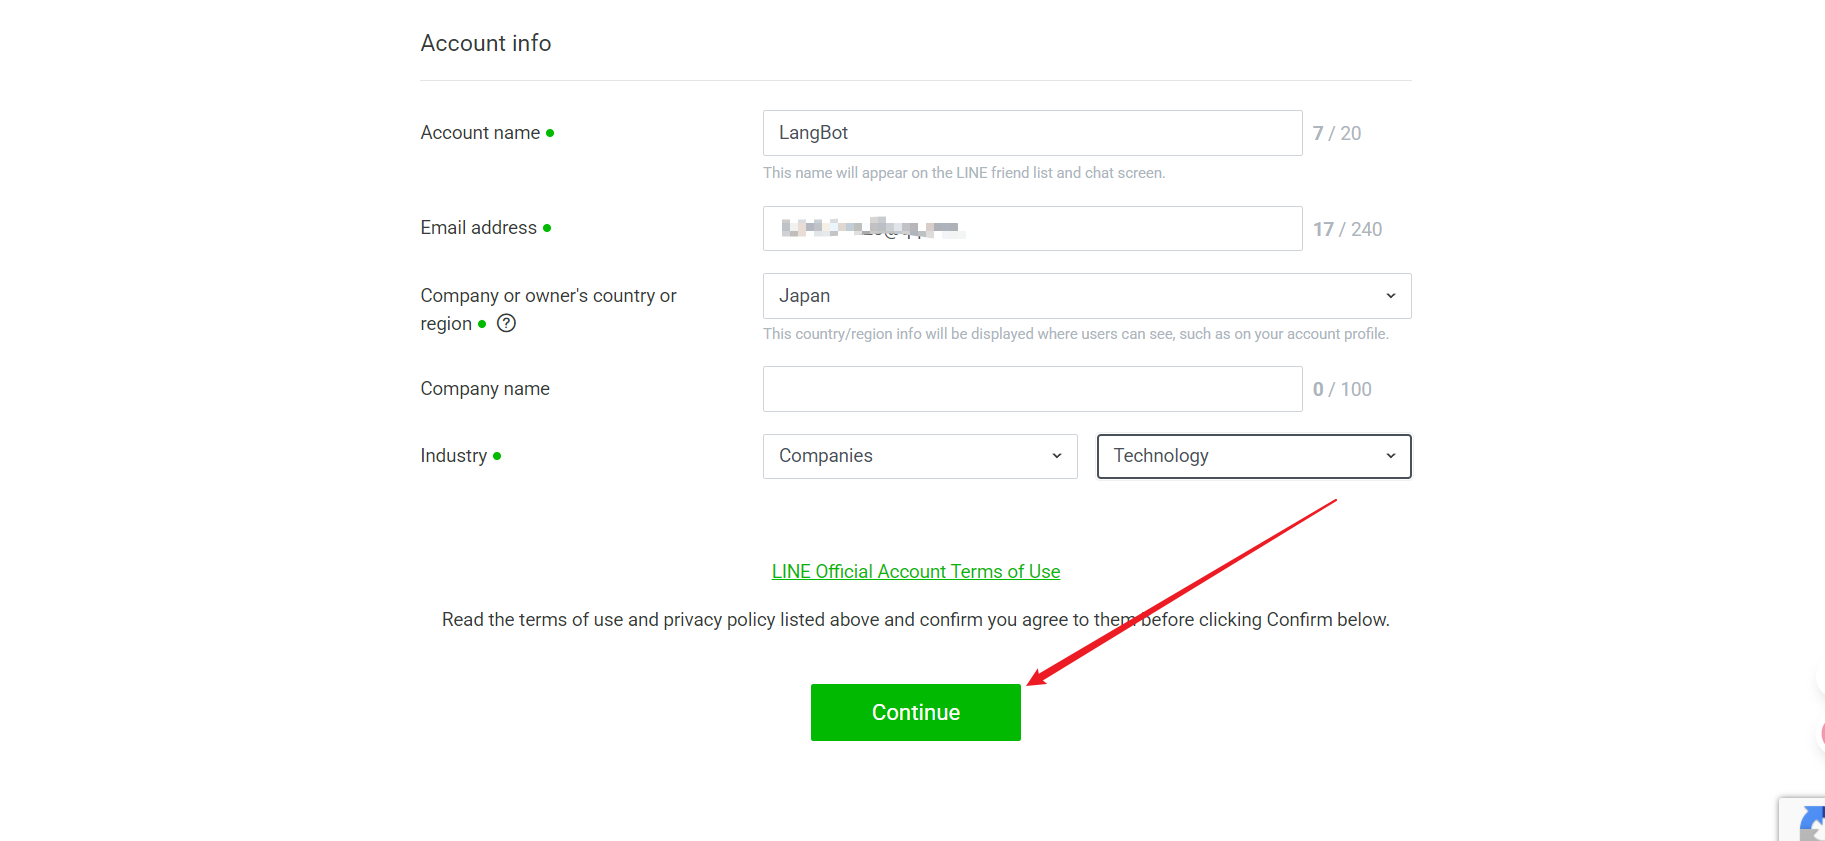 6. Check the information you entered, and if there are no issues, click Submit
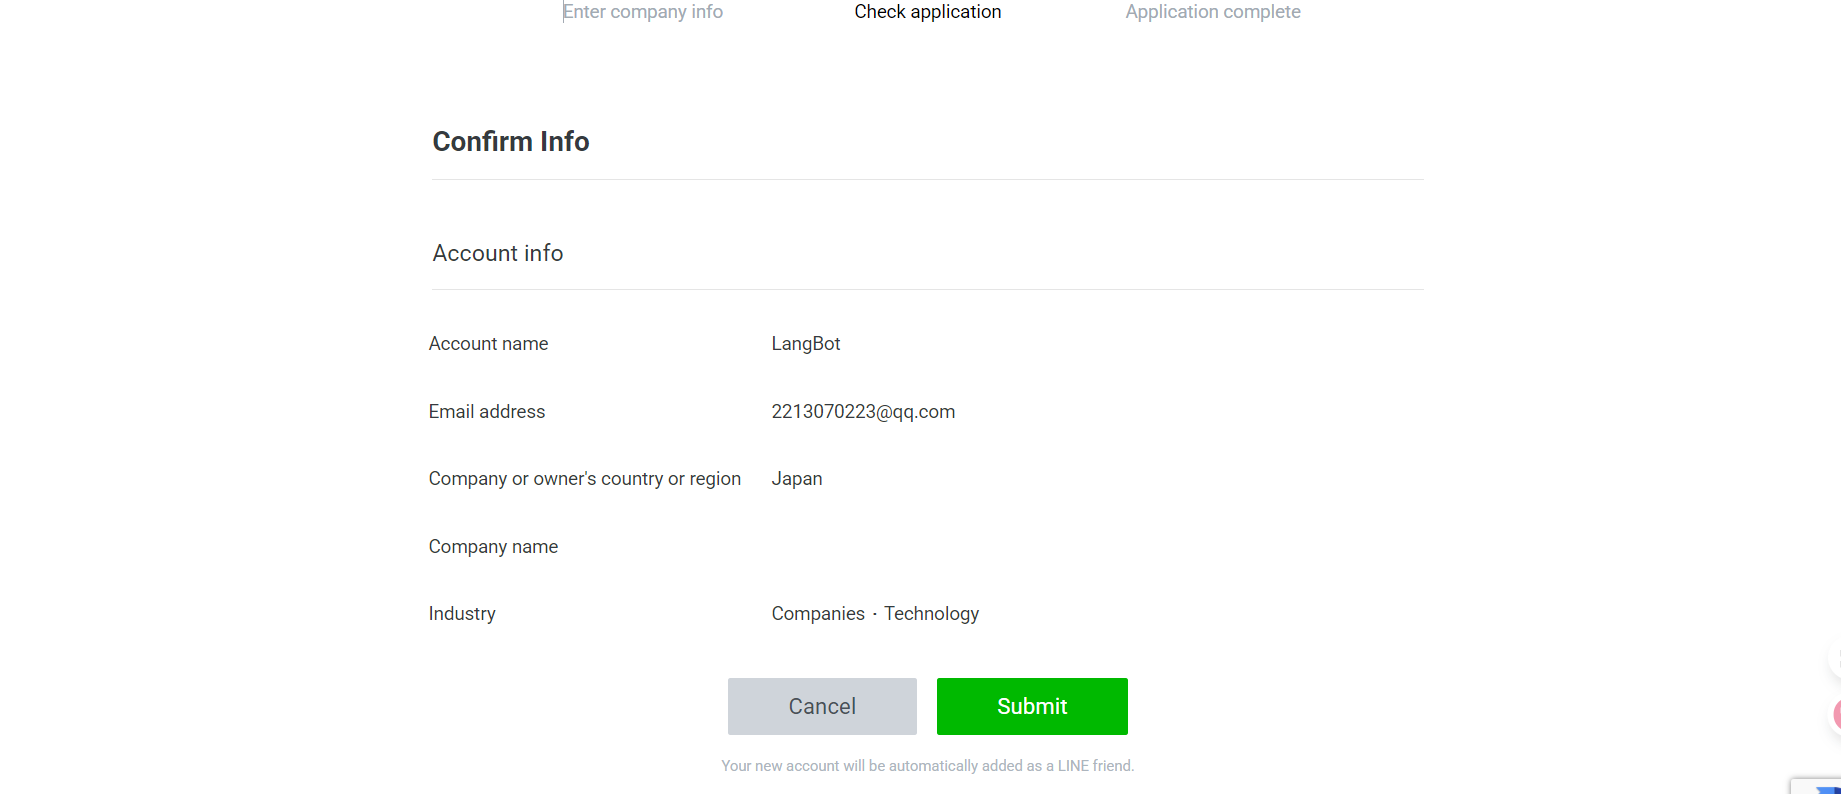 7. Successfully created, proceed to use
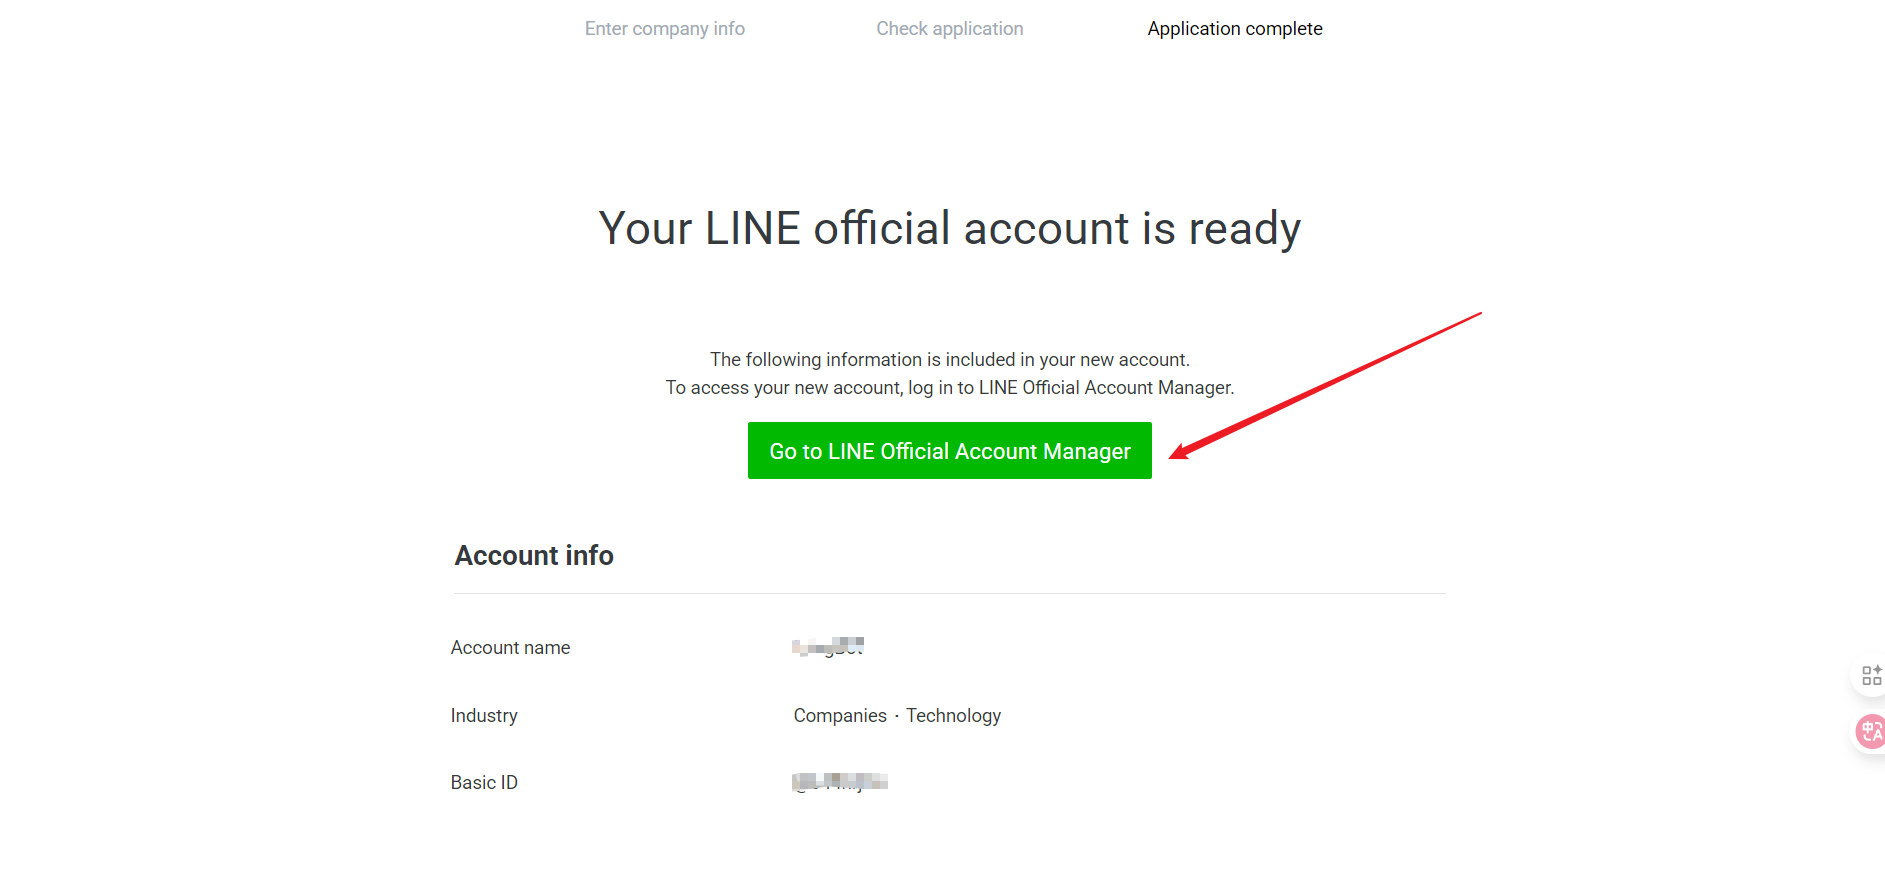 ### Get Configuration Information
After creation, you will obtain the following important information, please record it:
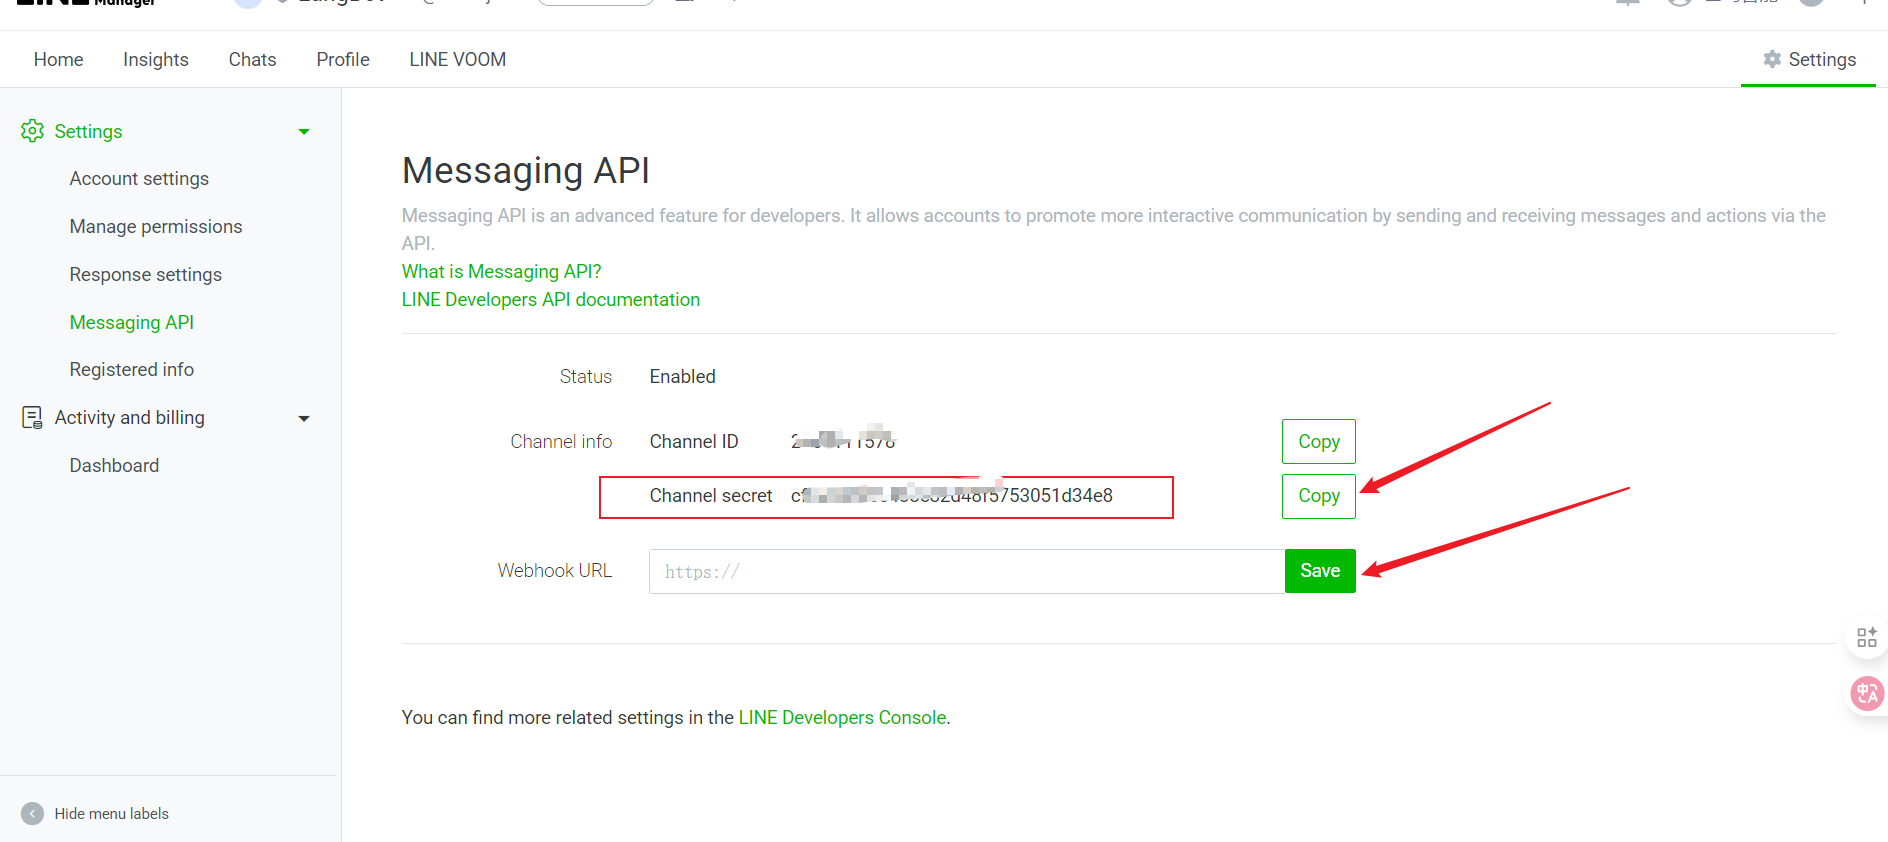
1. Channel Secret
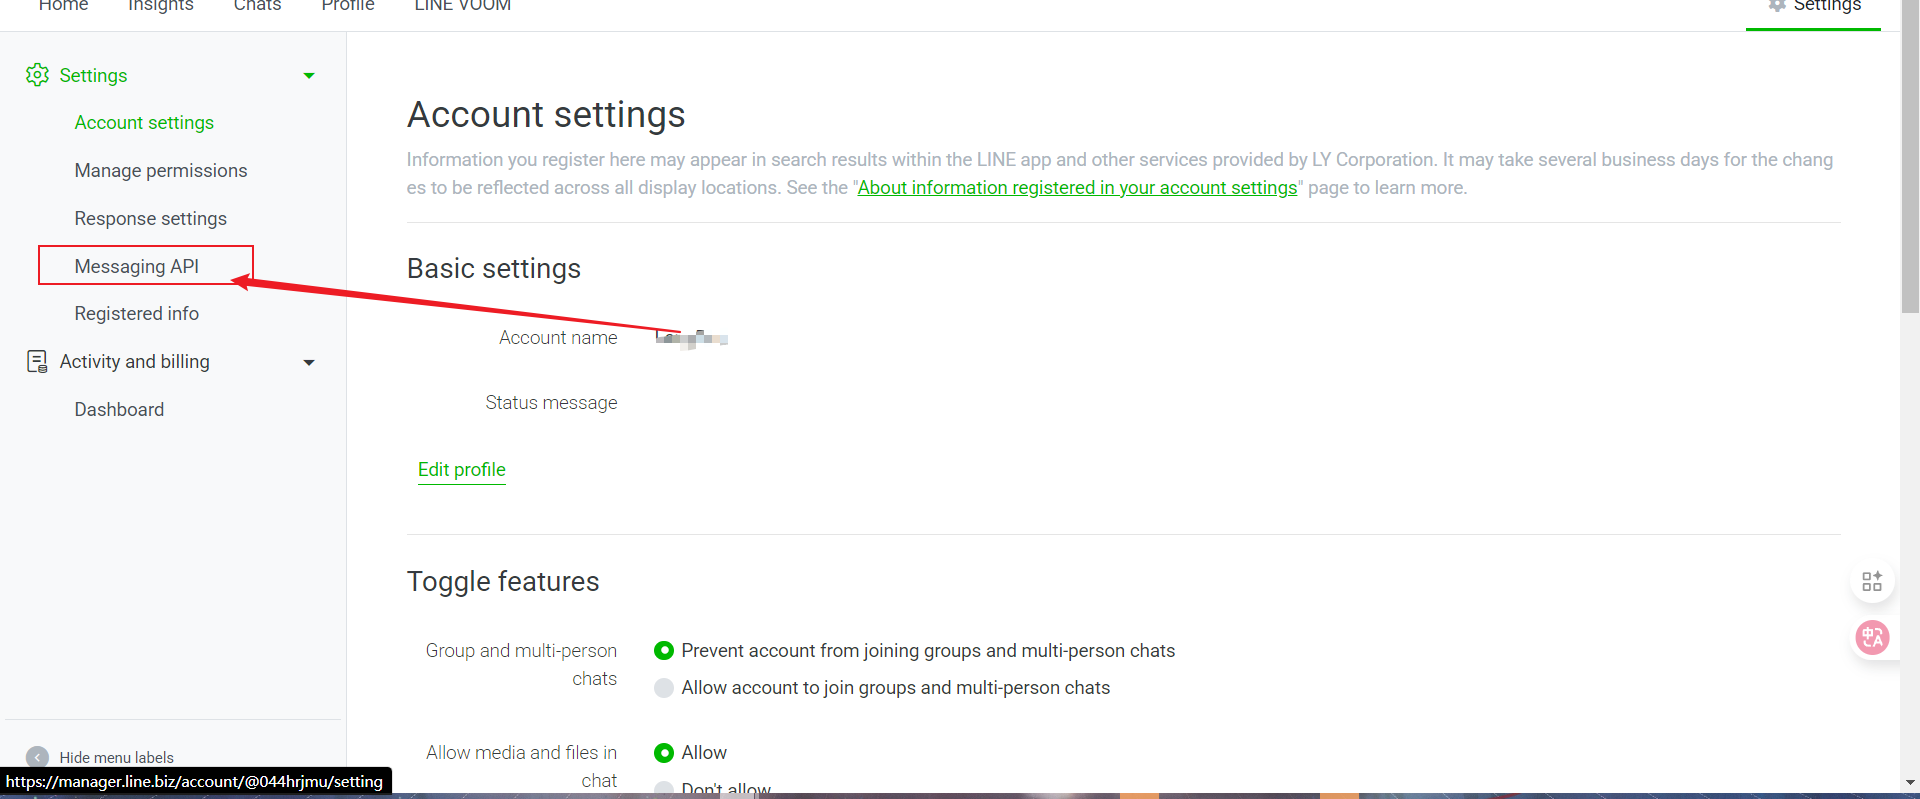
> [Page after clicking use](https://manager.line.biz/account)
* Select Settings
* Click Message API
### Get Configuration Information
After creation, you will obtain the following important information, please record it:
1. Channel Secret
> [Page after clicking use](https://manager.line.biz/account)
* Select Settings
* Click Message API
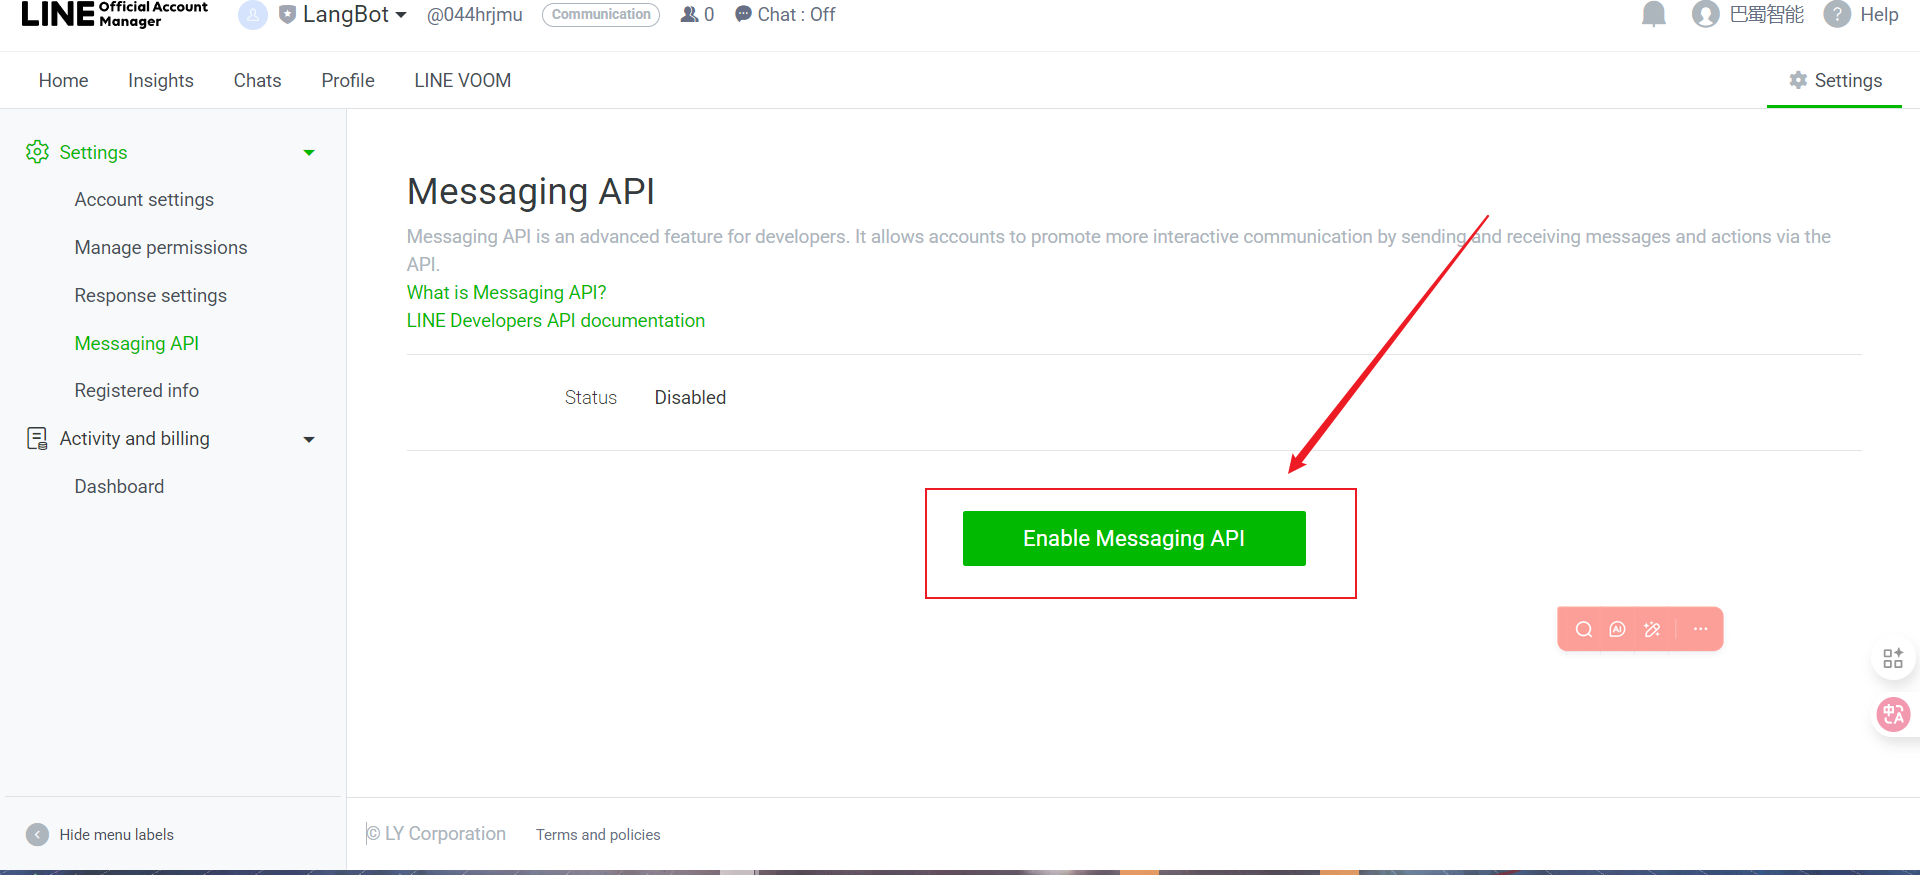
 * Enable Message API
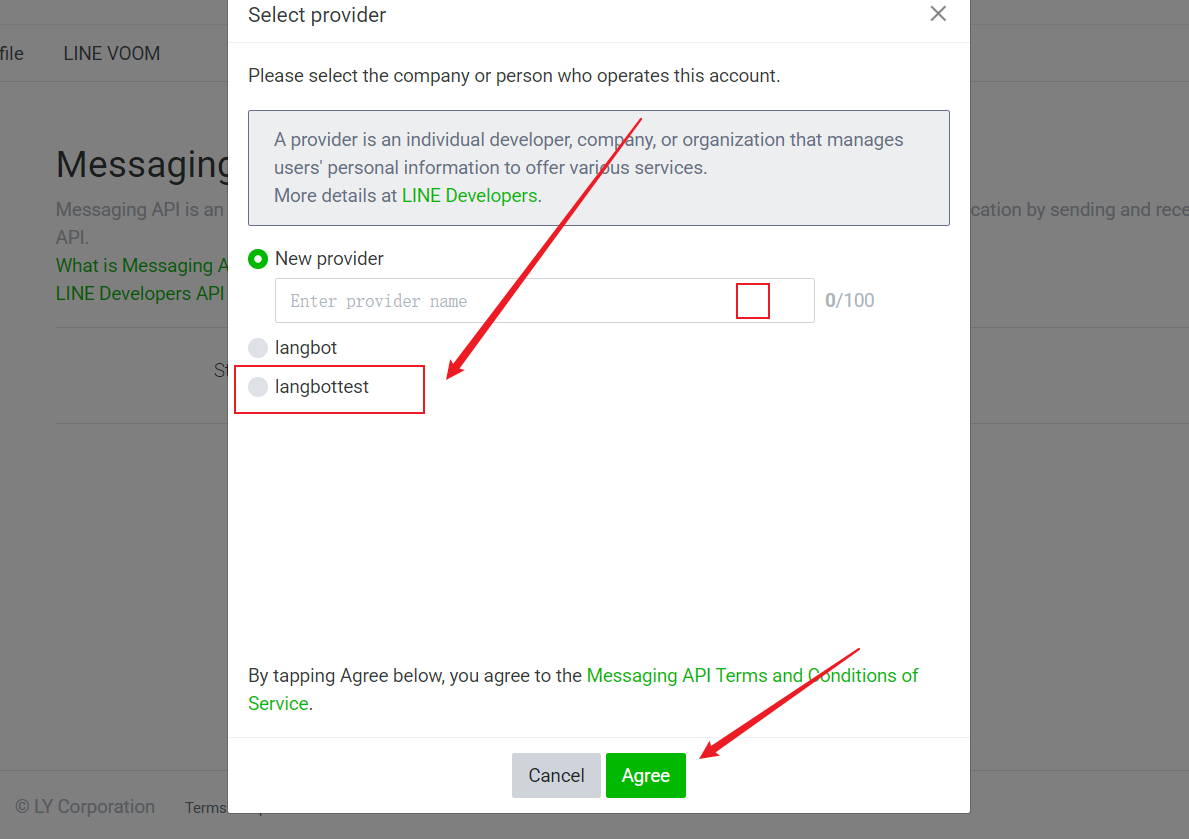
 * Select the Provider you just created and click Agree
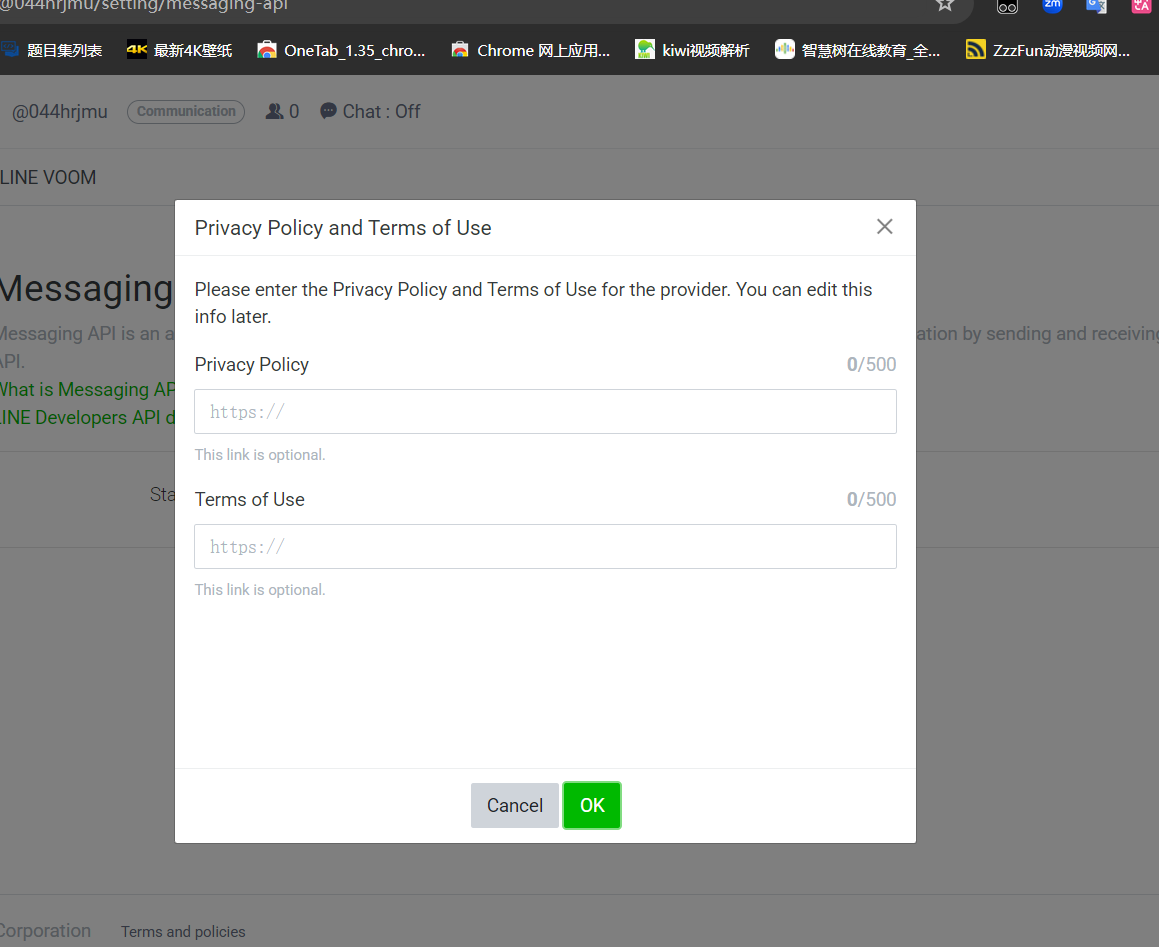
 * For privacy terms, simply click OK
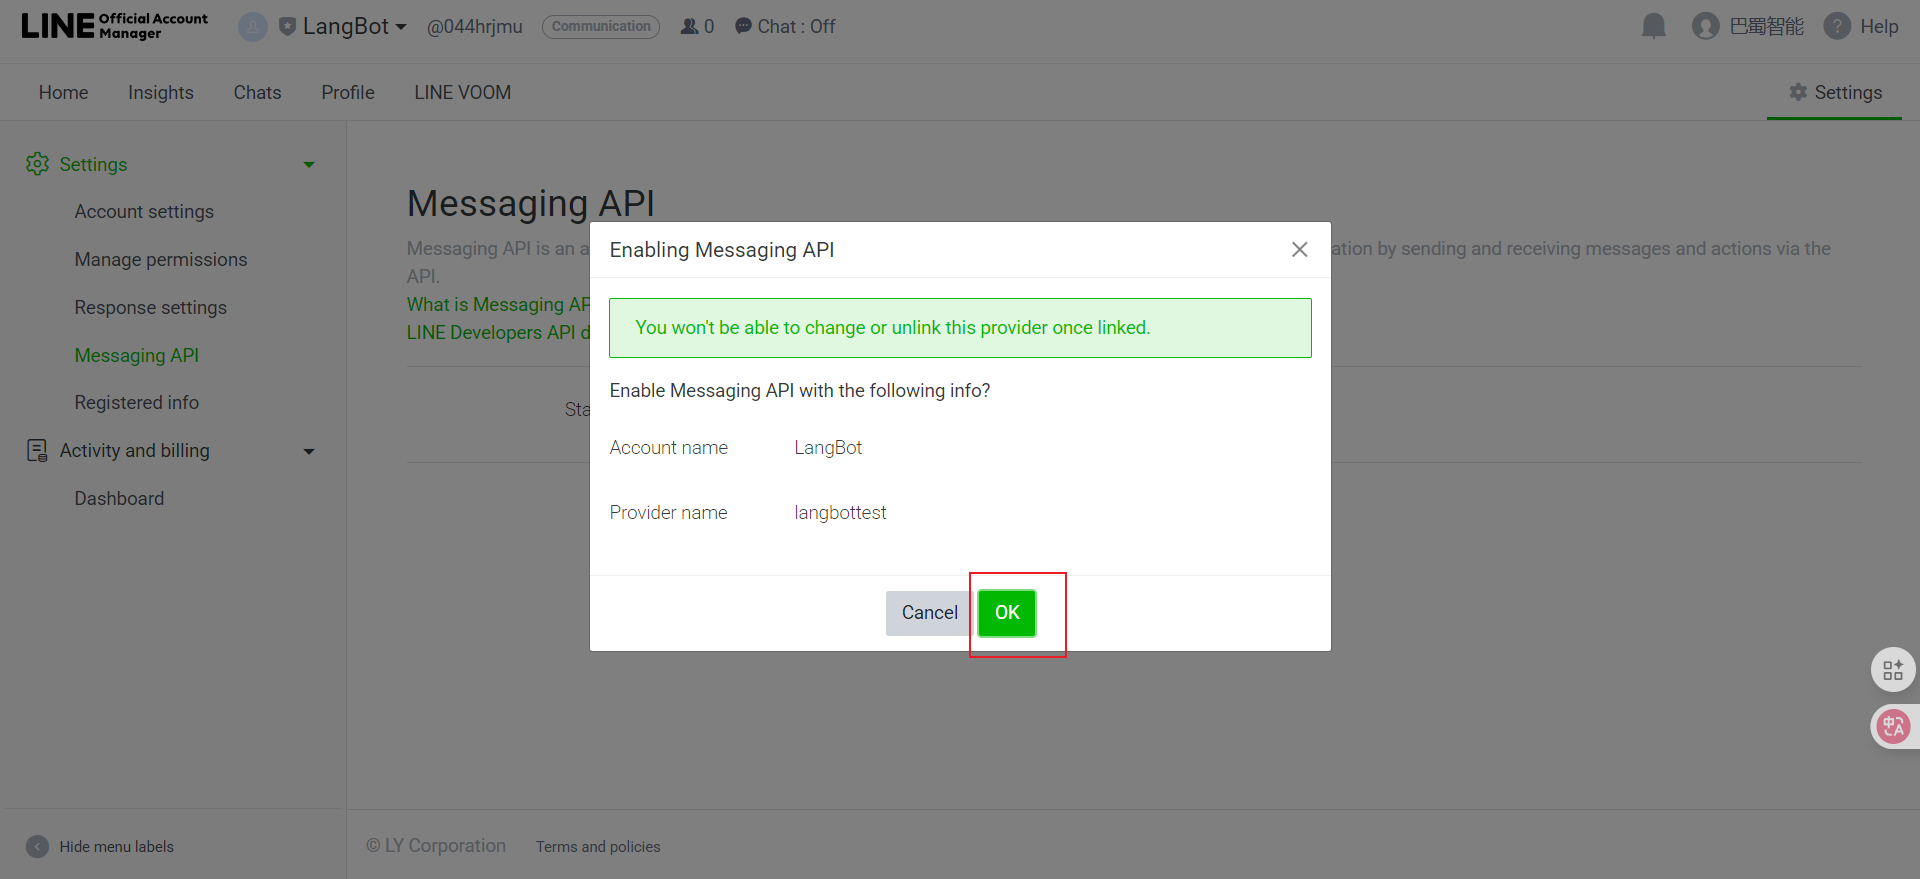
 * Click OK to complete creation
 * Copy it
 2. Channel Access Token (need to click the "Issue" button to generate)
* Click console or directly visit [Console](https://developers.line.biz/console/)
2. Channel Access Token (need to click the "Issue" button to generate)
* Click console or directly visit [Console](https://developers.line.biz/console/)
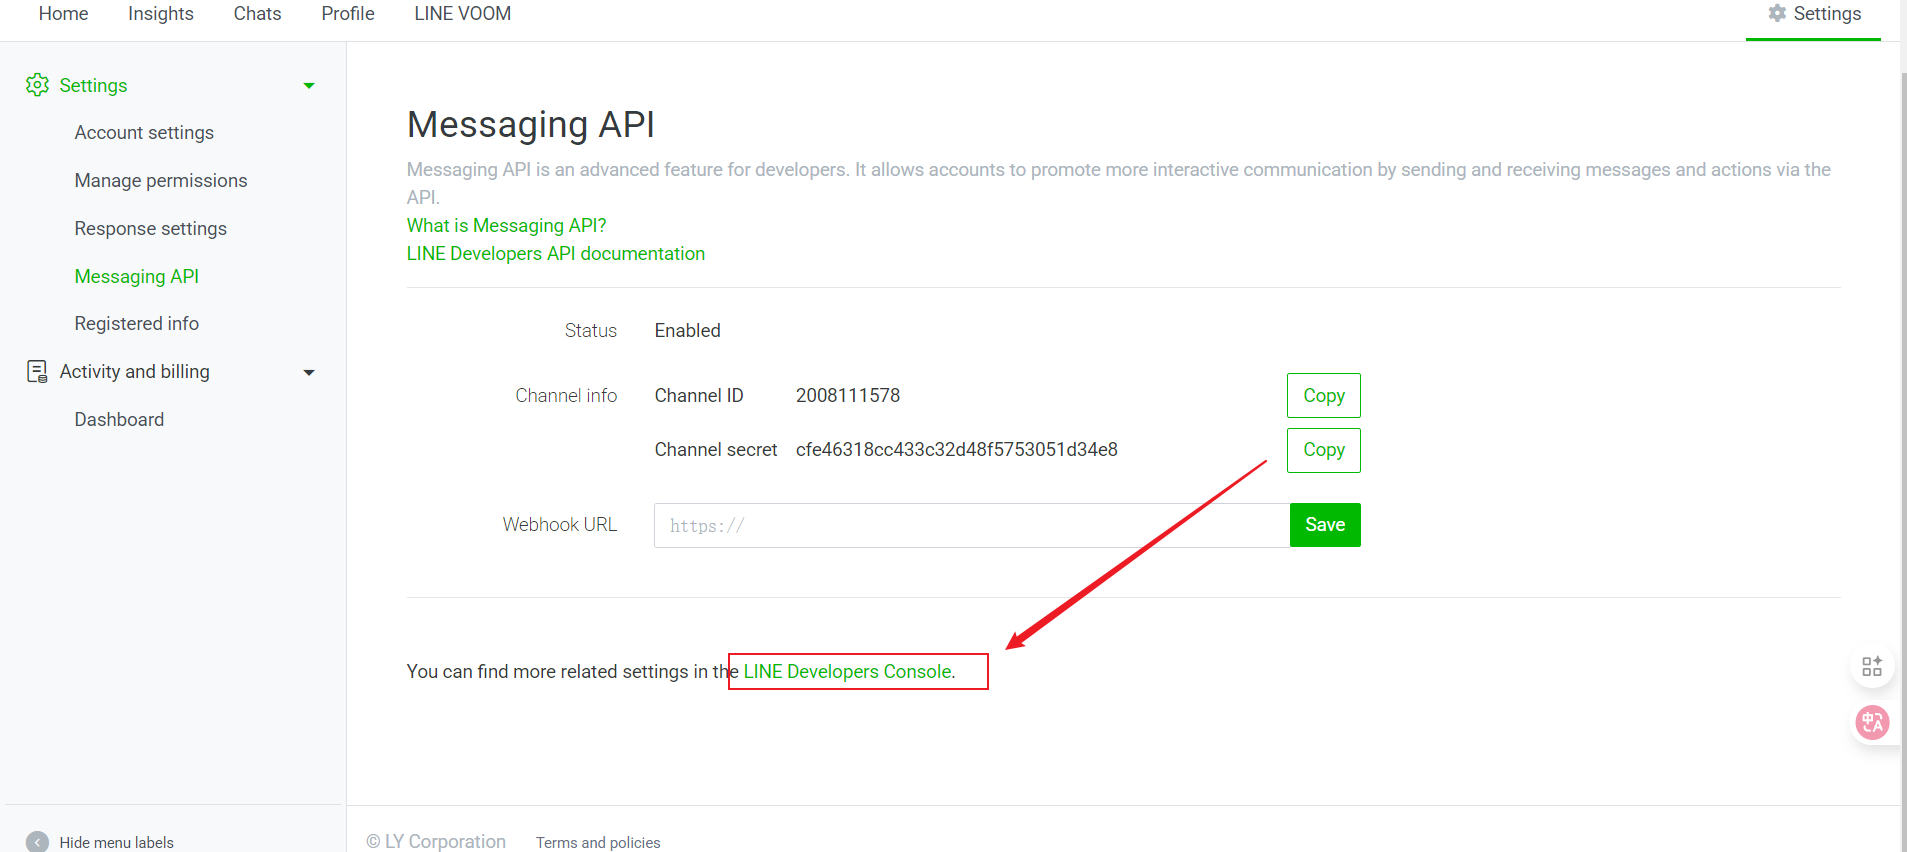 * Select the Provider you created and click Message API
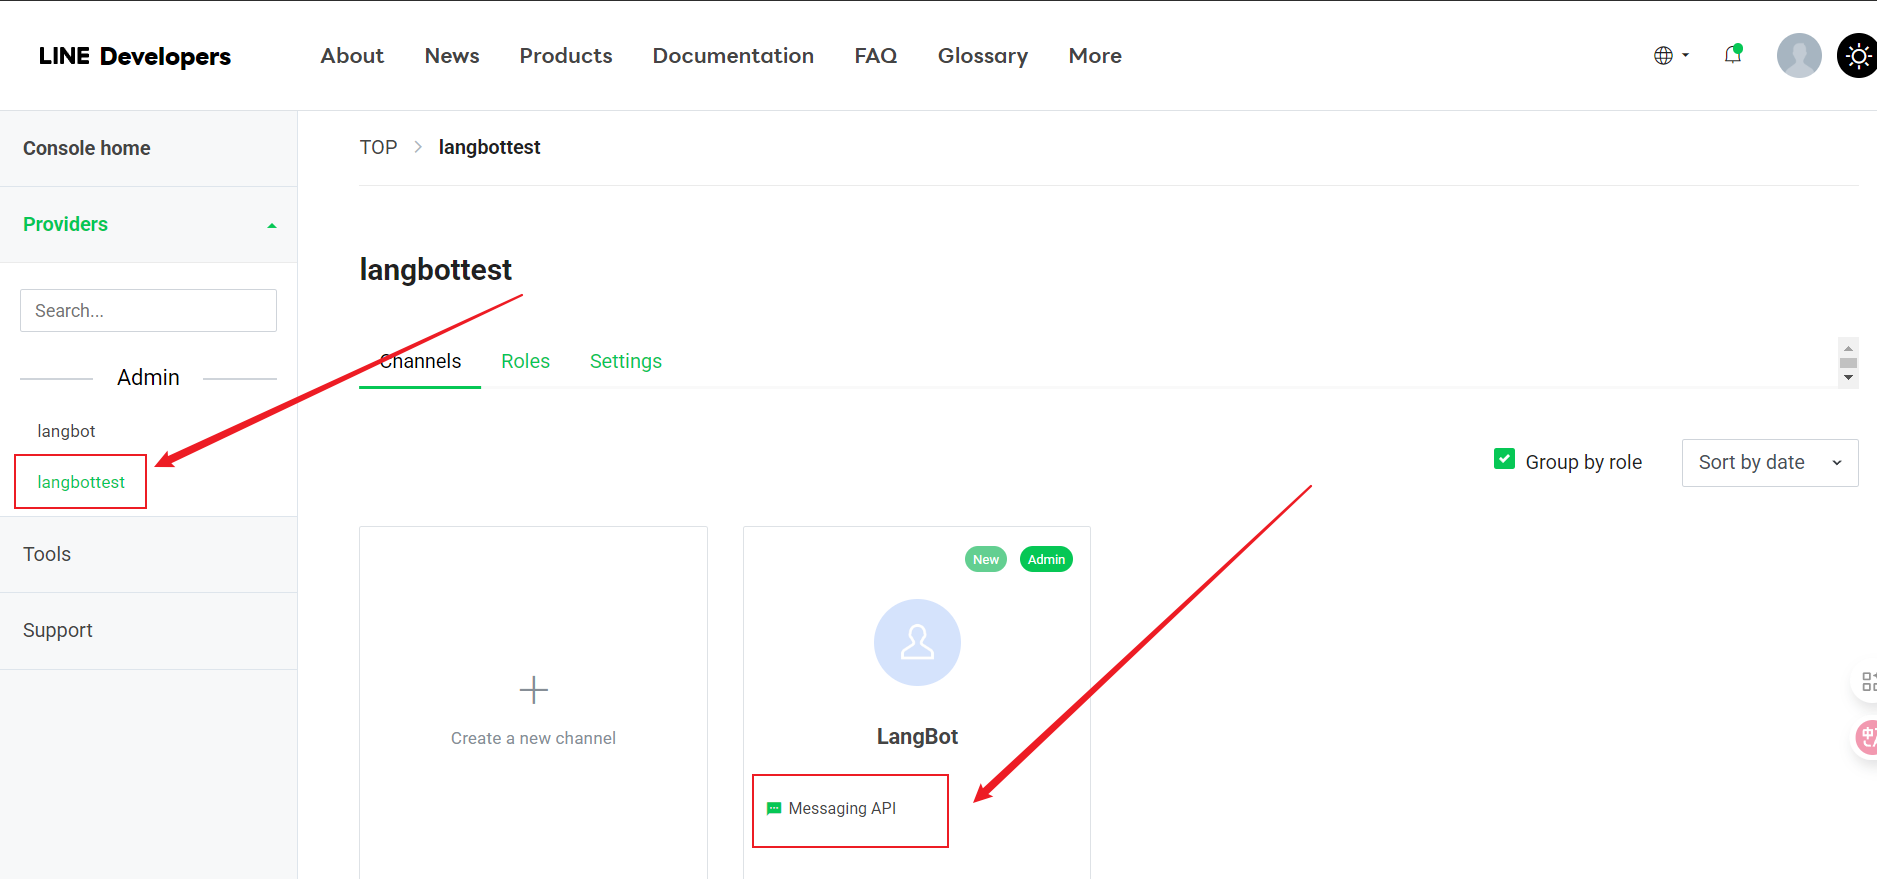 * Click Message API
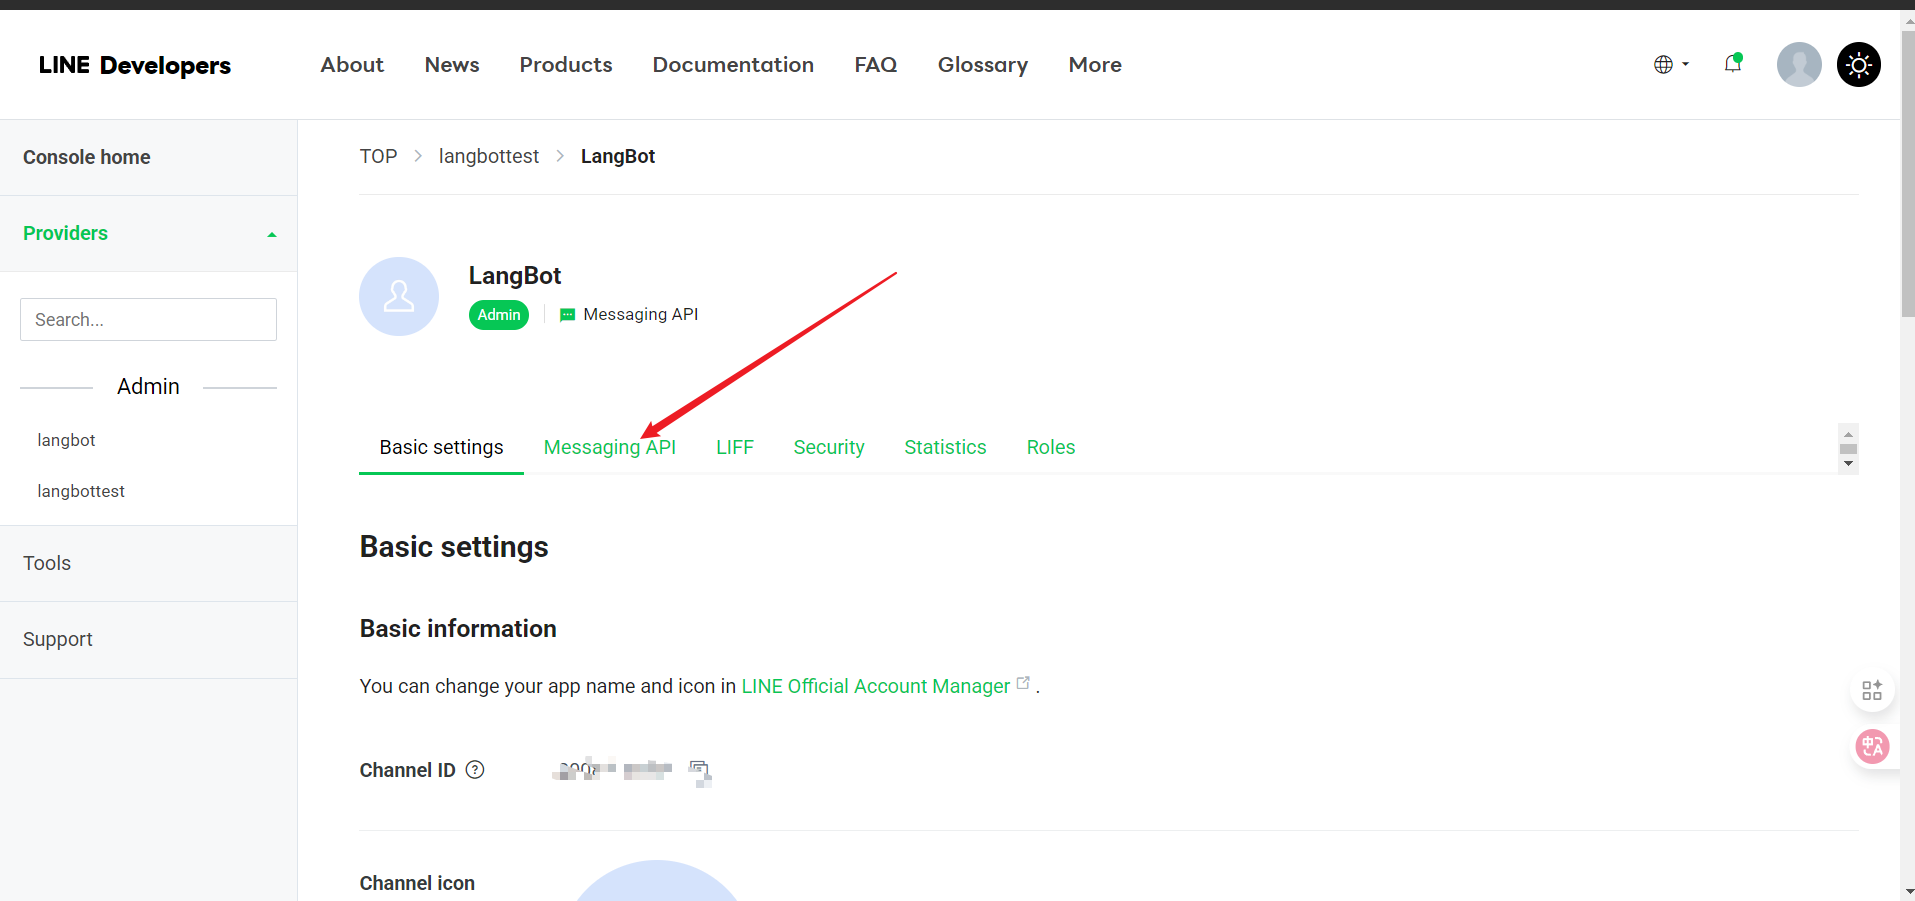 * Scroll to the bottom, click Issue
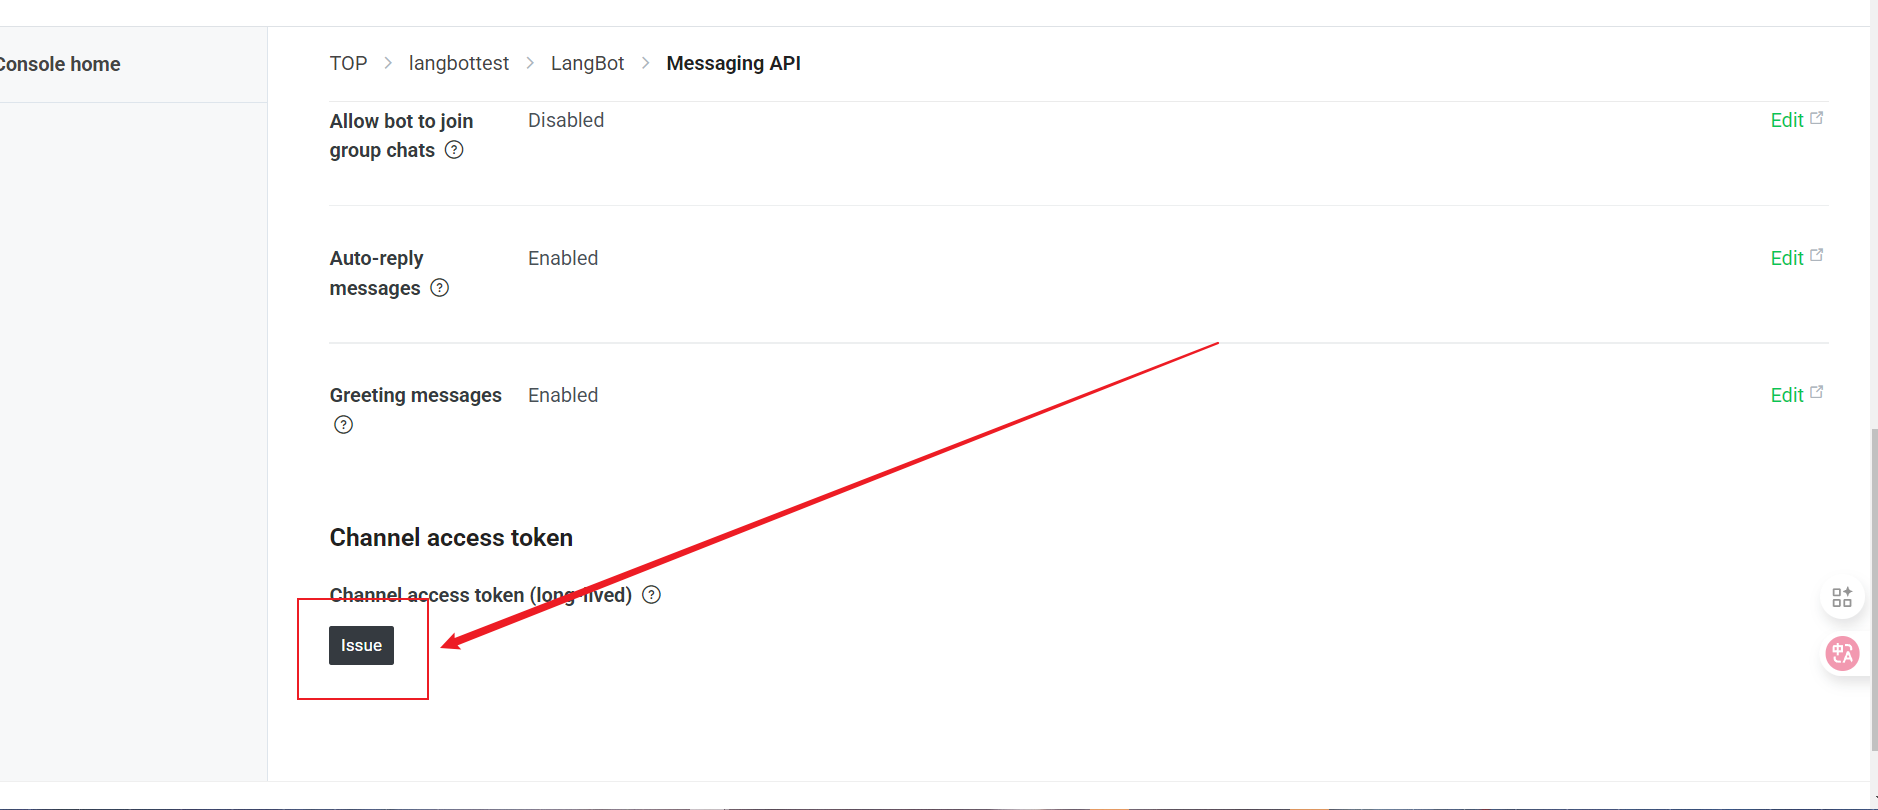 * Click the icon to copy
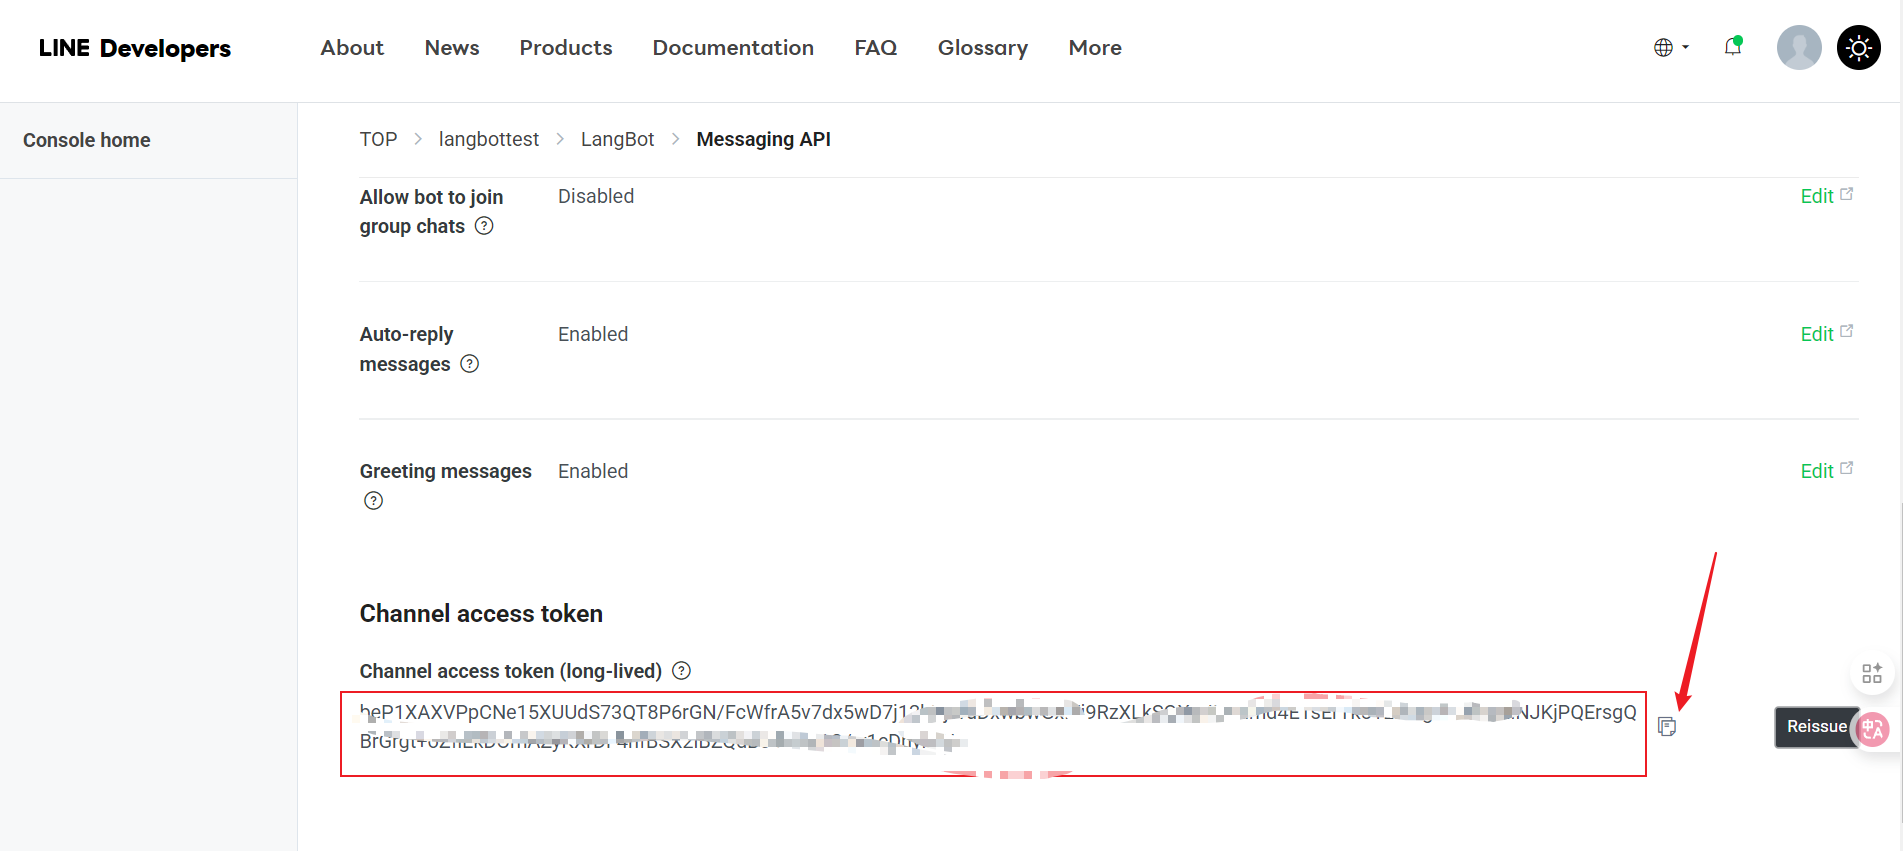 ## Connecting to LangBot
Next, open the LangBot configuration page:
1. Click "Bots", then click "Add"
## Connecting to LangBot
Next, open the LangBot configuration page:
1. Click "Bots", then click "Add"
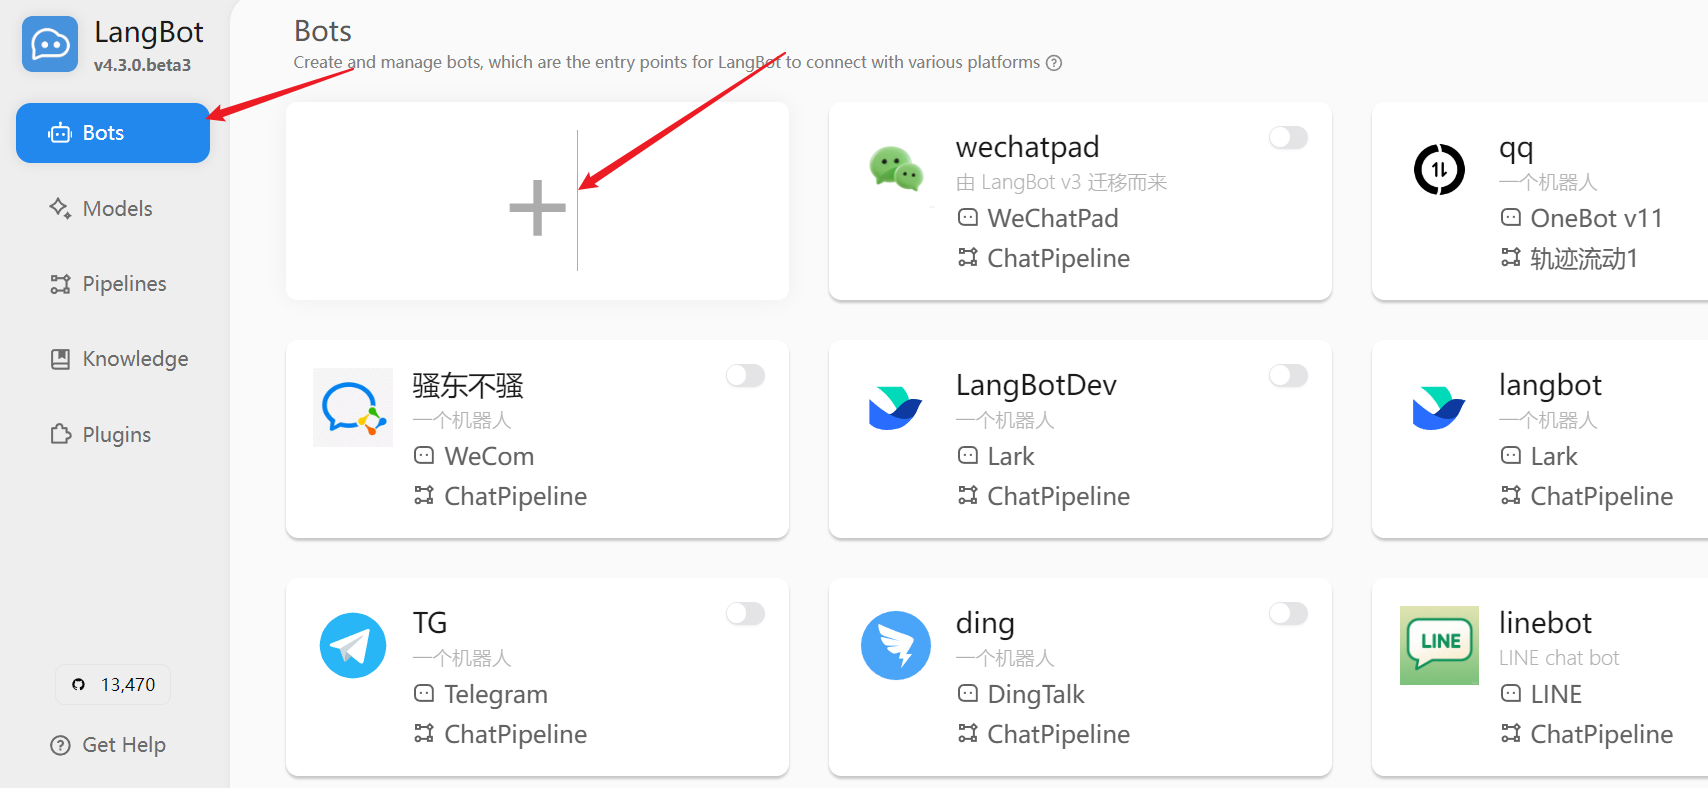 2. Select "LINE" in "Platform/Adapter Selection"
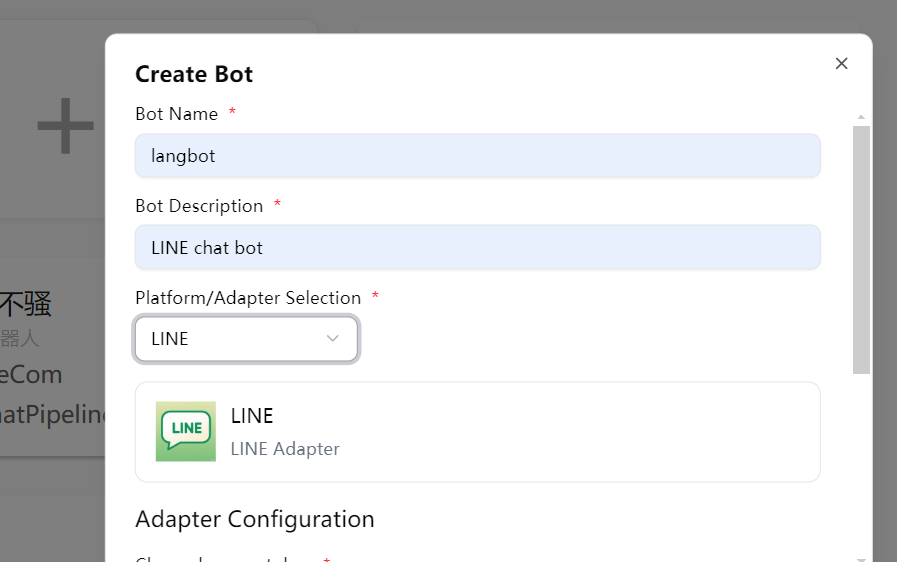 3. Fill in the configuration information:
* Channel Secret: The Channel secret you obtained earlier
* Channel Access Token: The Channel access token you obtained earlier
3. Fill in the configuration information:
* Channel Secret: The Channel secret you obtained earlier
* Channel Access Token: The Channel access token you obtained earlier
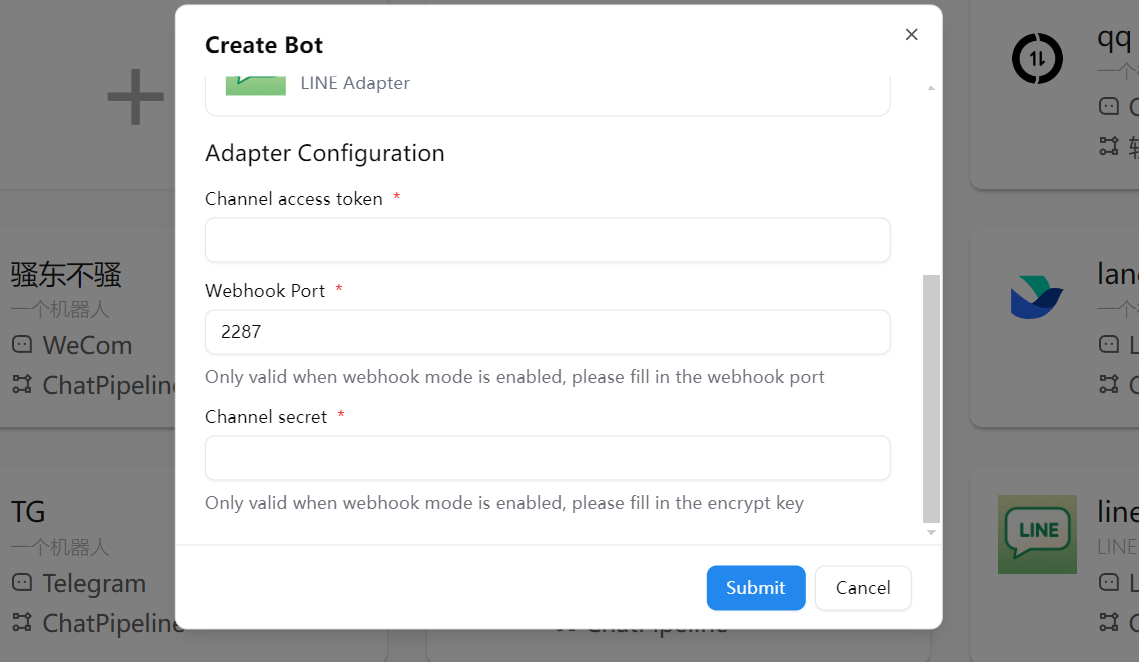 4. Click "Save" to complete the configuration
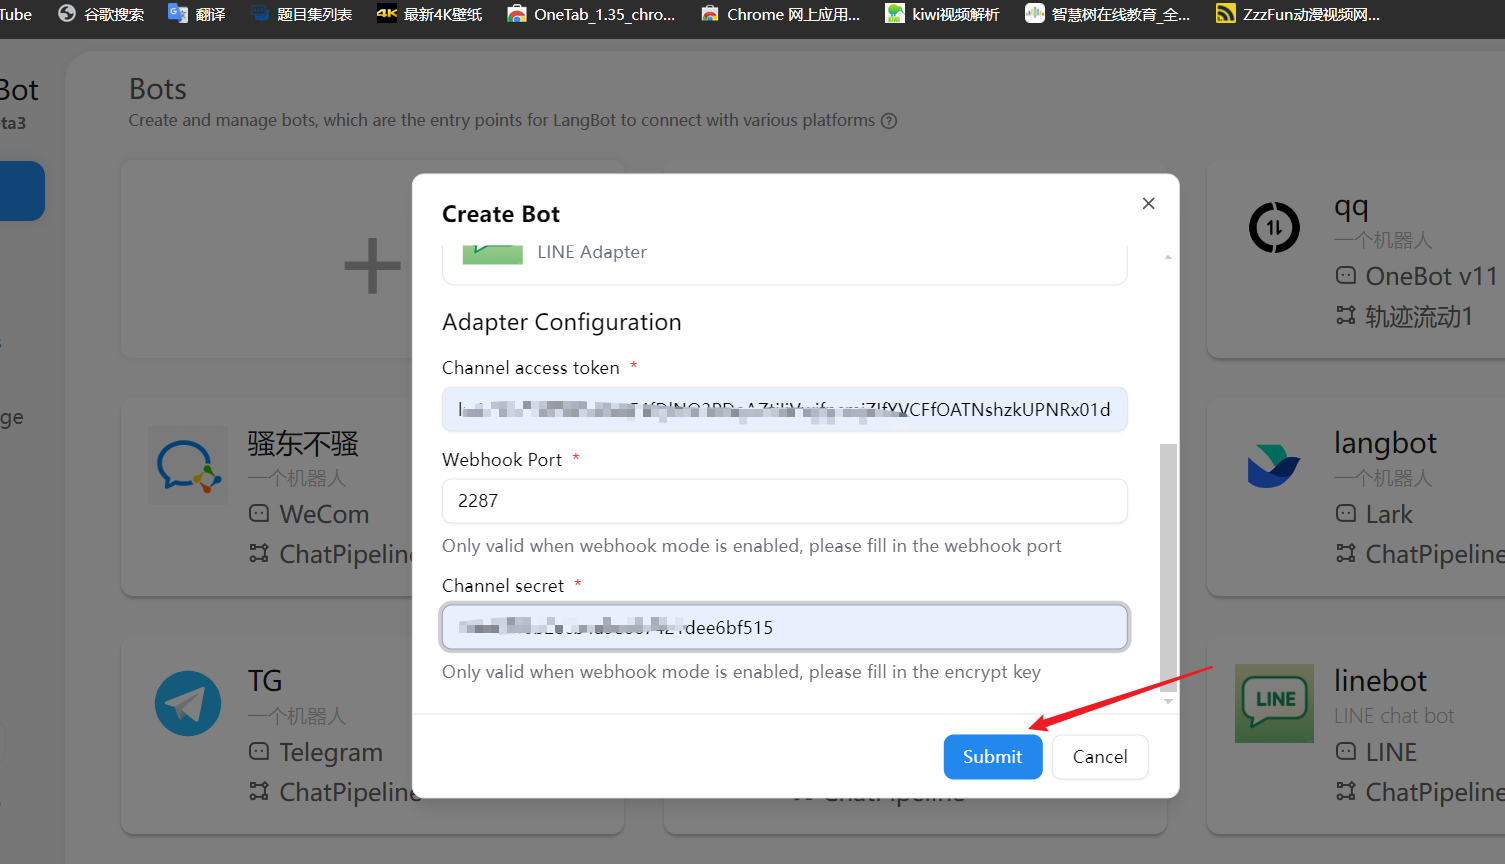 ## Configure Webhook
We recommend that you first refer to [Configure HTTP Reverse Proxy](/en/workshop/production/proxy-and-ssl) to configure the LangBot callback address.
**Don't want to set up a public server and domain?** [LangBot Cloud](https://space.langbot.app/cloud) includes built-in domain and HTTPS — get started right away.
* Get the Webhook callback URL from the LangBot configuration page
## Configure Webhook
We recommend that you first refer to [Configure HTTP Reverse Proxy](/en/workshop/production/proxy-and-ssl) to configure the LangBot callback address.
**Don't want to set up a public server and domain?** [LangBot Cloud](https://space.langbot.app/cloud) includes built-in domain and HTTPS — get started right away.
* Get the Webhook callback URL from the LangBot configuration page
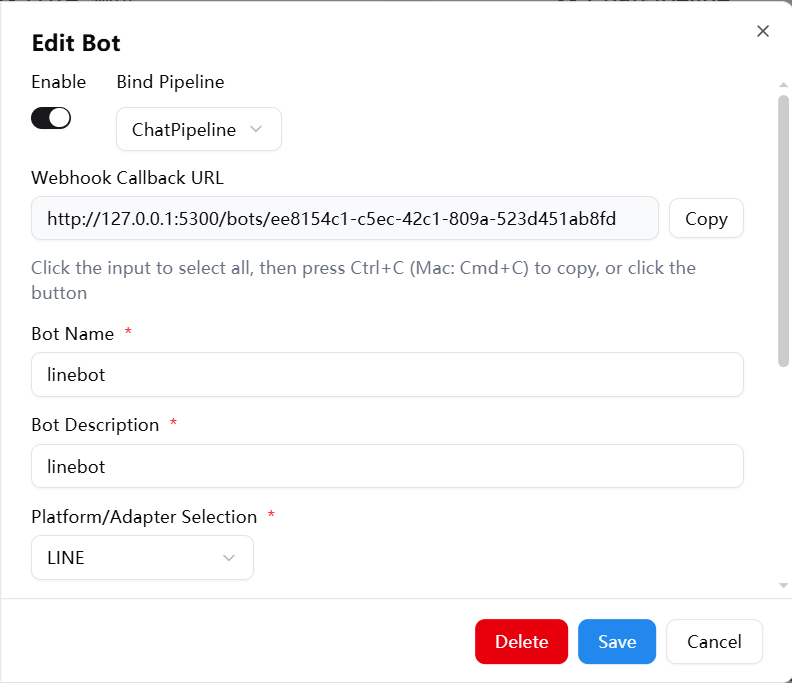 * Click console or directly visit [Console](https://developers.line.biz/console/)
* Select the Provider you created and click Message API
* Click Message API
* Click Edit to fill in the connection
* Click console or directly visit [Console](https://developers.line.biz/console/)
* Select the Provider you created and click Message API
* Click Message API
* Click Edit to fill in the connection
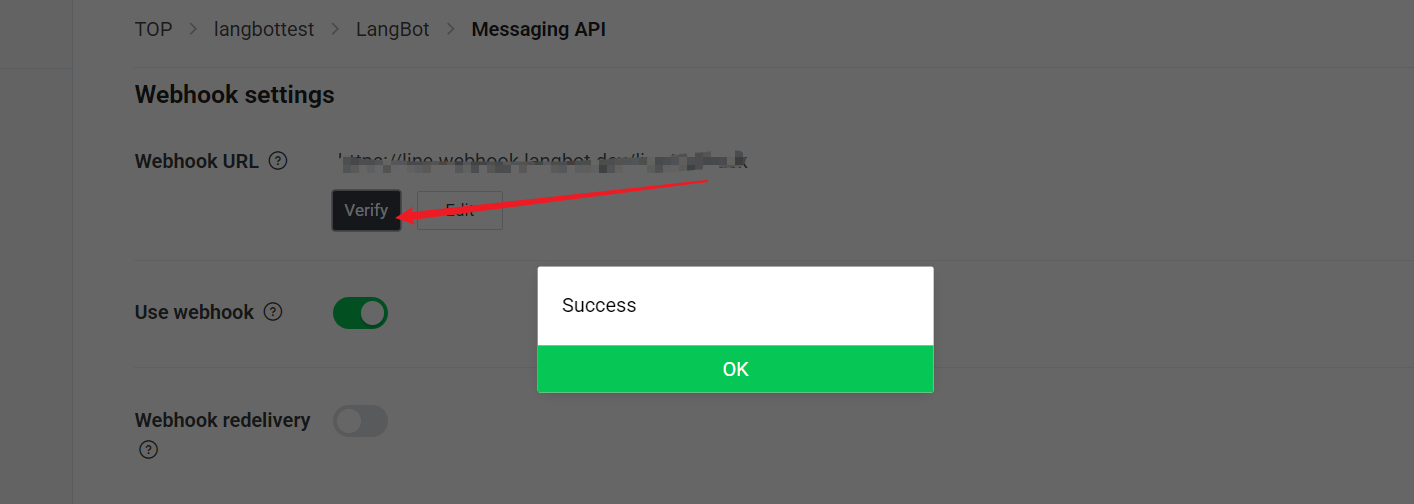
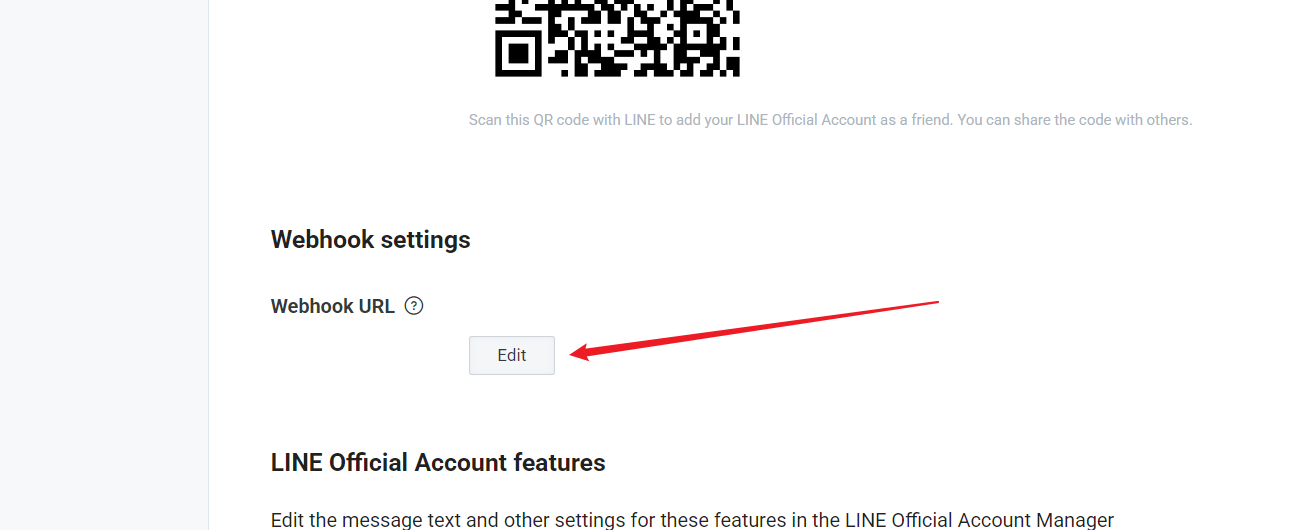 * Enter the connection (must be an HTTPS connection, which means you need an SSL certificate), click Update
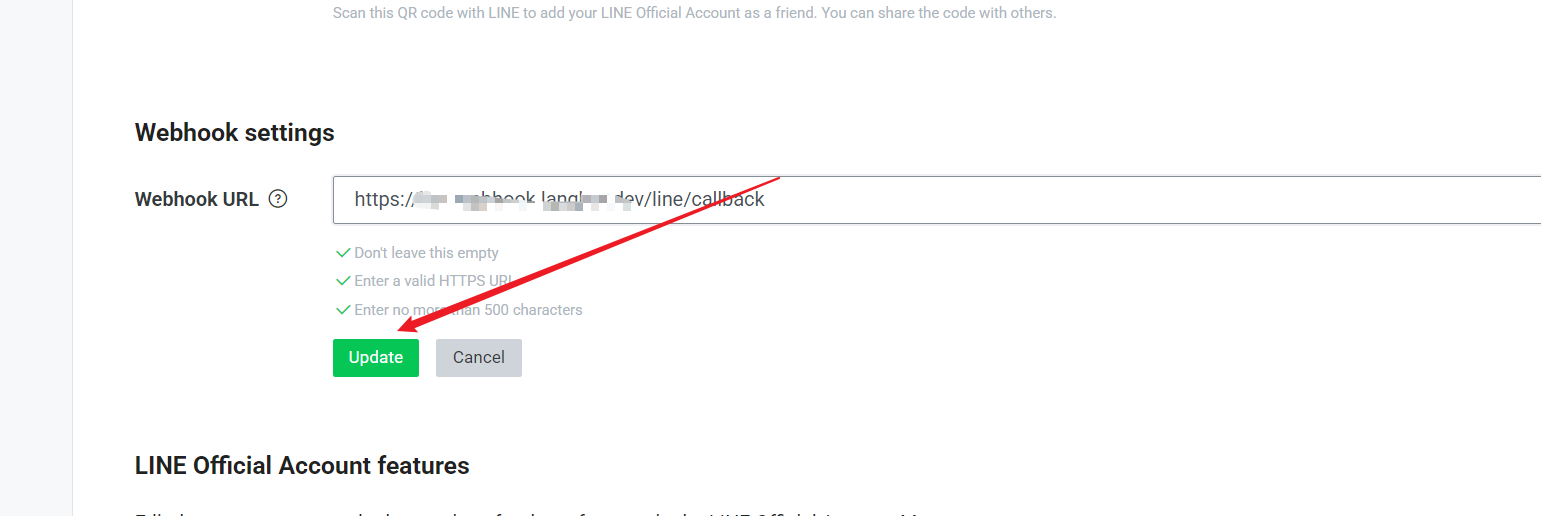 * Select Use Webhook
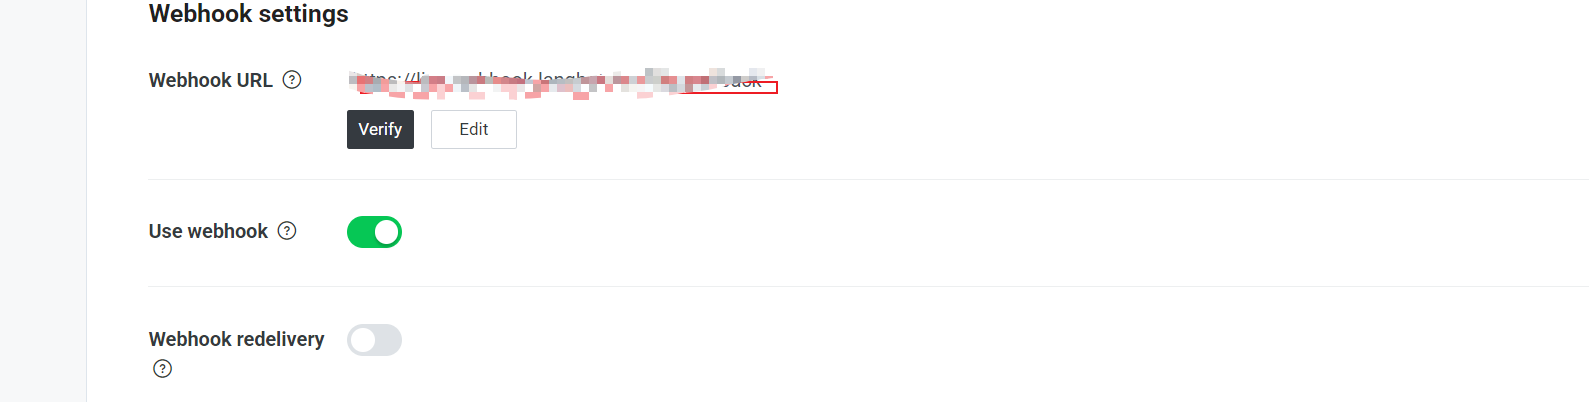 5. Click the "Verify" button to test if the connection is successful
 ## Feature Configuration
In the LINE developer console, you can further configure the bot's features:
1. In the "Messaging API" tab, find the "LINE Official Account Features" section
2. Enable or disable the following features as needed:
* Auto-reply messages
* Welcome messages when adding friends
* Group and multi-person chat
* Greeting when the bot joins a group
## Usage
After configuration, users can interact with your LINE bot through the following methods:
1. Scan the QR code provided in the LINE developer console to add the bot as a friend
2. Send messages in the chat, and the bot will process and reply through LangBot
## Common Issues
### Webhook Verification Failed
* Ensure your server can be accessed via HTTPS
* Check if the Webhook URL is correct
* Confirm that the LangBot service is running properly
### Unable to Receive Messages
* Check if the Channel Access Token is valid
* Confirm that the "Use Webhook" option is enabled
* Check the LangBot logs for error messages
### Permission Issues
* Ensure you have enabled the necessary permissions for the bot in the LINE developer console
* For some advanced features, a LINE Premium account may be required
## Feature Configuration
In the LINE developer console, you can further configure the bot's features:
1. In the "Messaging API" tab, find the "LINE Official Account Features" section
2. Enable or disable the following features as needed:
* Auto-reply messages
* Welcome messages when adding friends
* Group and multi-person chat
* Greeting when the bot joins a group
## Usage
After configuration, users can interact with your LINE bot through the following methods:
1. Scan the QR code provided in the LINE developer console to add the bot as a friend
2. Send messages in the chat, and the bot will process and reply through LangBot
## Common Issues
### Webhook Verification Failed
* Ensure your server can be accessed via HTTPS
* Check if the Webhook URL is correct
* Confirm that the LangBot service is running properly
### Unable to Receive Messages
* Check if the Channel Access Token is valid
* Confirm that the "Use Webhook" option is enabled
* Check the LangBot logs for error messages
### Permission Issues
* Ensure you have enabled the necessary permissions for the bot in the LINE developer console
* For some advanced features, a LINE Premium account may be required