> ## Documentation Index
> Fetch the complete documentation index at: https://docs.langbot.app/llms.txt
> Use this file to discover all available pages before exploring further.
# DingTalk
> Build a DingTalk AI bot with LangBot. Connect GPT, Claude, Dify and more to DingTalk groups and conversations.
Deploy LangBot to DingTalk.
## One-Click Setup (Recommended)
LangBot supports one-click DingTalk app creation with automatic credential filling — no manual copy-paste needed.
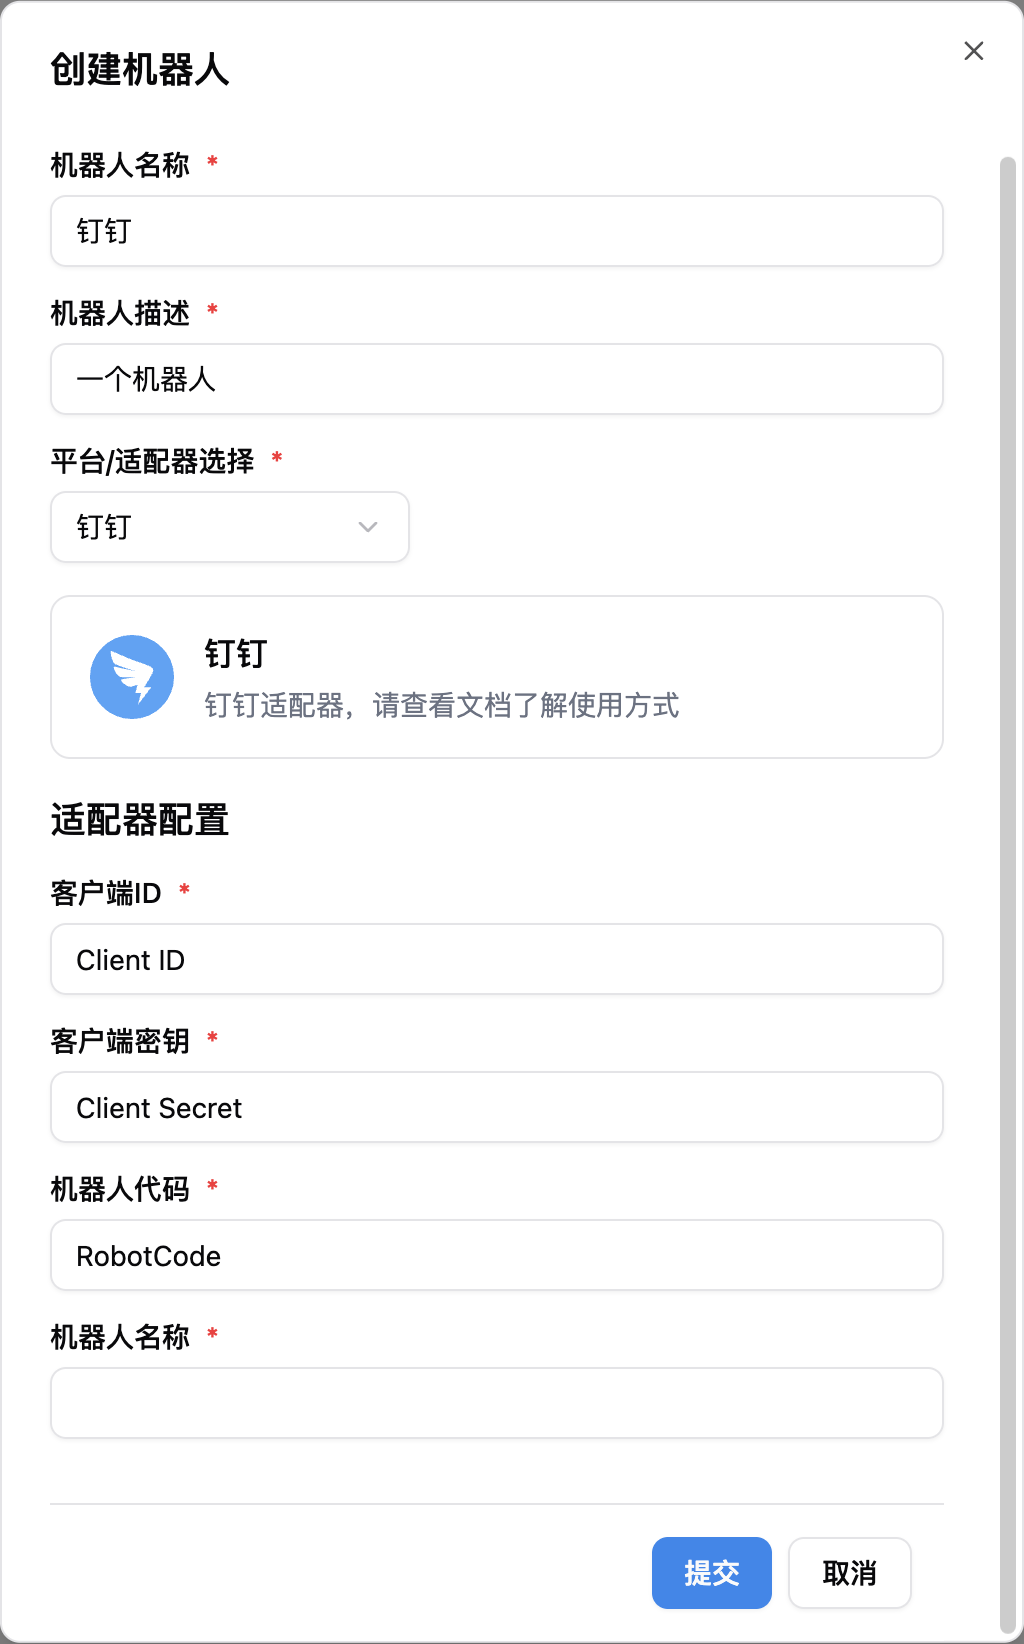
1. Open LangBot WebUI, go to **Bots > Create Bot**
2. Enter a bot name, select `DingTalk` as the platform/adapter
3. In the **One-Click Create App** section that appears, click the **Start** button
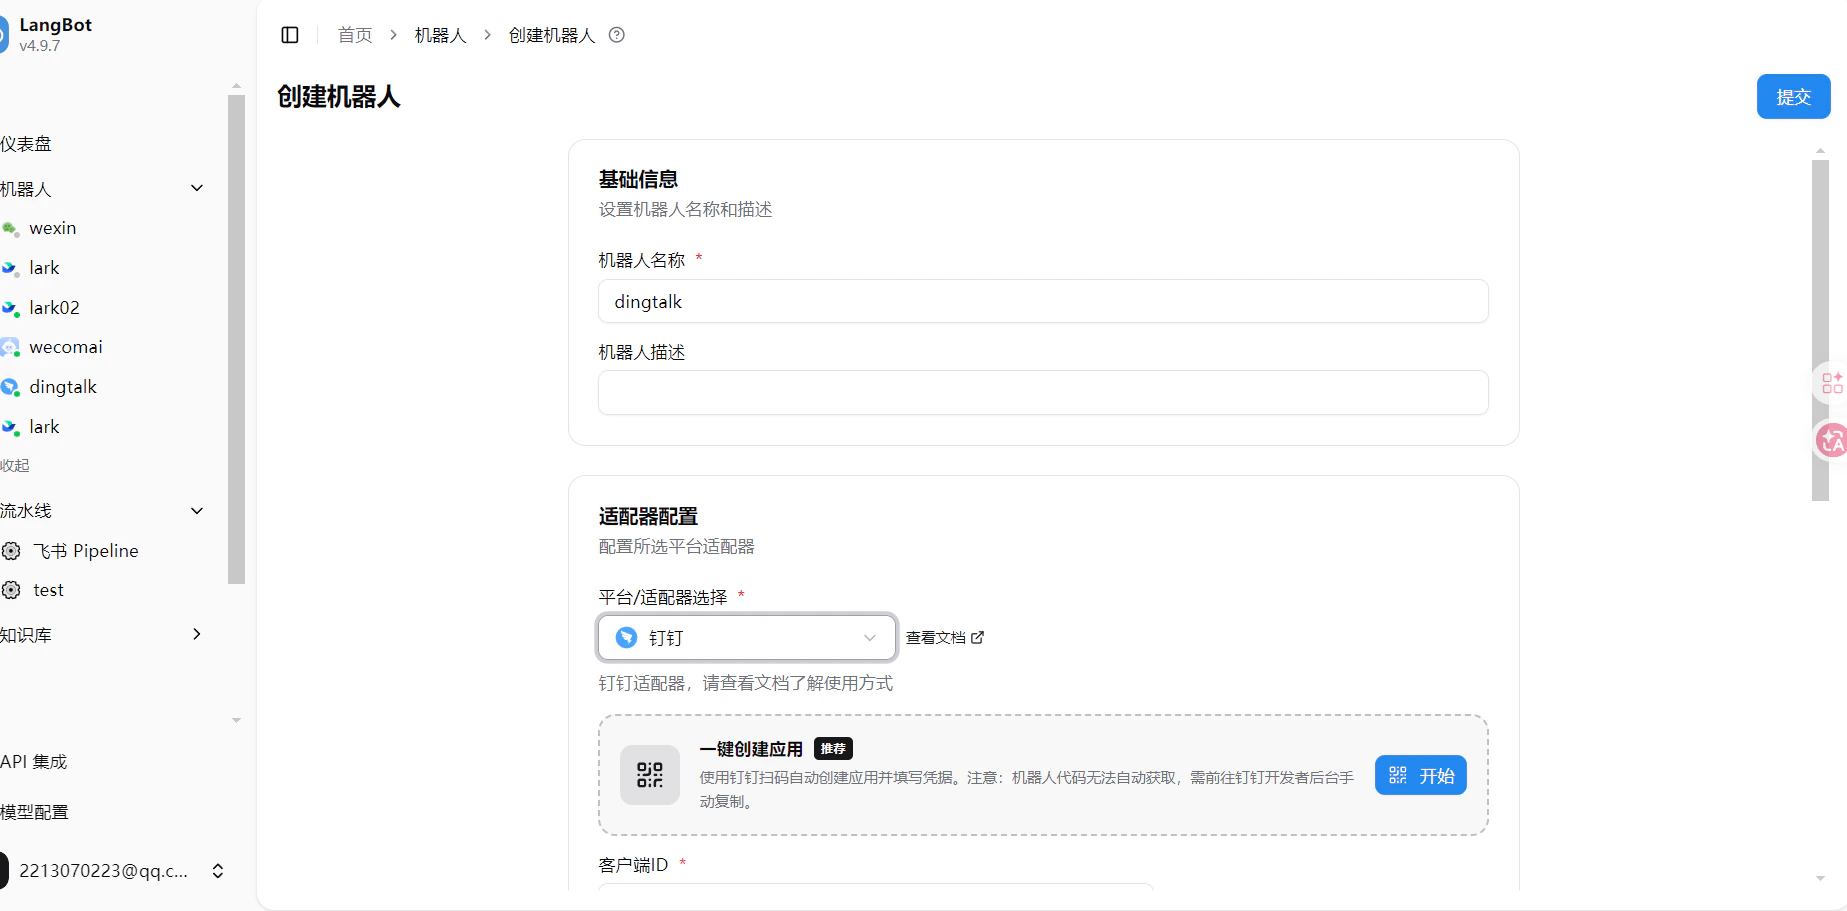 4. Scan the QR code with the DingTalk app. On your phone, select the organization to create the bot in
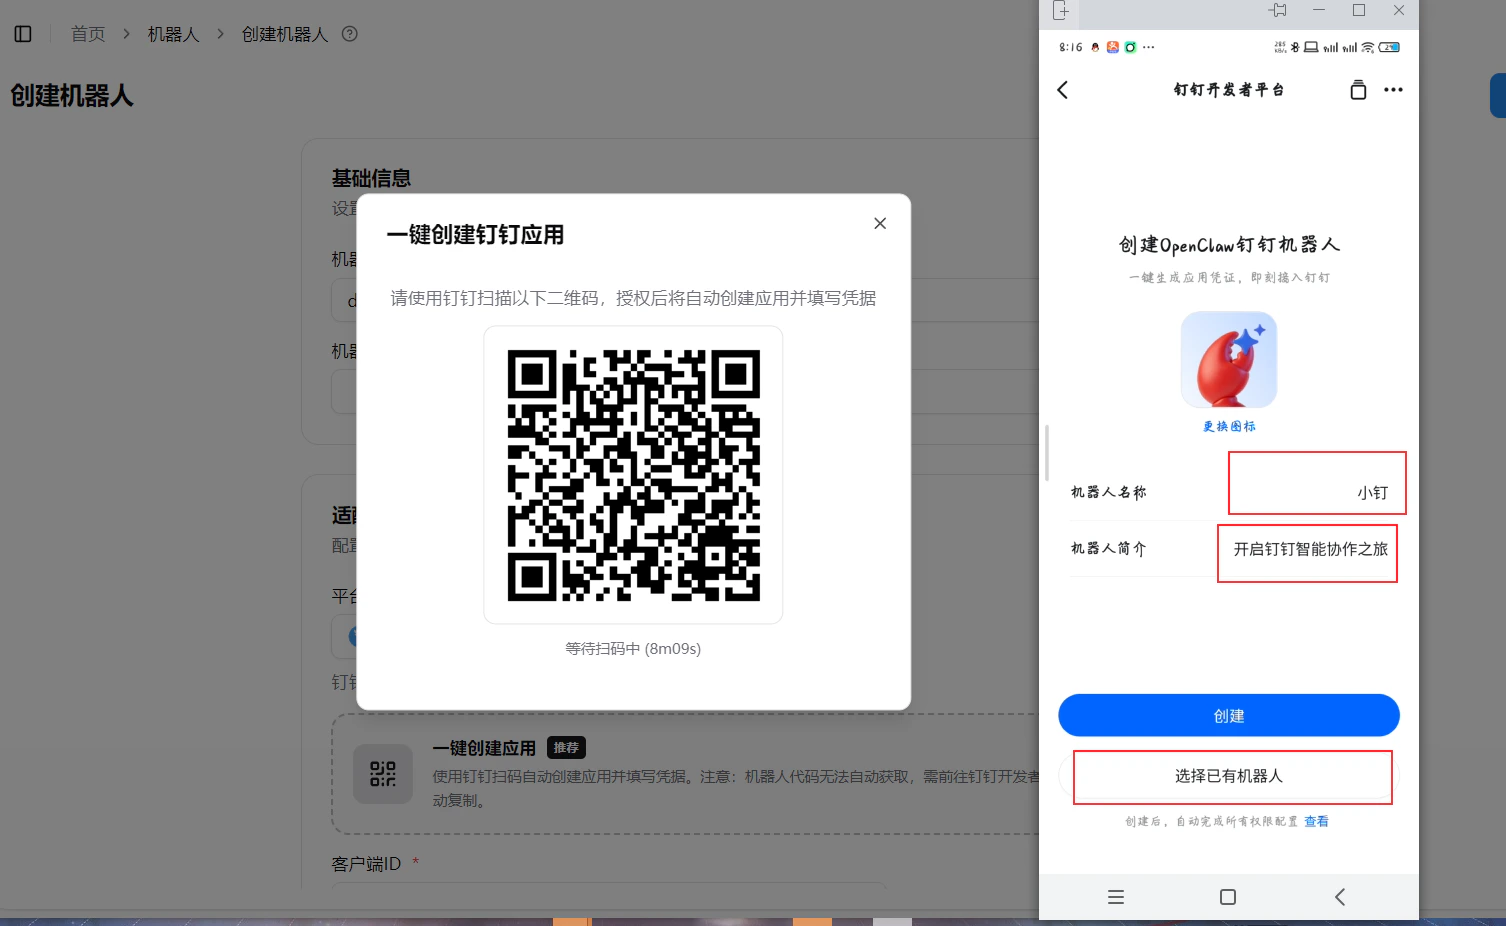
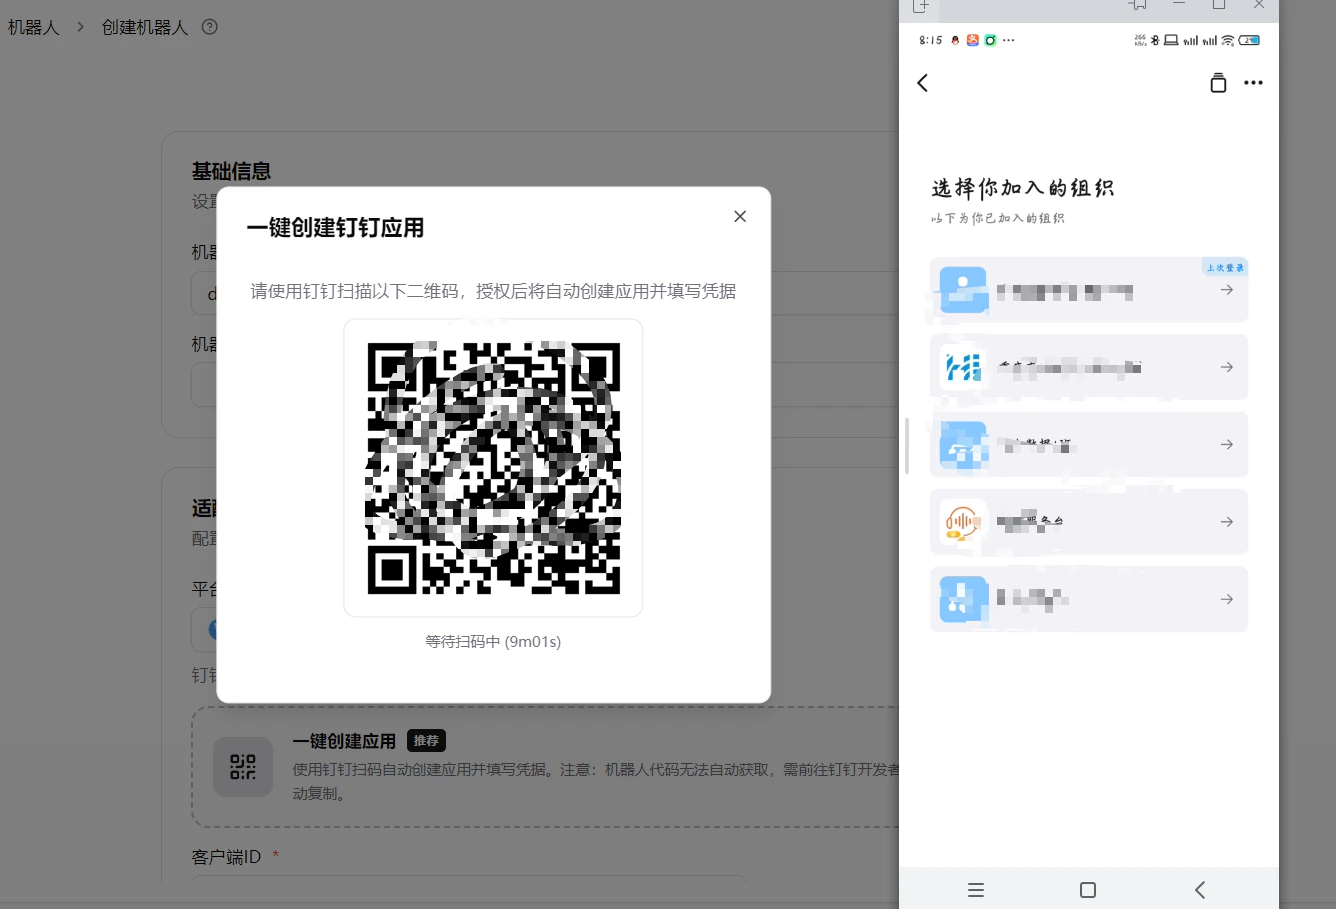 5. Choose to **create a new bot** or **select an existing one**
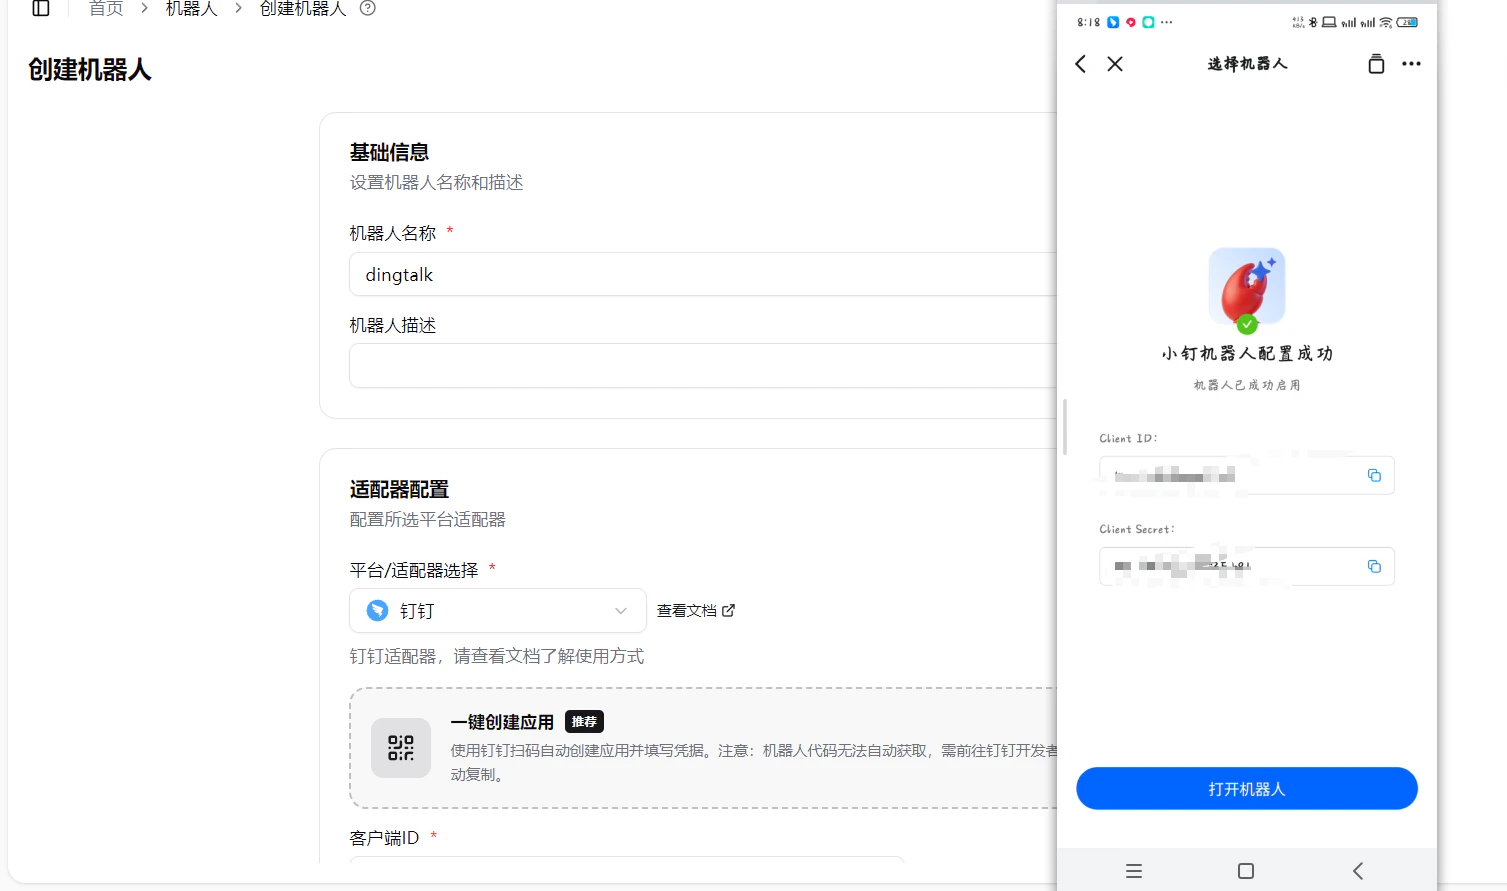
 6. After authorization, the phone will show "Configuration Successful", and Client ID / Client Secret will be **auto-filled** in the LangBot WebUI
 7. **Manually fill in the bot name** (must match the DingTalk bot name), and the **Robot Code** (required for image/file features — get it from DingTalk Developer Console > Bot Configuration)
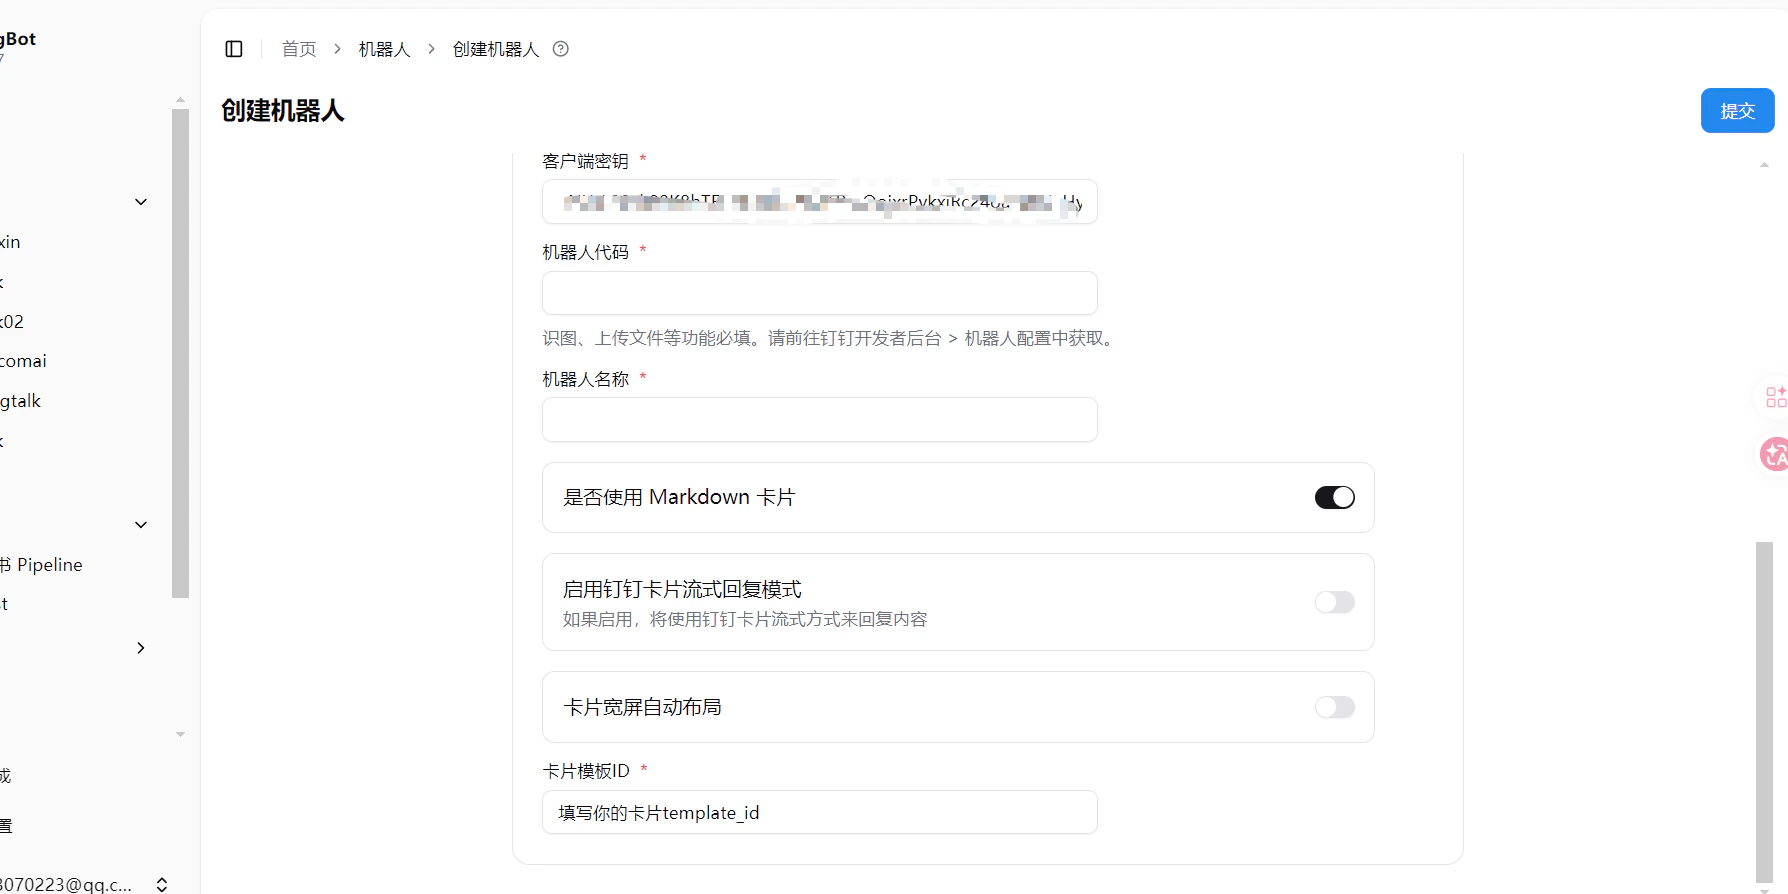 8. Click **Submit** to complete
After one-click setup, normal text chat works immediately. However:
* **Image/File support**: Requires the Robot Code (RobotCode) to be filled in. If not filled during one-click setup, get it from DingTalk Developer Console > Bot Configuration
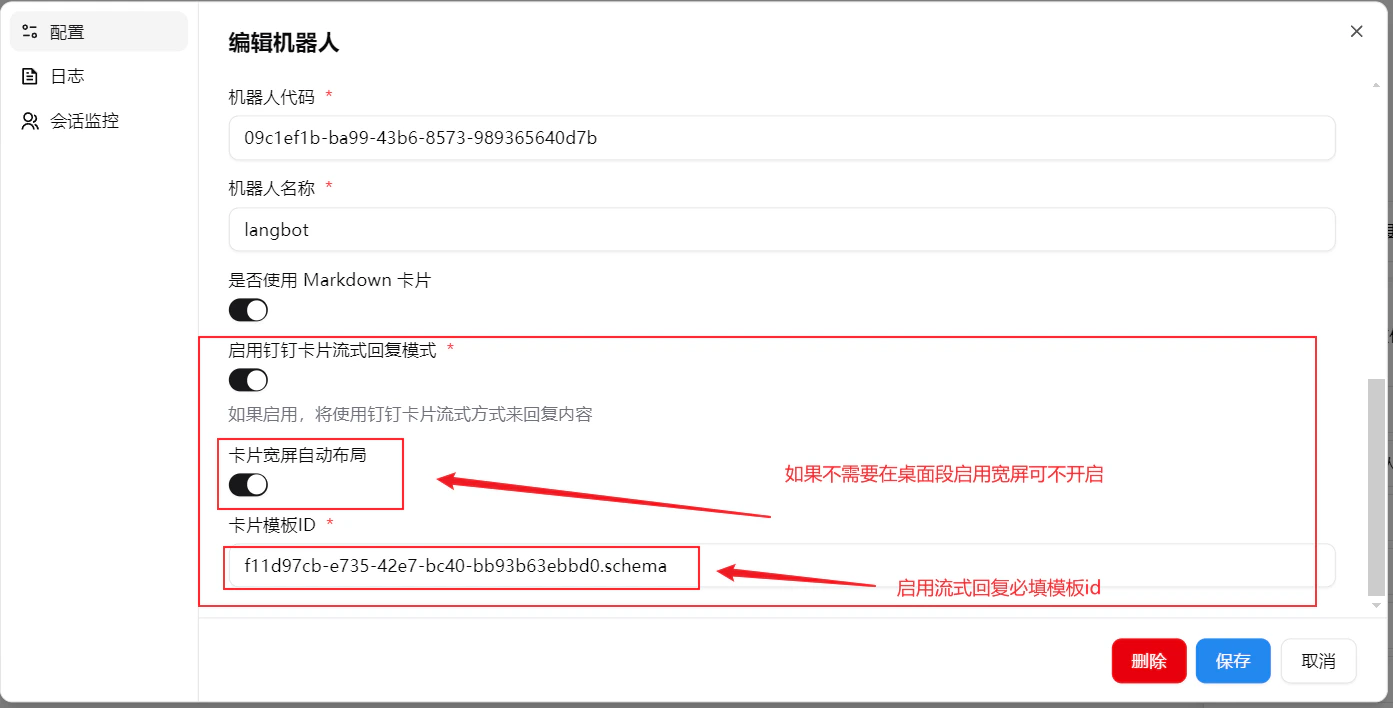
* **Streaming replies**: Requires manually configuring a card template ID — see the Card Template section below
***
## Manual Configuration
### Create Bot
Enter the [DingTalk Developer Backend](https://open-dev.dingtalk.com/?spm=ding_open_doc.document.0.0.74f445e5MkawbT#/), log in and enter the organization. After successful login, enter the open platform, which looks like this:
8. Click **Submit** to complete
After one-click setup, normal text chat works immediately. However:
* **Image/File support**: Requires the Robot Code (RobotCode) to be filled in. If not filled during one-click setup, get it from DingTalk Developer Console > Bot Configuration
* **Streaming replies**: Requires manually configuring a card template ID — see the Card Template section below
***
## Manual Configuration
### Create Bot
Enter the [DingTalk Developer Backend](https://open-dev.dingtalk.com/?spm=ding_open_doc.document.0.0.74f445e5MkawbT#/), log in and enter the organization. After successful login, enter the open platform, which looks like this:
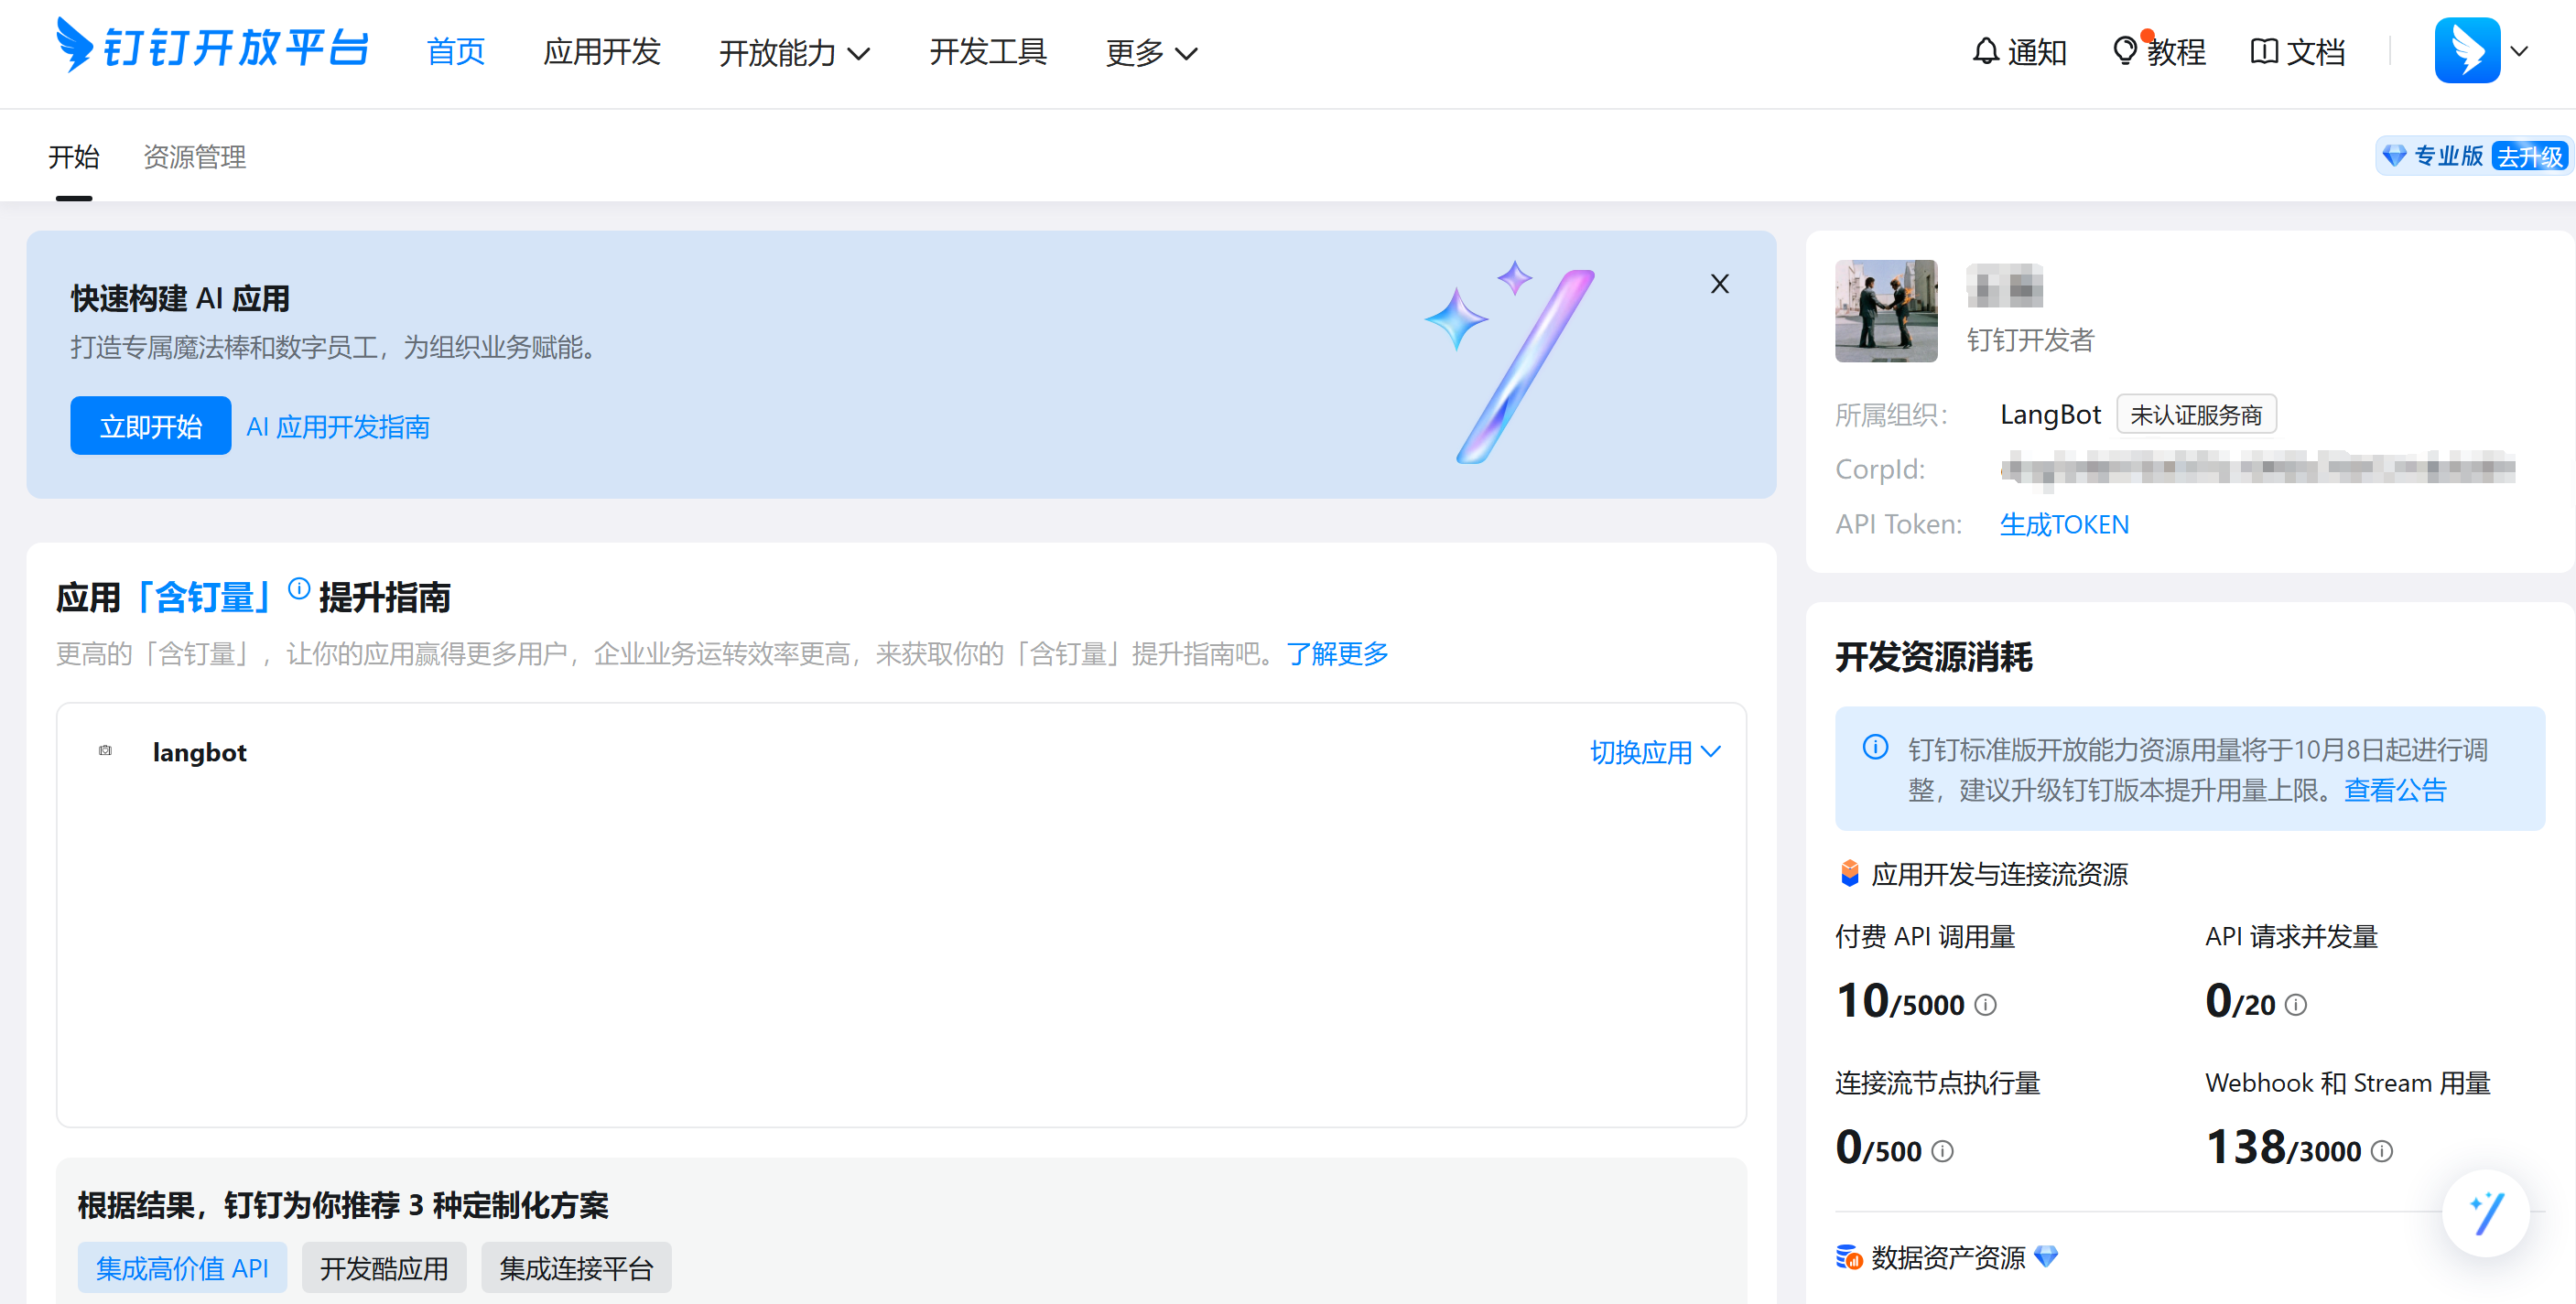 Click `Application Development` at the top, then click the blue button `Create Application` on the right, fill in the basic information of the bot, and click save.
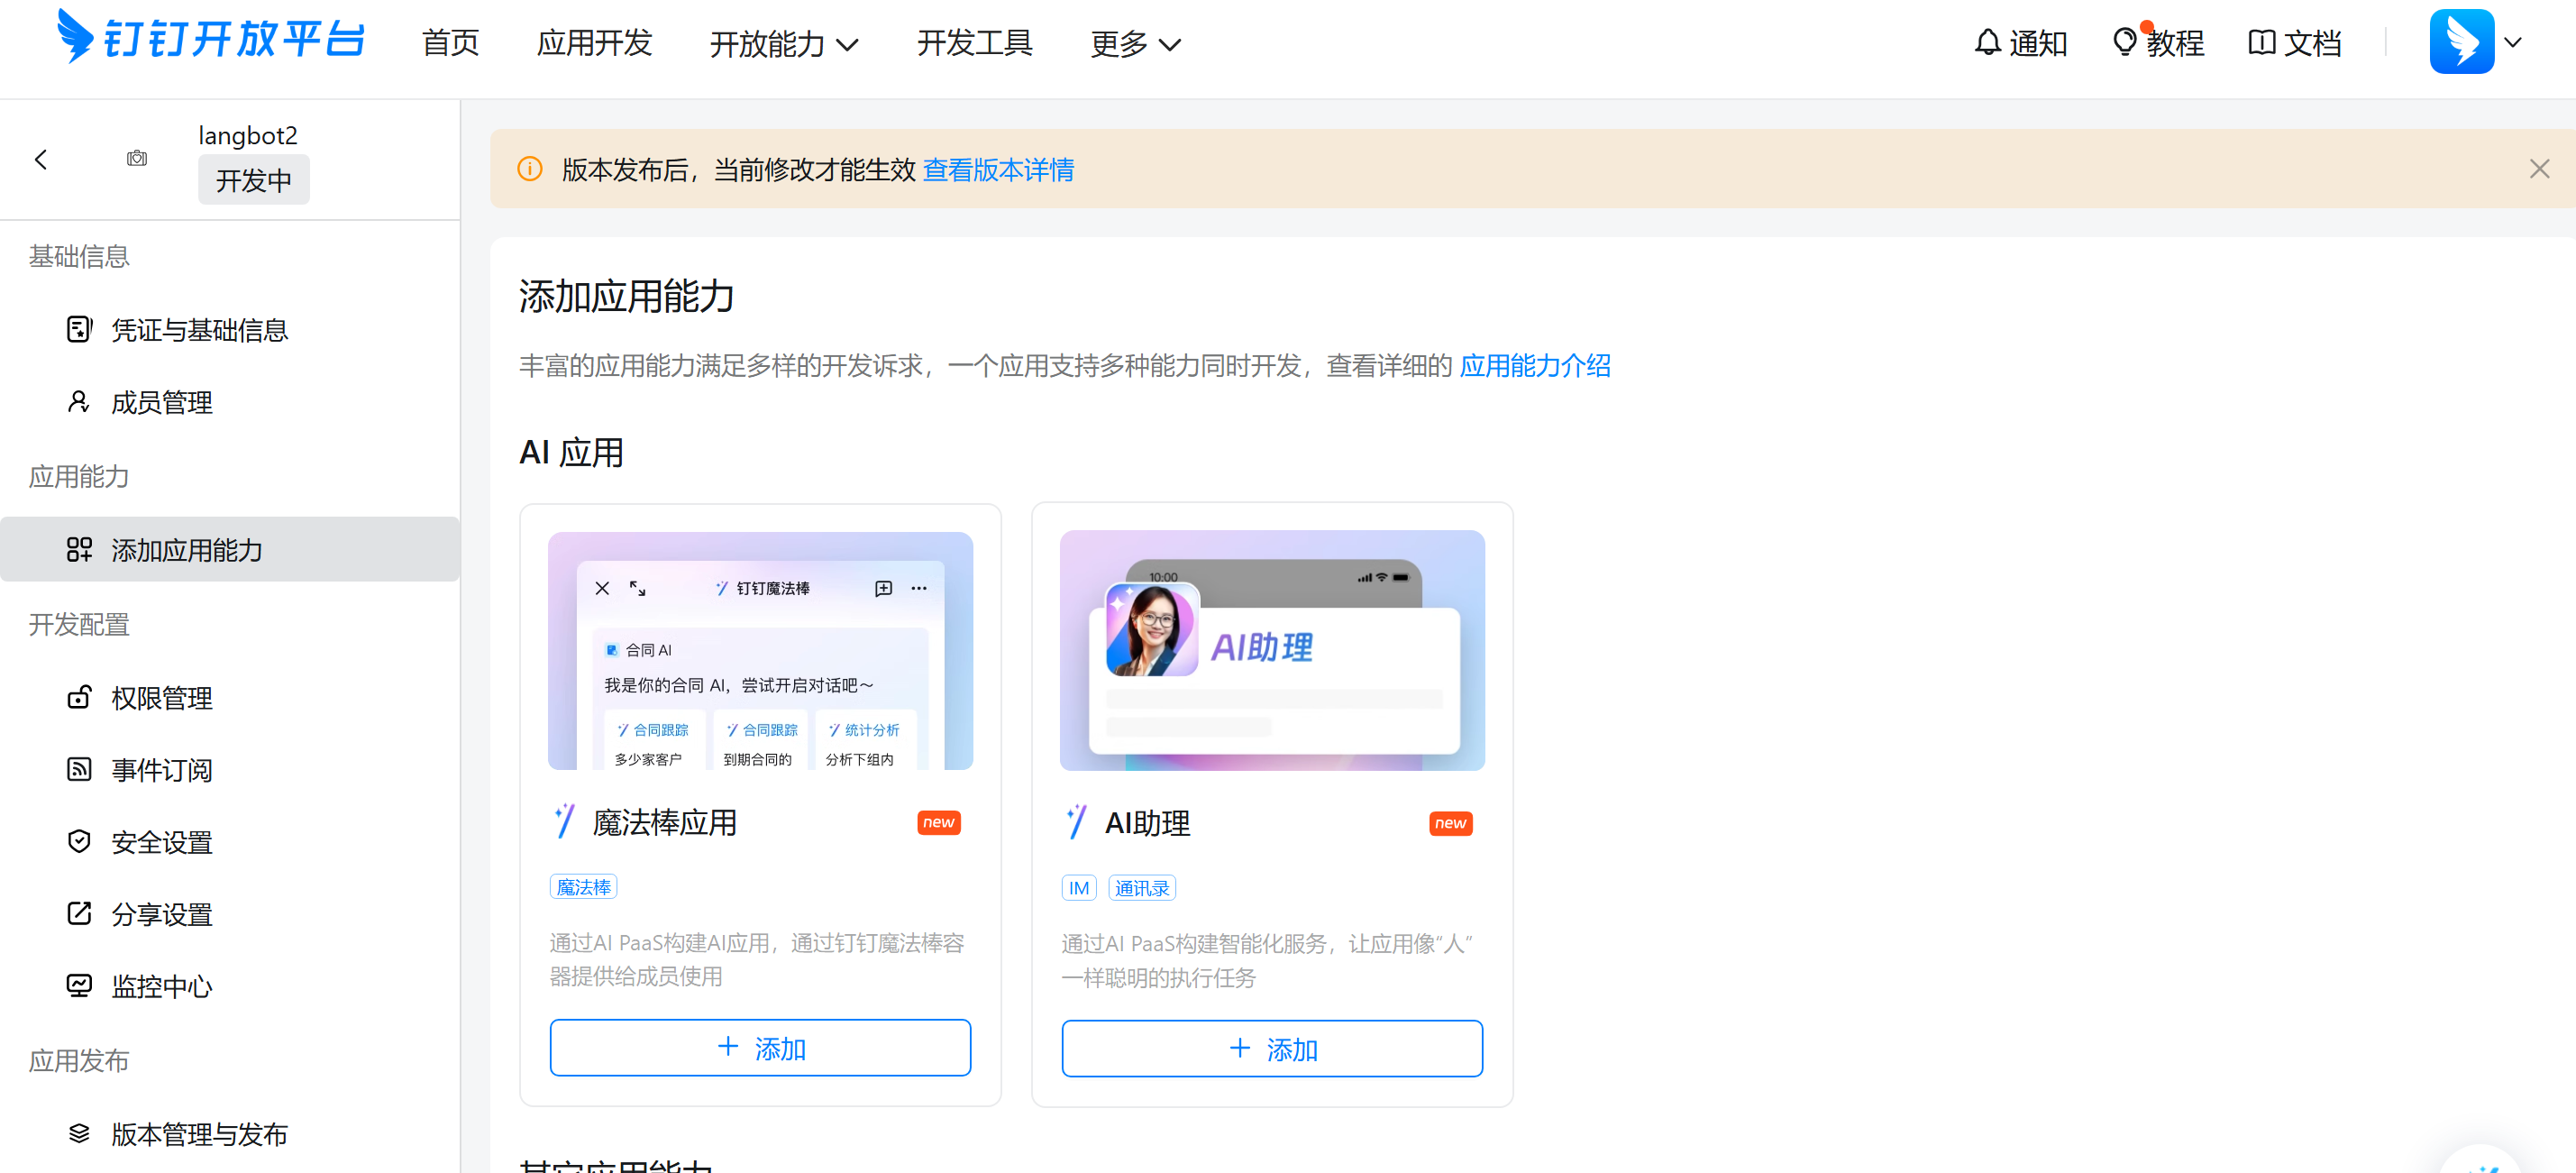
Enter the bot's backend, for example, if we have a bot named langbot2, its management page looks like this:
Click `Application Development` at the top, then click the blue button `Create Application` on the right, fill in the basic information of the bot, and click save.
Enter the bot's backend, for example, if we have a bot named langbot2, its management page looks like this:
 ### Configure Bot
Click `Add Application Capability`, `Other Application Capabilities`, `Configure` in `Robot`, click configure and fill in the information, as shown below:
### Configure Bot
Click `Add Application Capability`, `Other Application Capabilities`, `Configure` in `Robot`, click configure and fill in the information, as shown below:
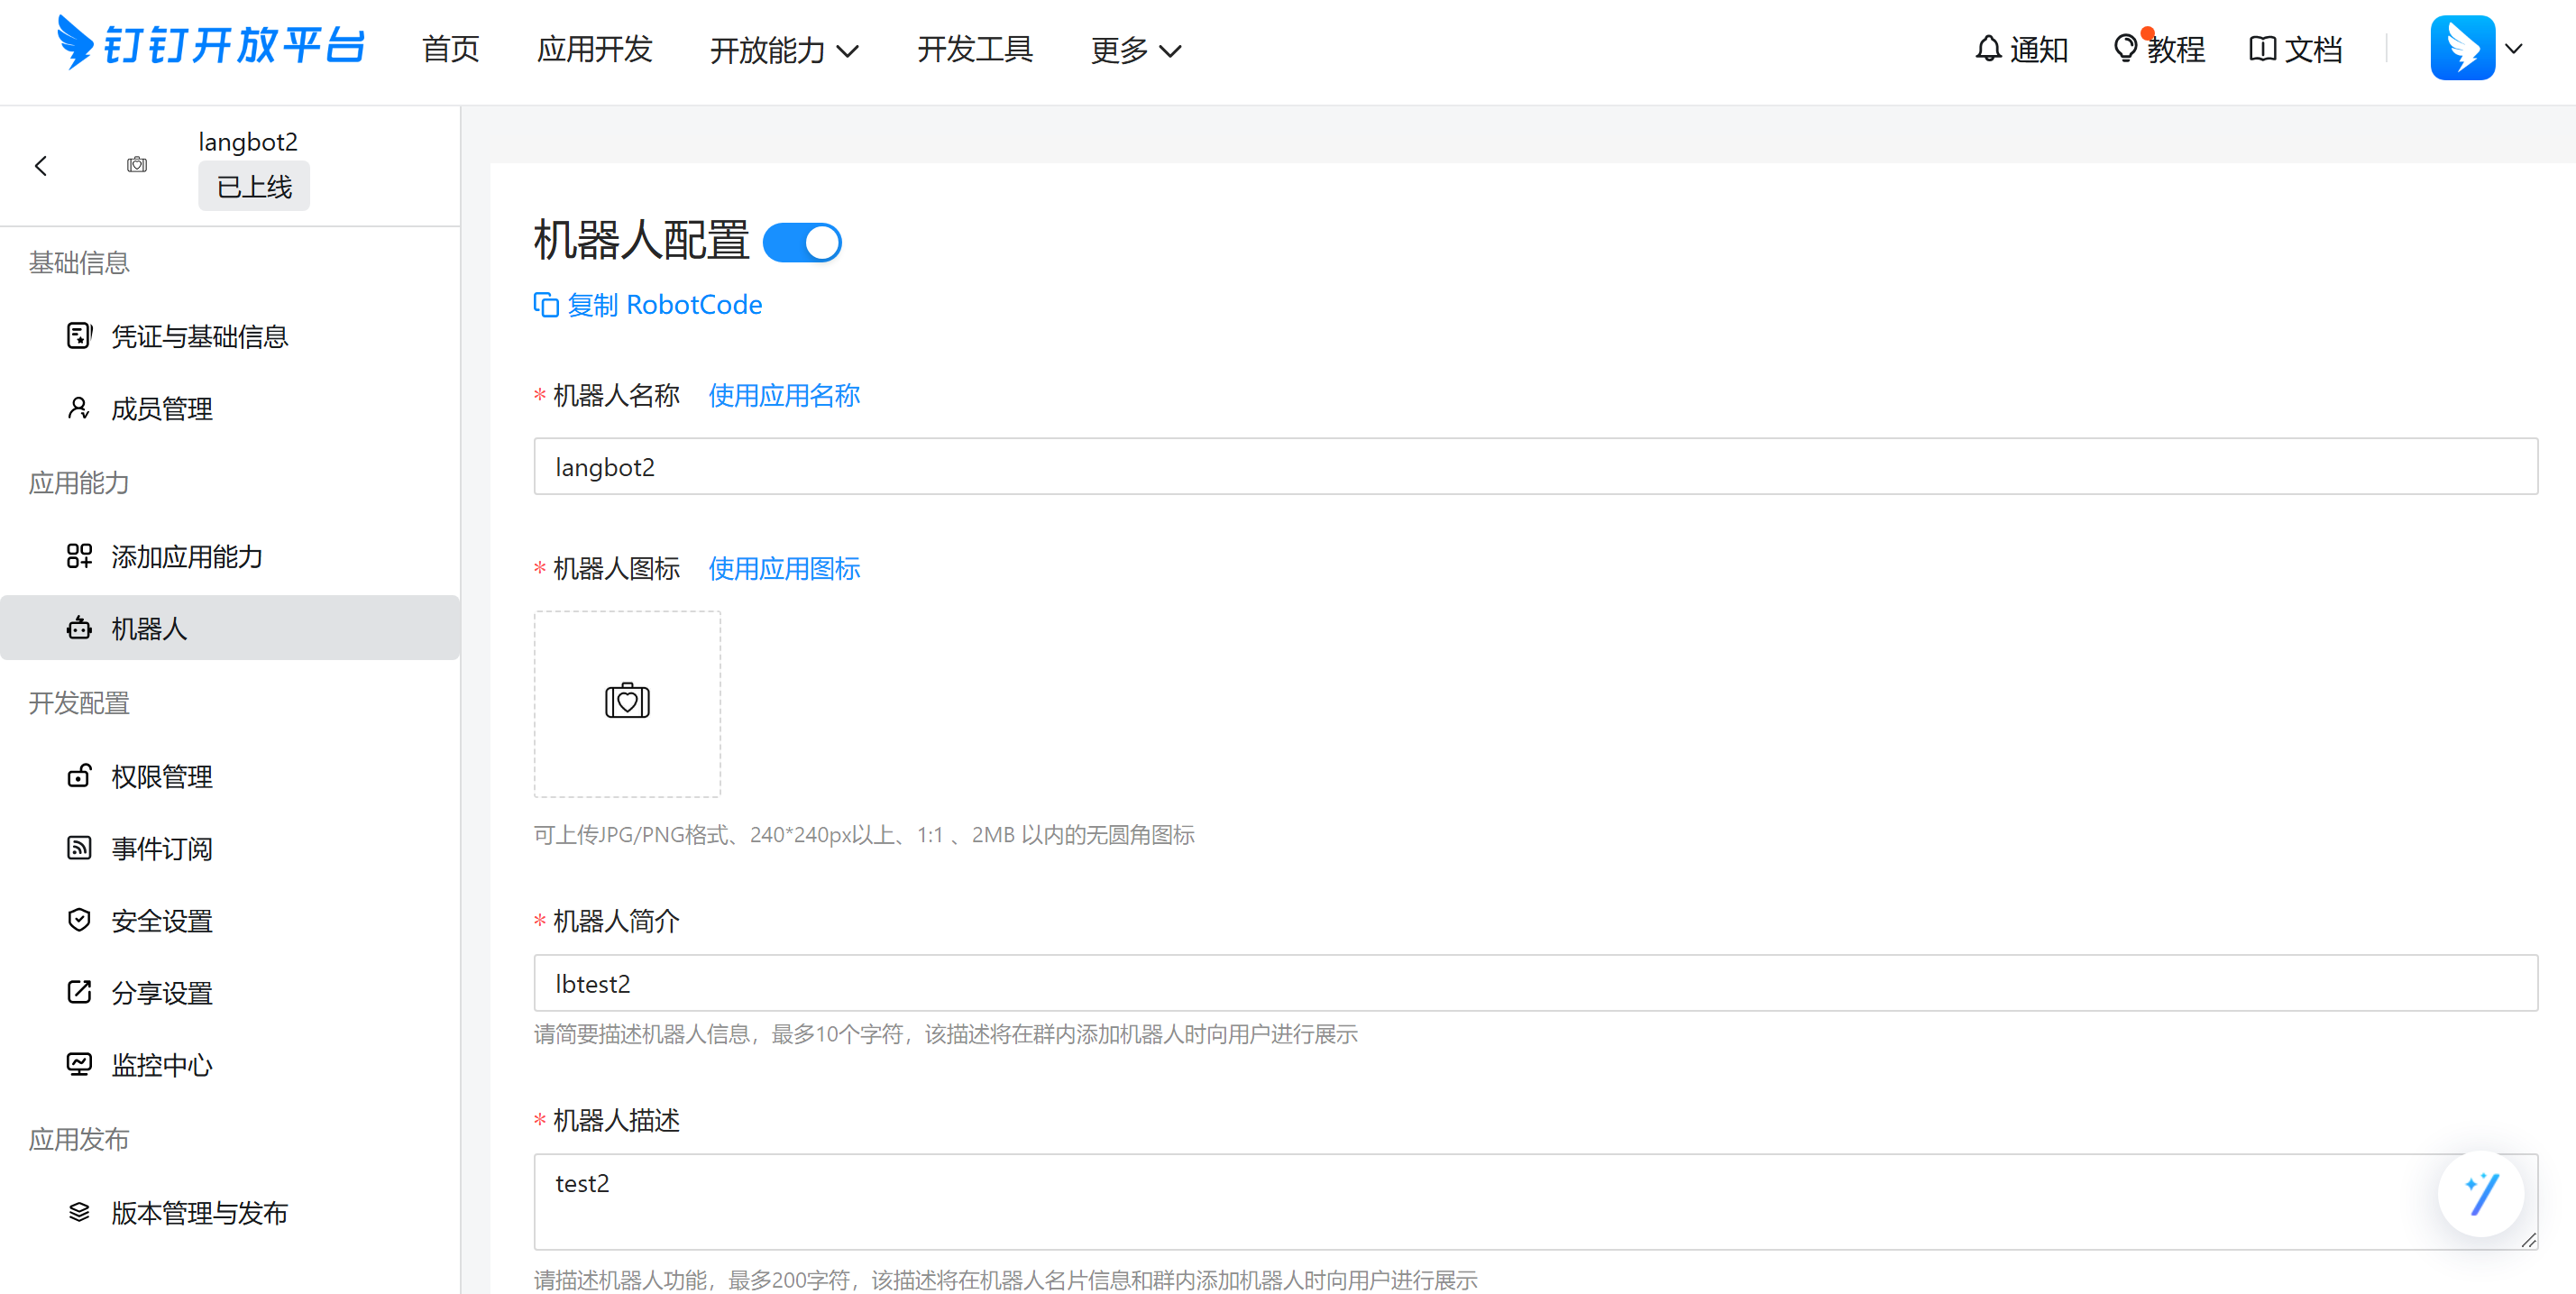 Click `Publish` at the bottom of the page, after successful publication, click `Version Management and Publishing` at the bottom left of the bot page, as shown:
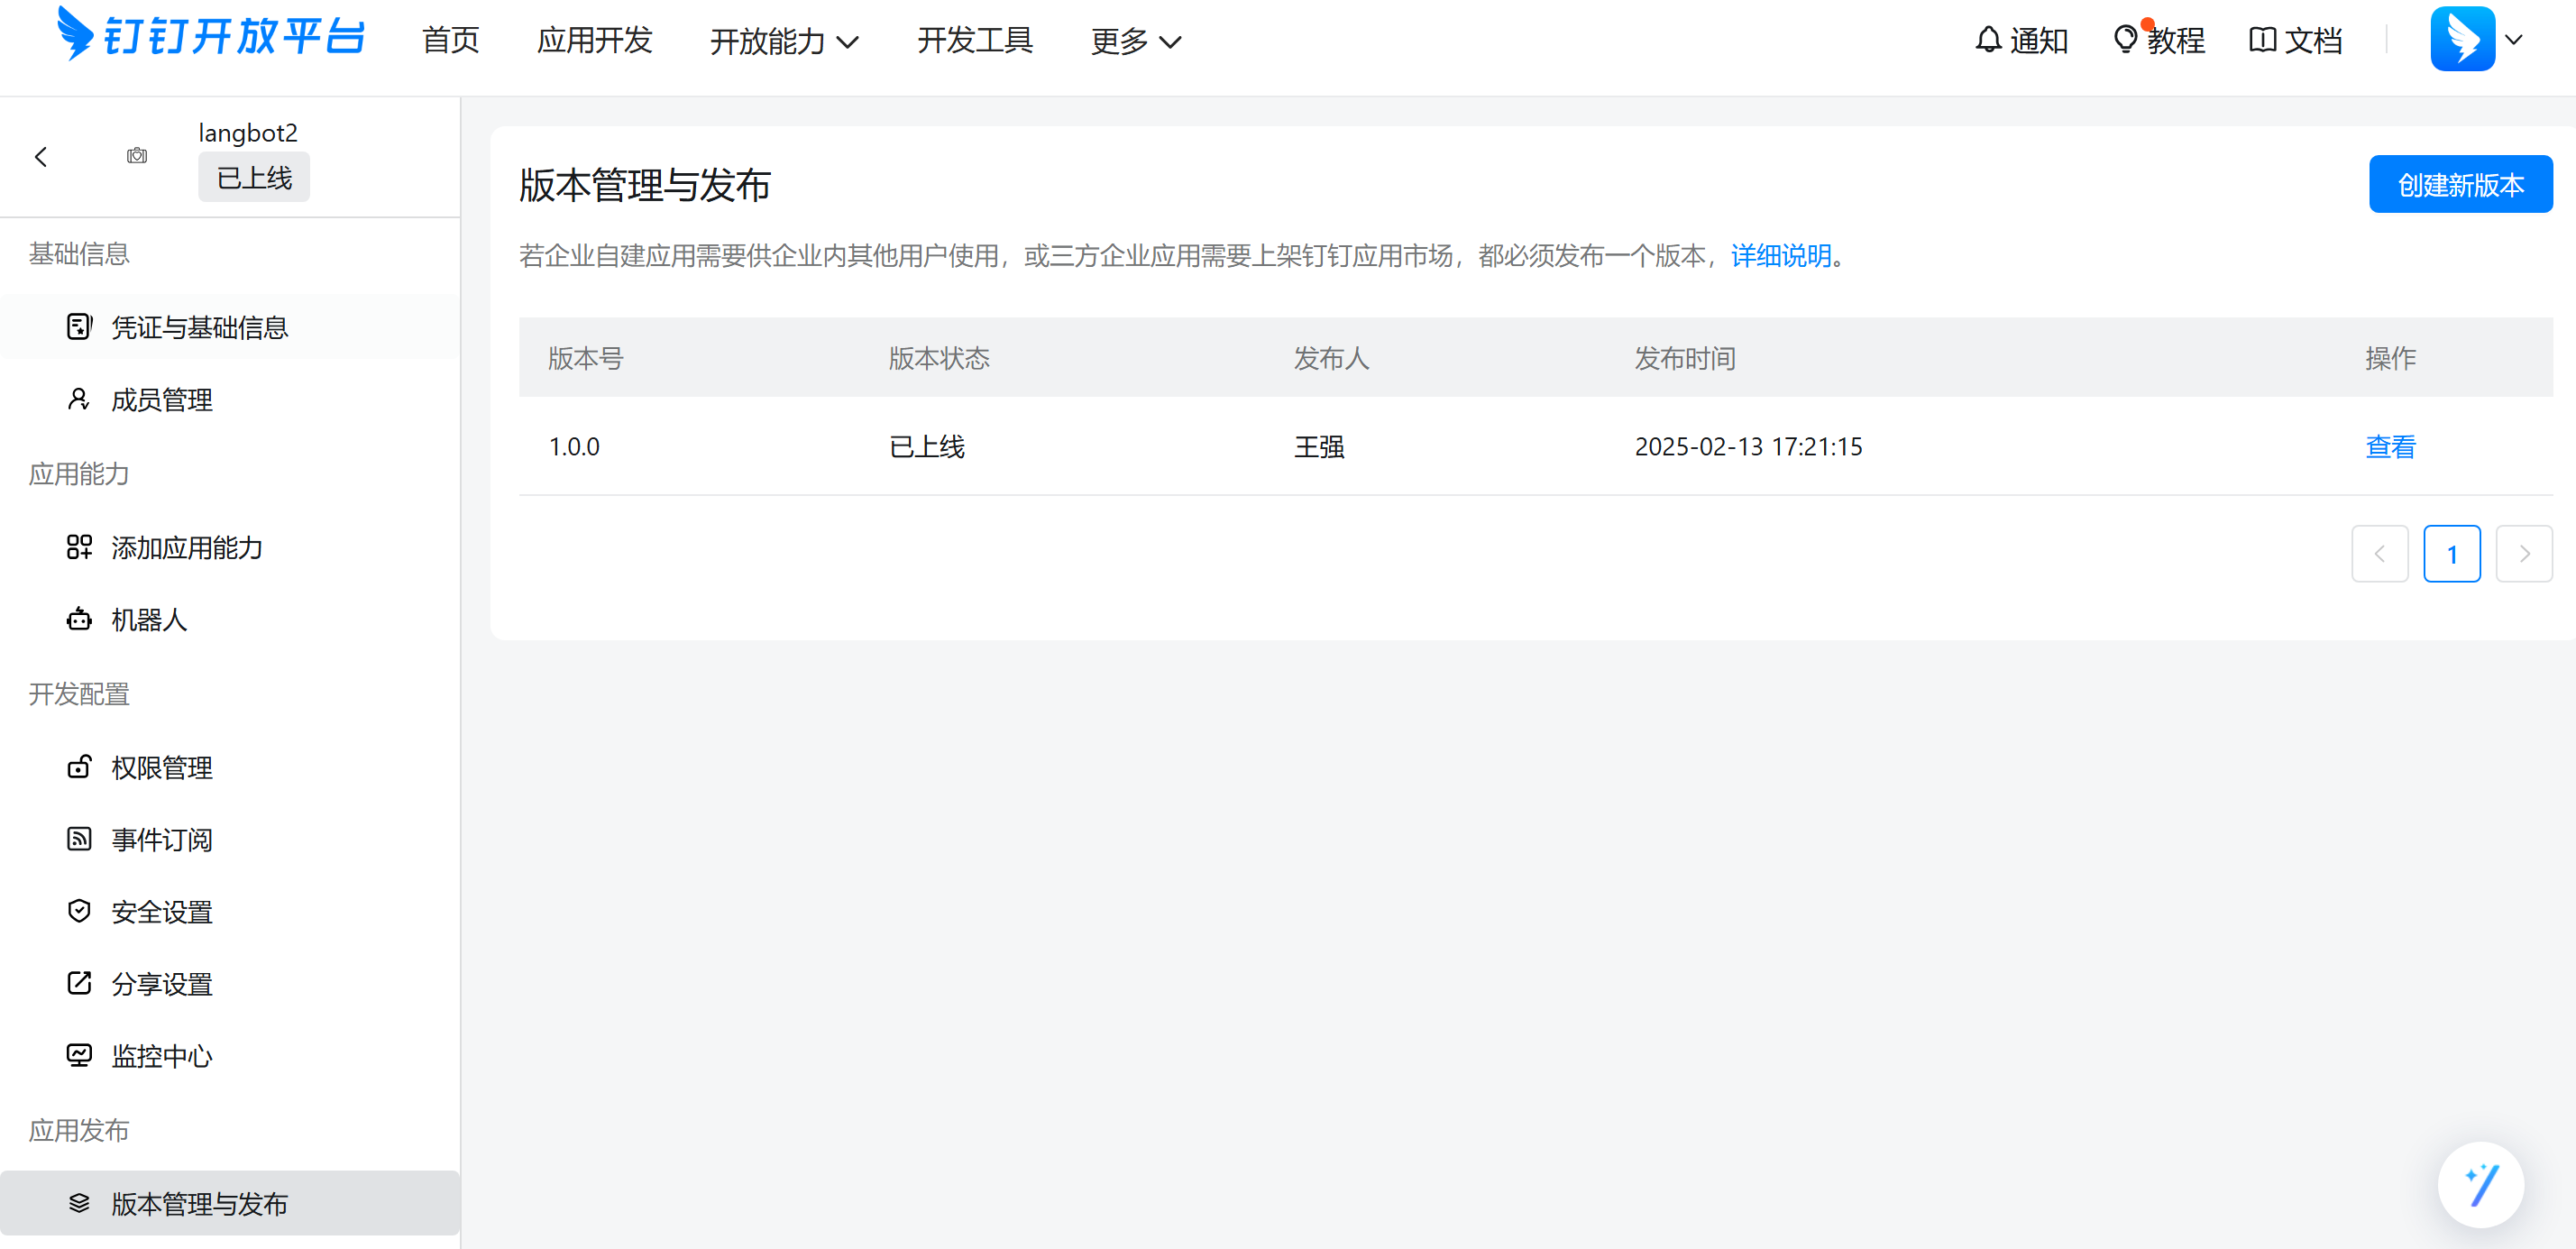 If this is the first time creating a bot, the right side is empty, you need to click `Create New Version`, set information in it, then set `Application Visibility Range`, and click save.
Click `Event Subscription`, change the push method to `Stream Mode Push`.
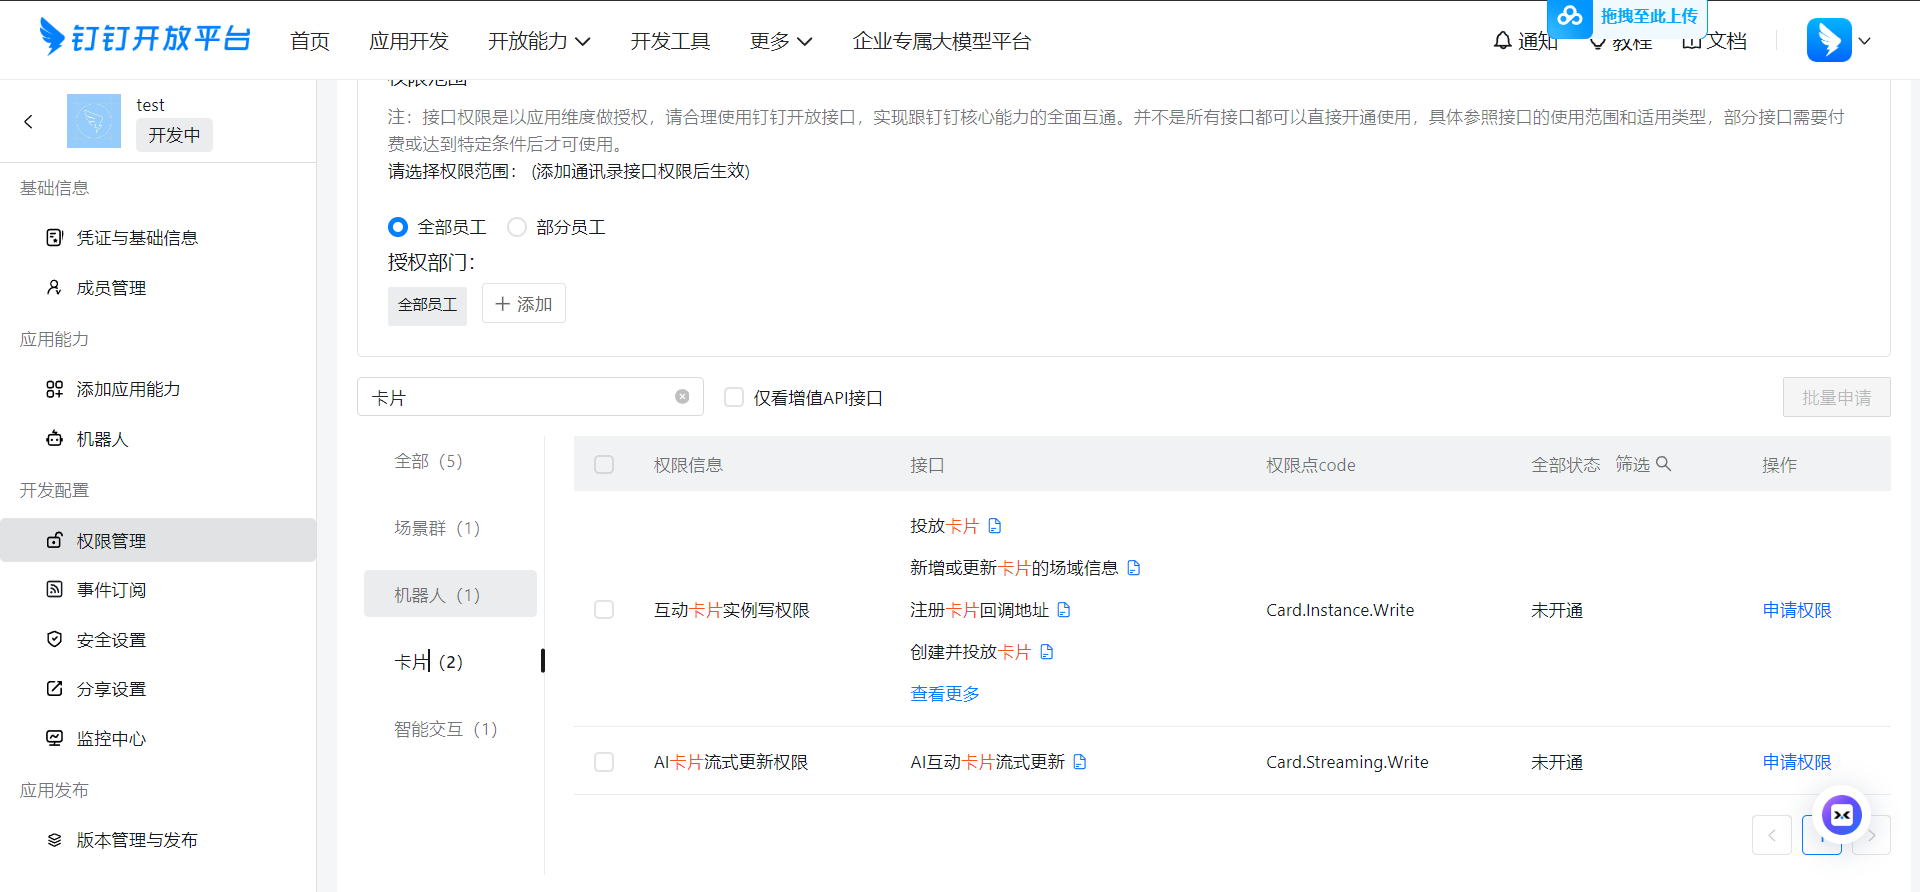
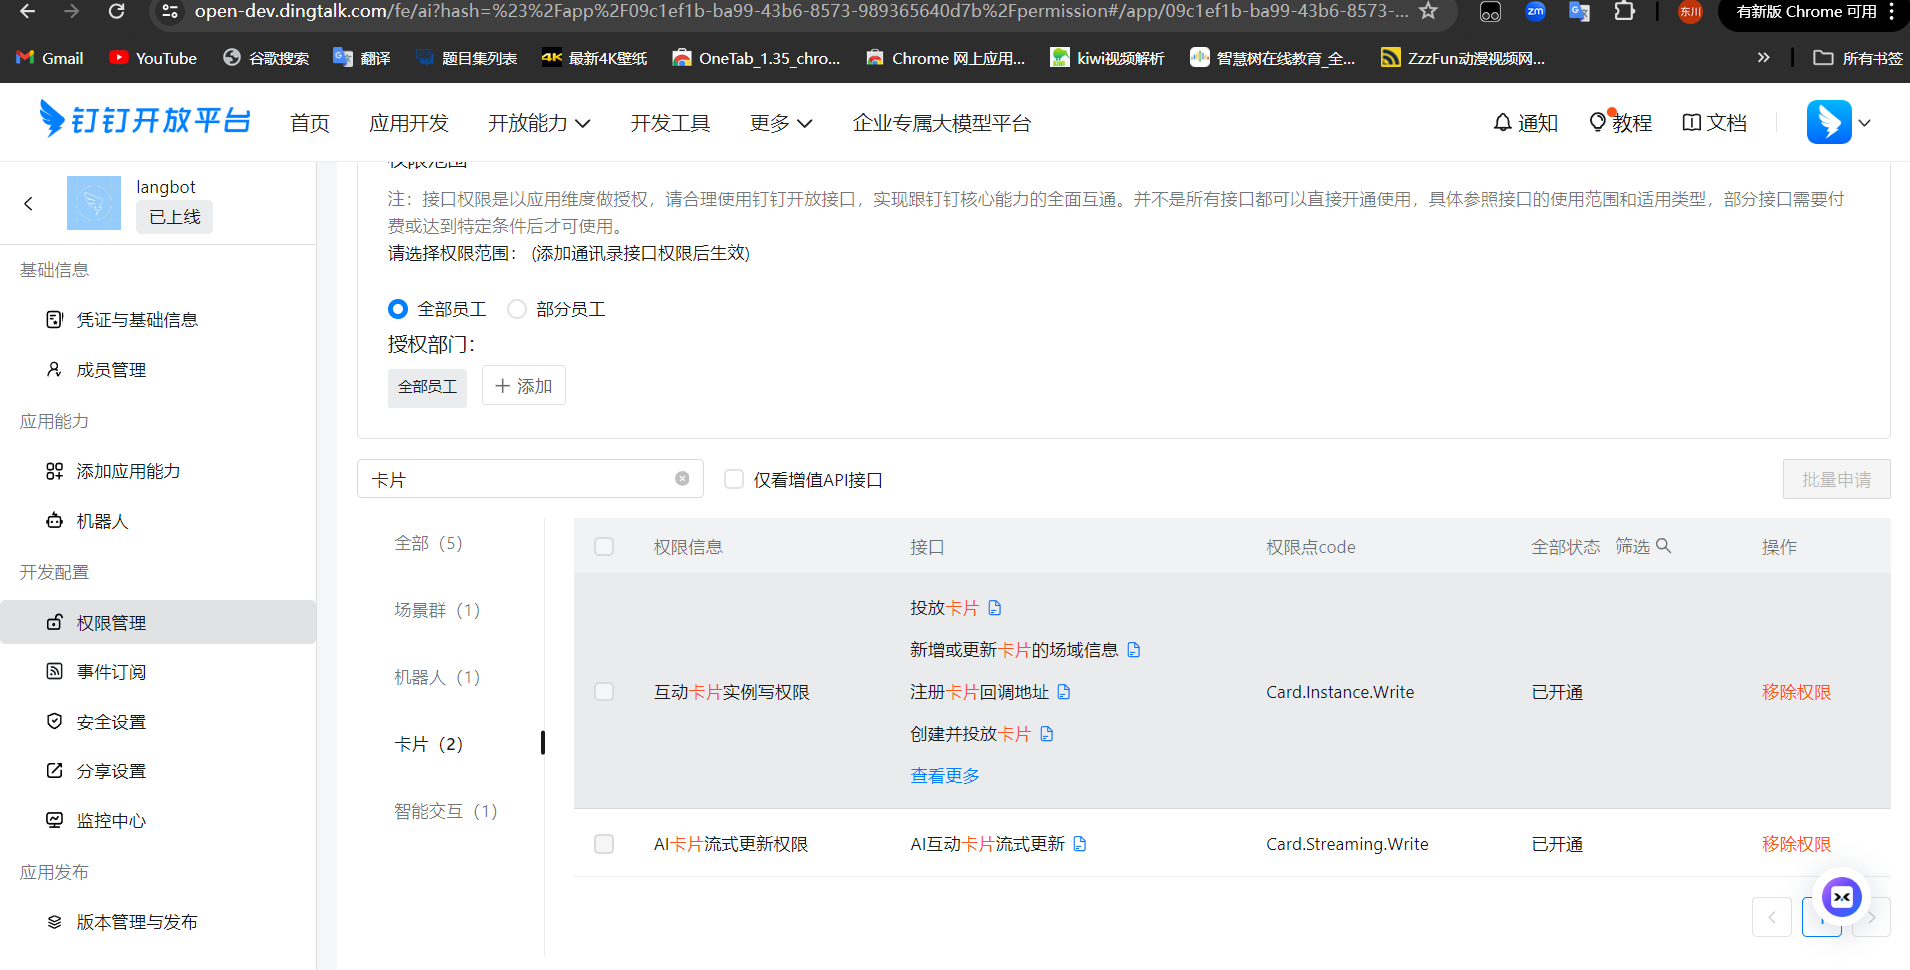
If card streaming is needed, you must apply for card permissions in the permission management, as shown:
If this is the first time creating a bot, the right side is empty, you need to click `Create New Version`, set information in it, then set `Application Visibility Range`, and click save.
Click `Event Subscription`, change the push method to `Stream Mode Push`.
If card streaming is needed, you must apply for card permissions in the permission management, as shown:
 Additionally, for card messages you mainly need to create a card template and record the template ID to fill in the configuration, the process is as follows:
> The card content template ID can be obtained by logging into the developer backend > [Card Platform](https://open-dev.dingtalk.com/fe/card?spm=ding_open_doc.document.0.0.33cf2281L0fXsV)
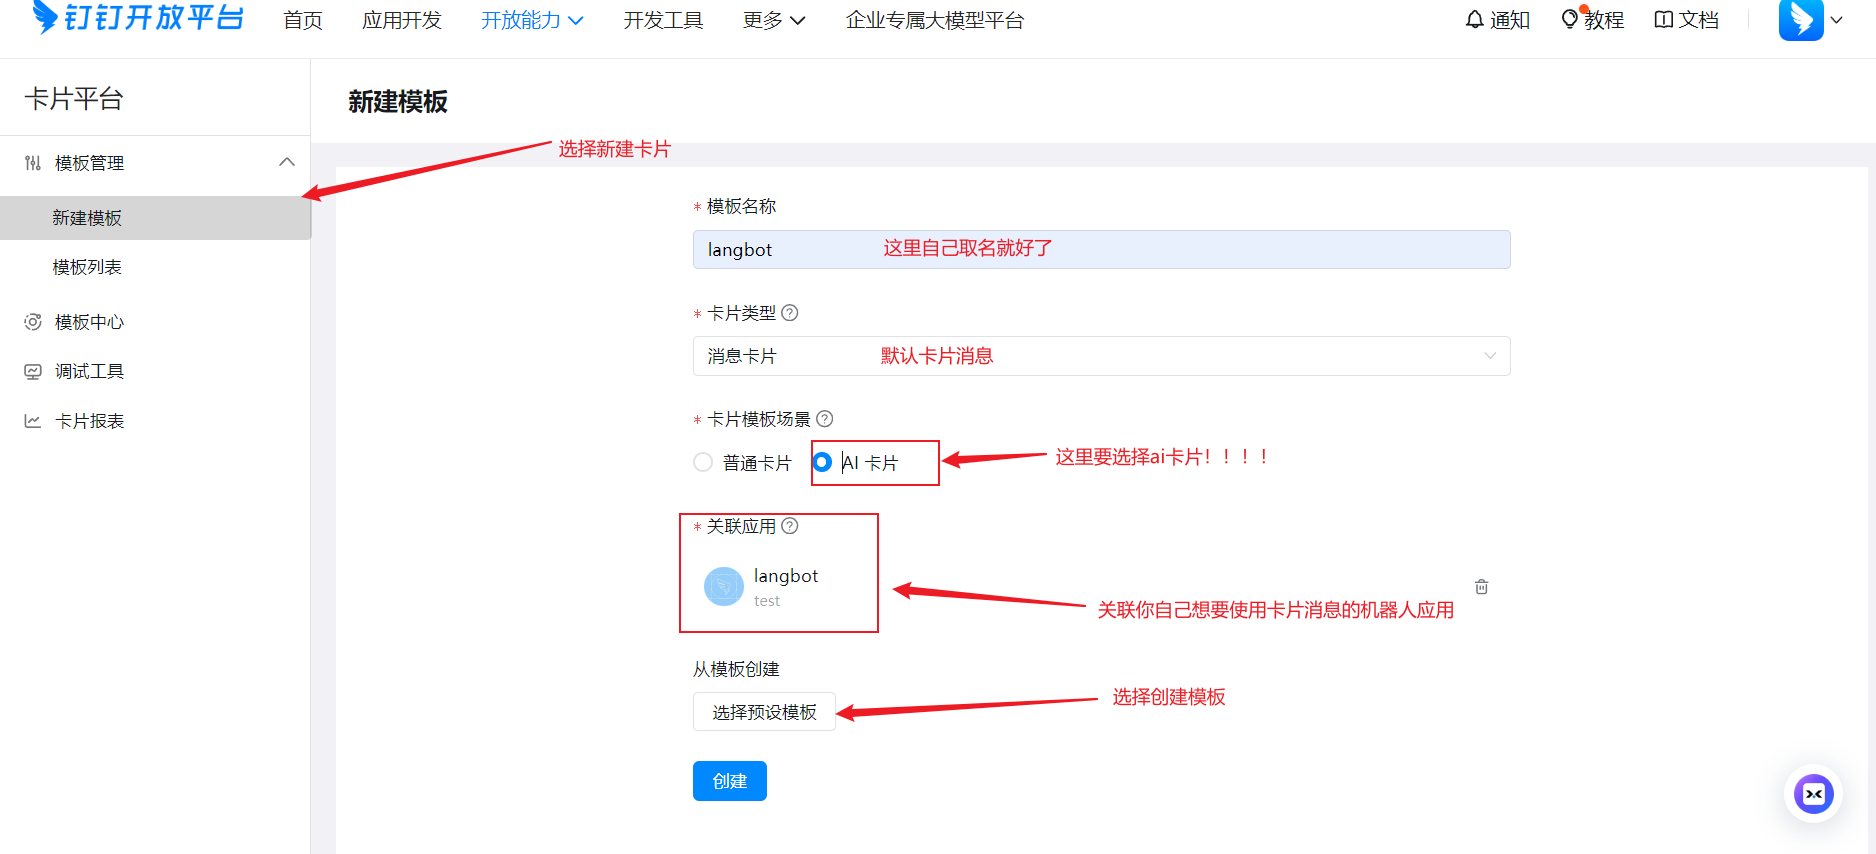
Fill in information when creating a new template, as shown:
Additionally, for card messages you mainly need to create a card template and record the template ID to fill in the configuration, the process is as follows:
> The card content template ID can be obtained by logging into the developer backend > [Card Platform](https://open-dev.dingtalk.com/fe/card?spm=ding_open_doc.document.0.0.33cf2281L0fXsV)
Fill in information when creating a new template, as shown:
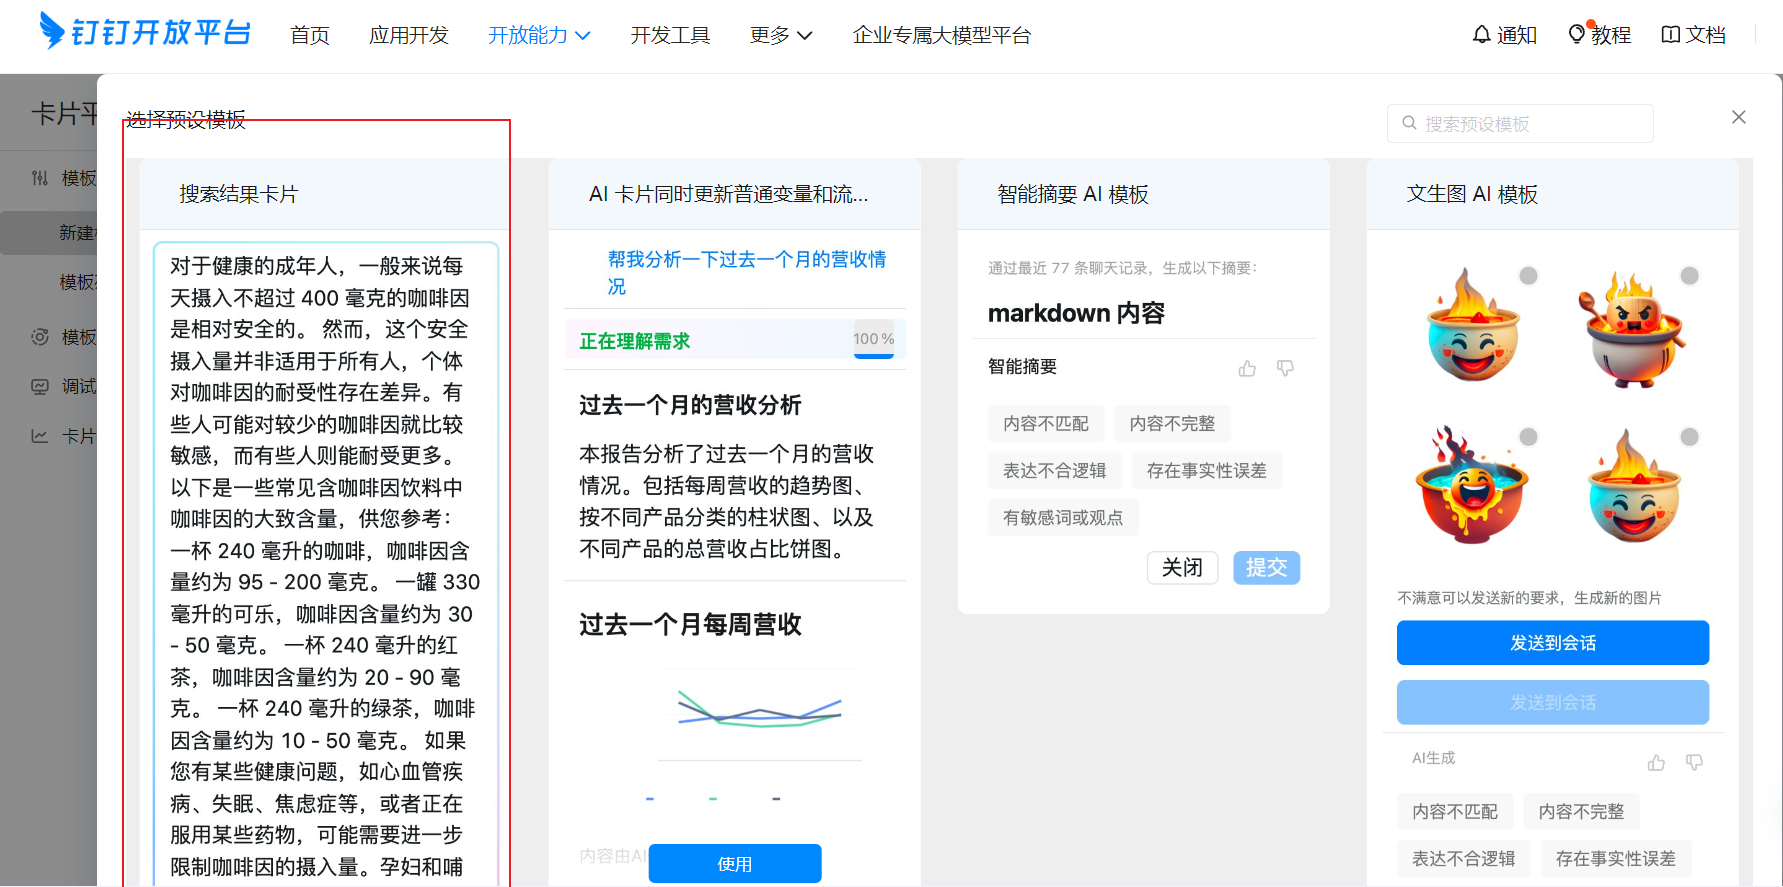
 Select a preset template (just choose the first one and modify the template content later), as shown:
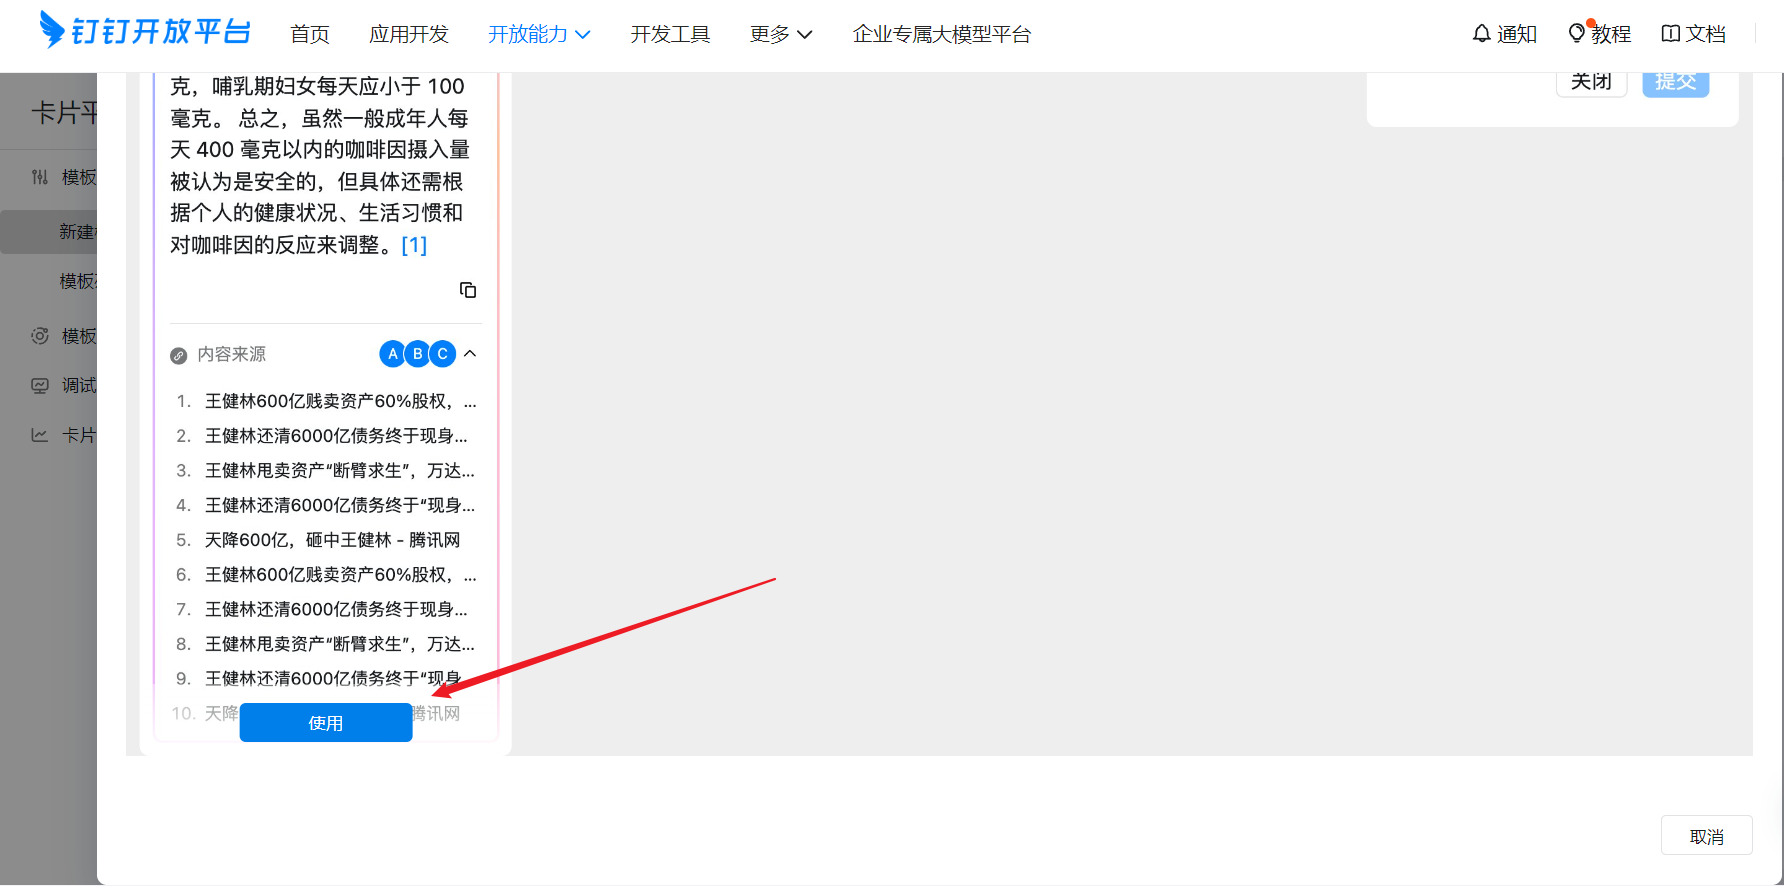
 Click Use
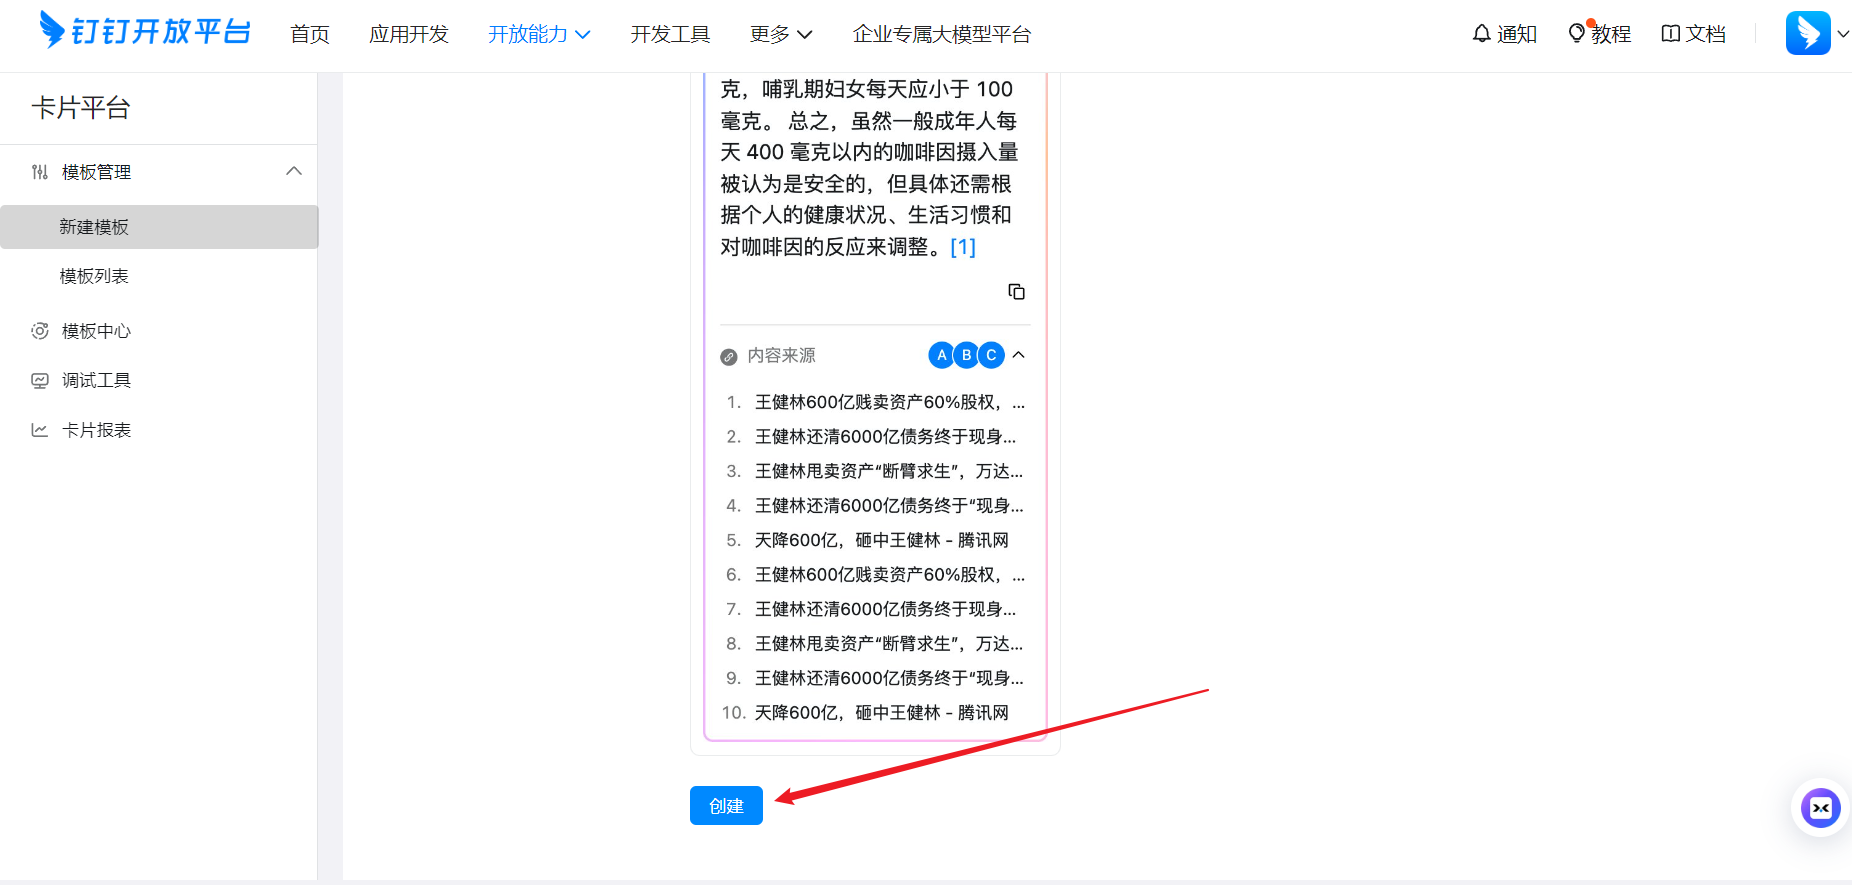
 Create
 After clicking Create you'll be redirected to edit the template. As shown, you can freely edit your desired card message:
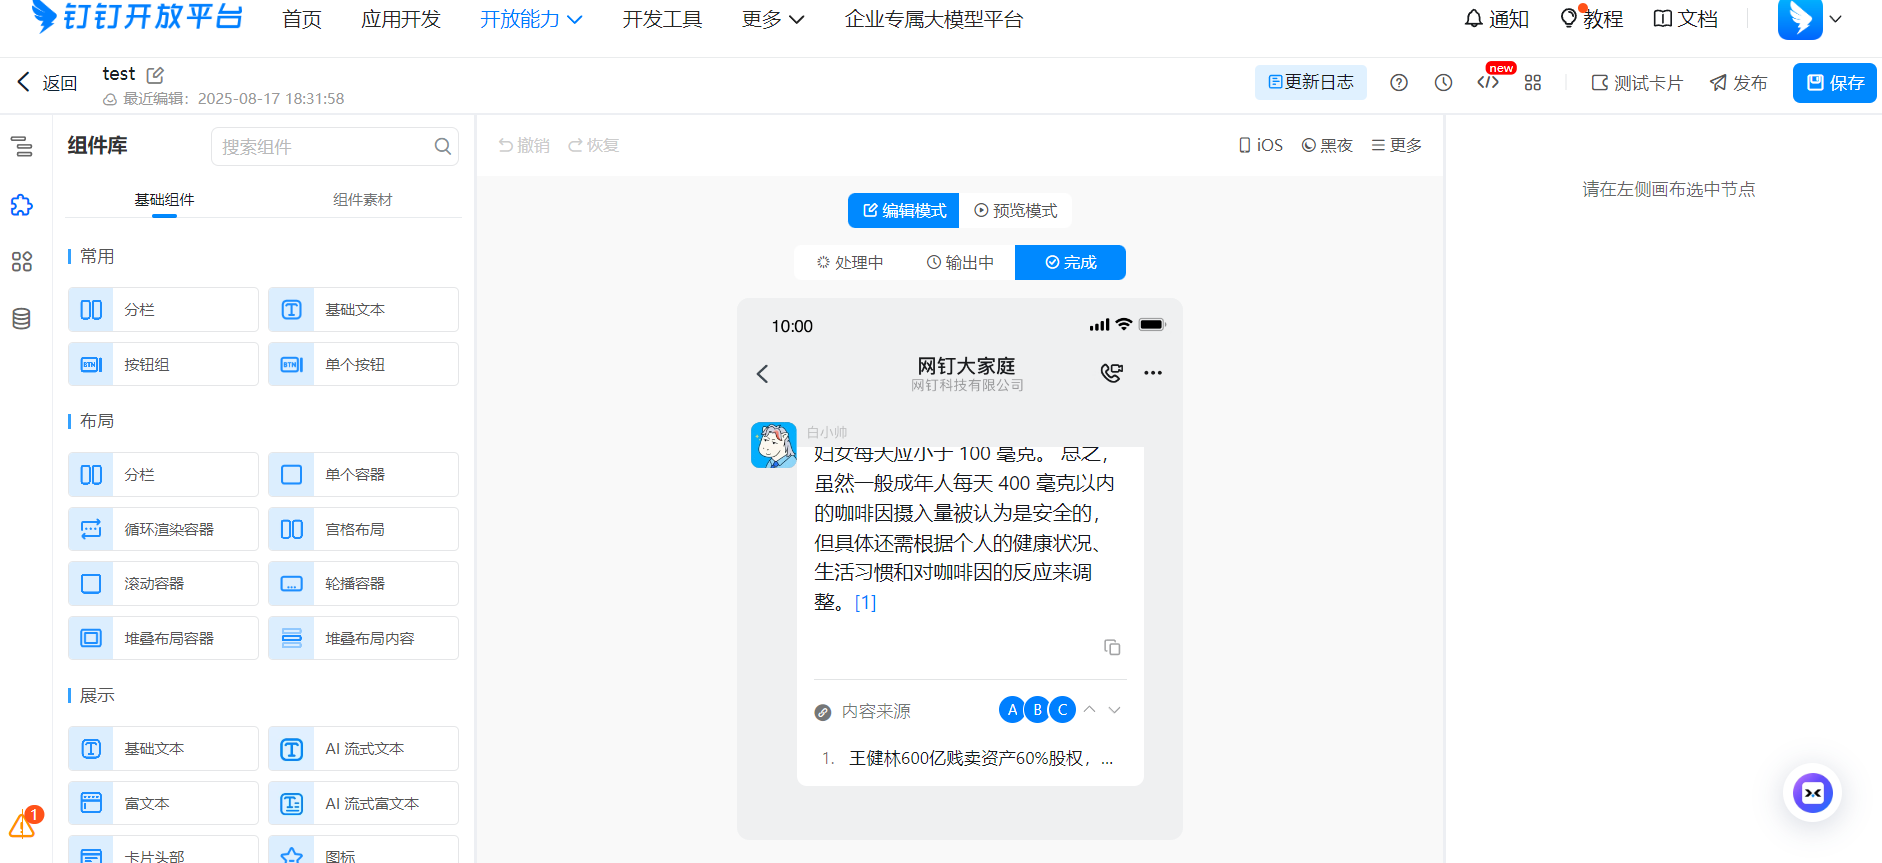 For the main content, keep the default 'content' unchanged:
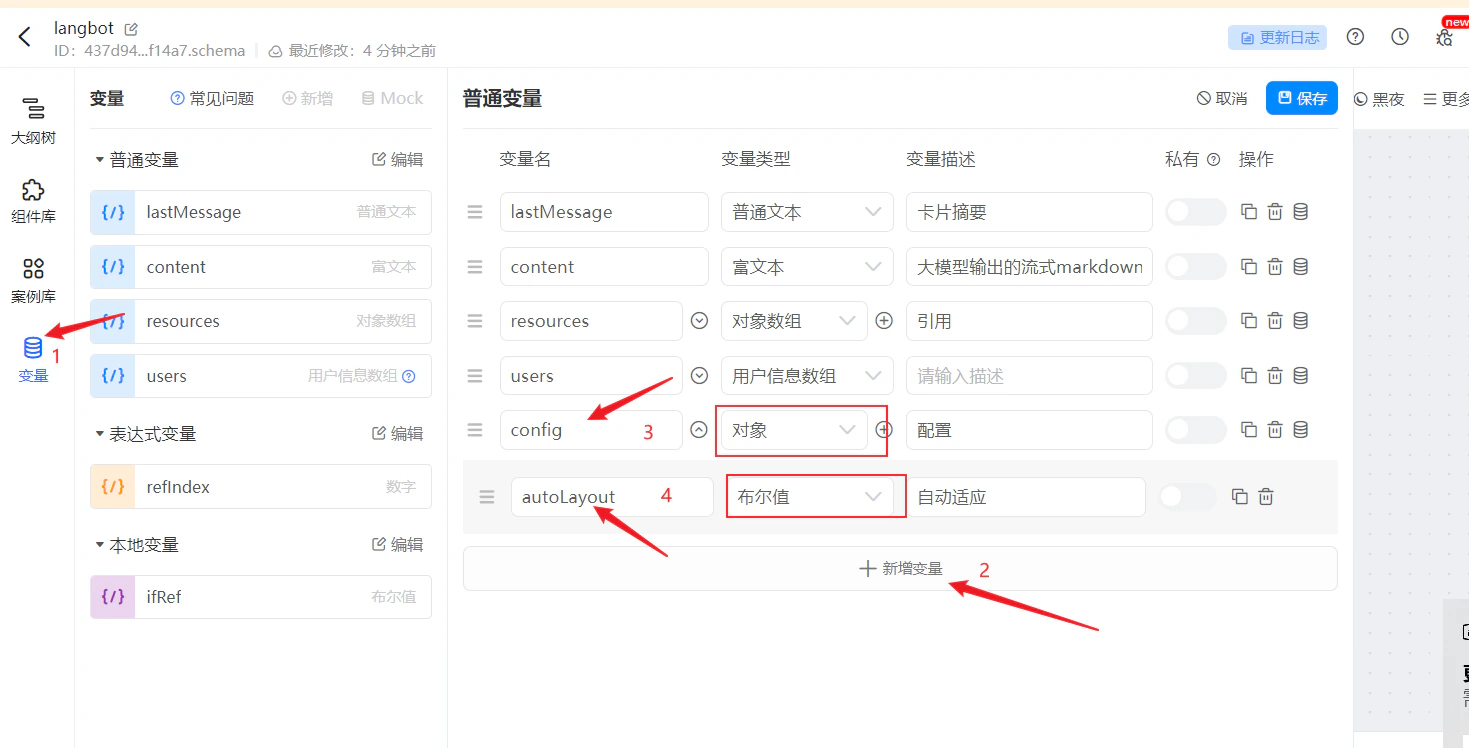
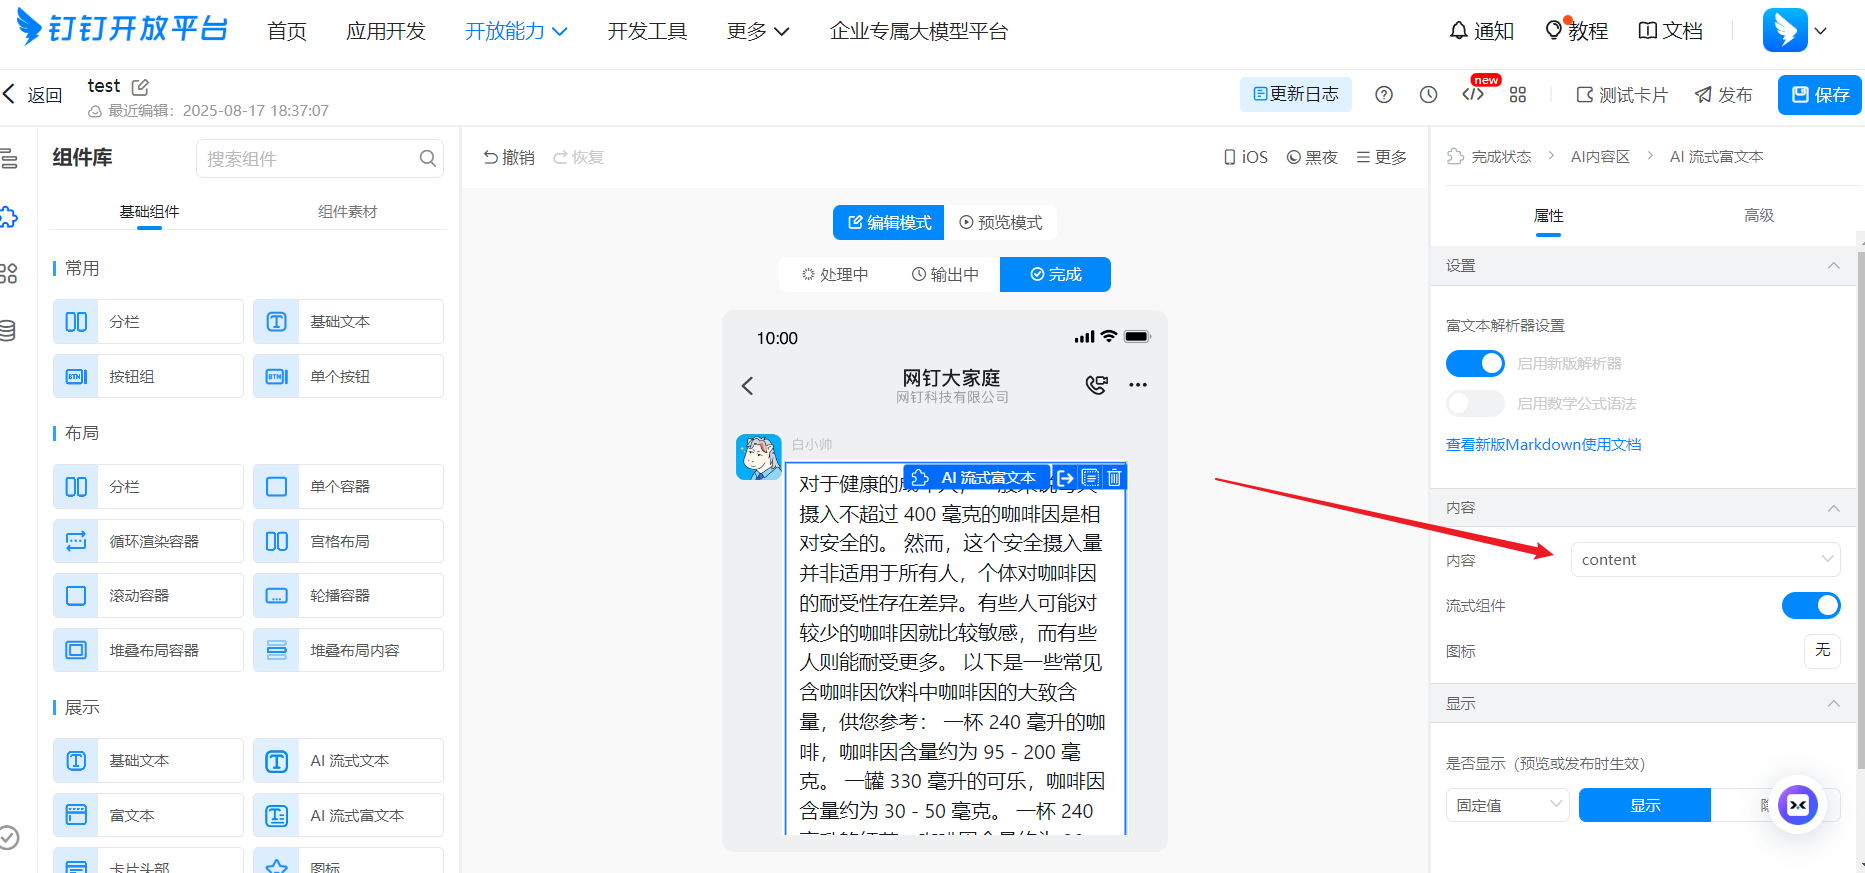 Widescreen configuration parameters, you need to add . in the template variables. See [DingTalk Widescreen Configuration](https://open.dingtalk.com/document/development/configure-widescreen-cards)
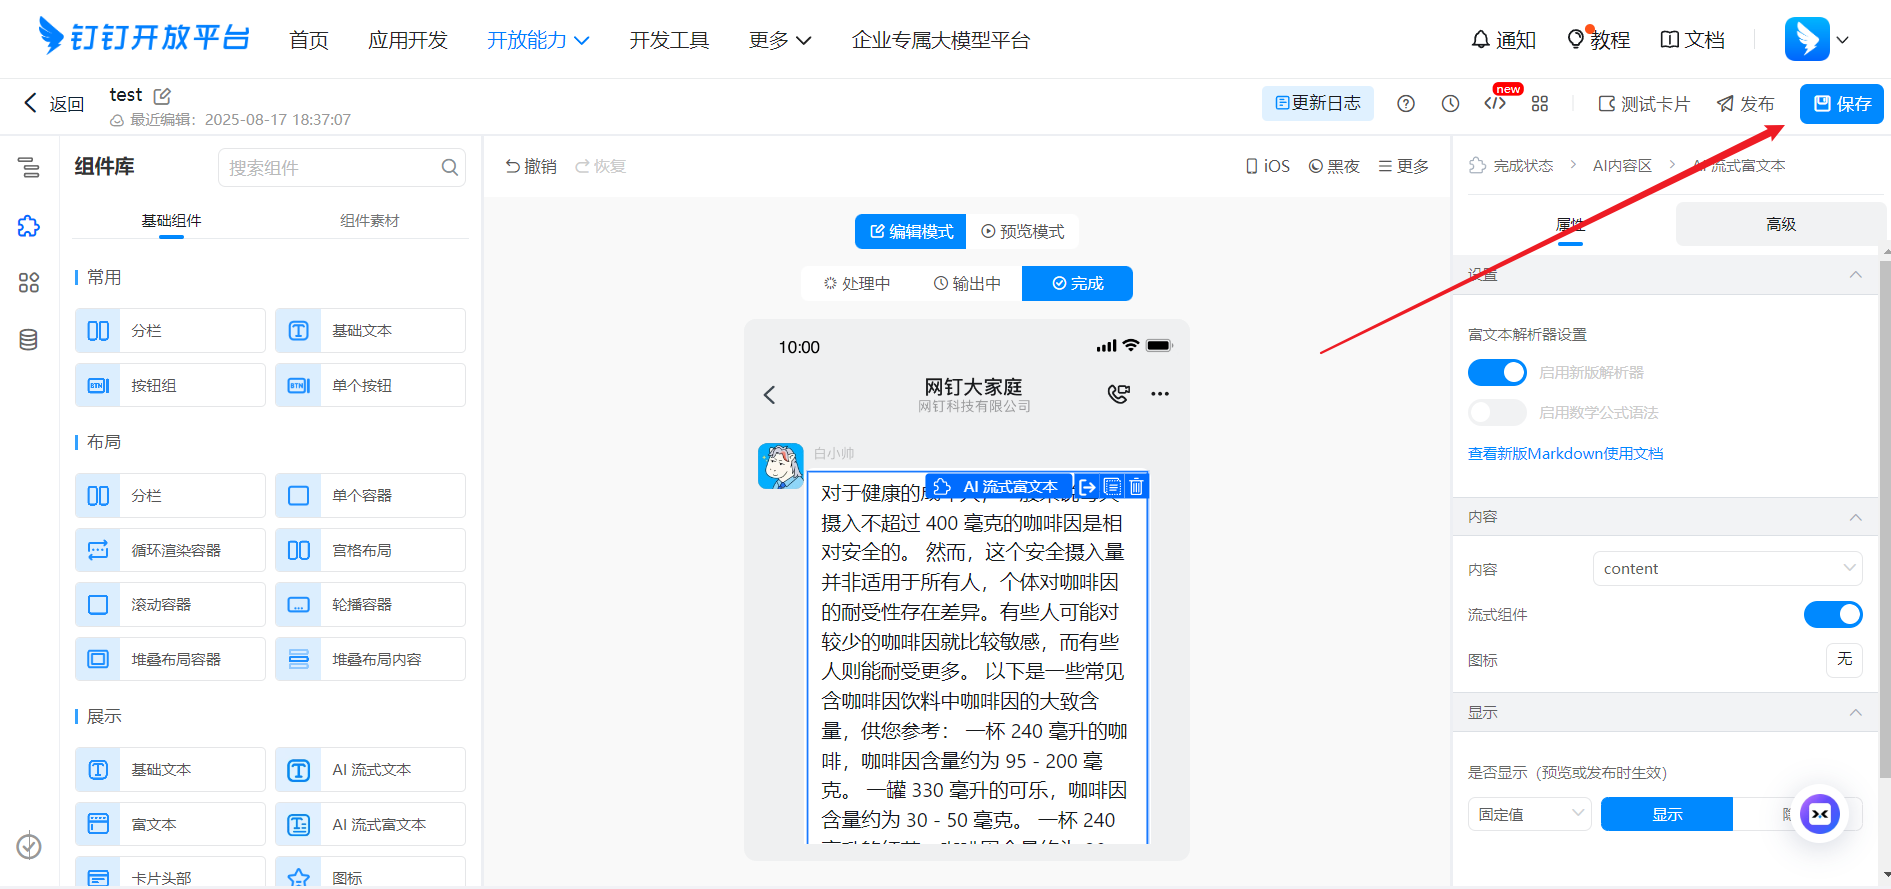
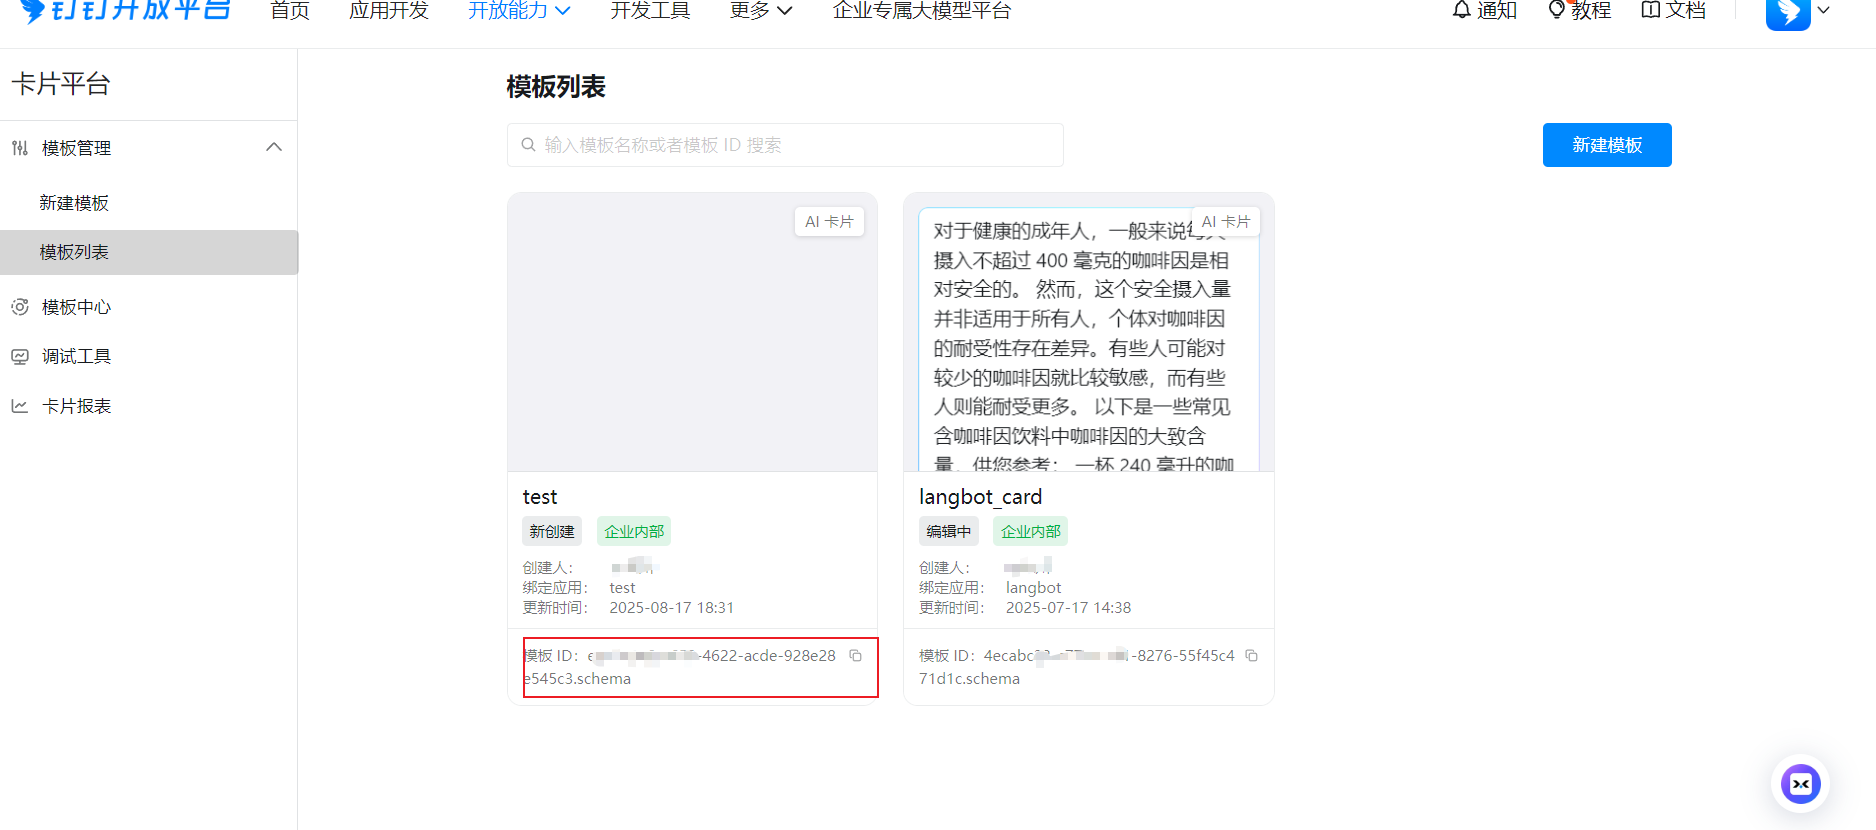
 After editing and confirming everything is correct, save it and copy the template ID to fill in the configuration file:
 ### Fill in Configuration Information
Click `Credentials and Basic Information`, record `Client ID` and `Client Secret`,
Click `Application Capabilities`, `Robot`, record the RobotCode and Robot Name.
`markdown_card` is whether to enable Markdown form replies. When this configuration item is disabled, the `@Sender` configuration switch will not take effect.
Record the above configuration items and fill them in the LangBot bot configuration form
Click [Card Platform](https://open-dev.dingtalk.com/fe/card?spm=ding_open_doc.document.0.0.33cf2281L0fXsV), copy the corresponding bound template ID from the template list, and fill it into the card template ID field.
### Fill in Configuration Information
Click `Credentials and Basic Information`, record `Client ID` and `Client Secret`,
Click `Application Capabilities`, `Robot`, record the RobotCode and Robot Name.
`markdown_card` is whether to enable Markdown form replies. When this configuration item is disabled, the `@Sender` configuration switch will not take effect.
Record the above configuration items and fill them in the LangBot bot configuration form
Click [Card Platform](https://open-dev.dingtalk.com/fe/card?spm=ding_open_doc.document.0.0.33cf2281L0fXsV), copy the corresponding bound template ID from the template list, and fill it into the card template ID field.
 Streaming related:
 **Start LangBot**.
### Add Bot
This article uses DingTalk Windows desktop version as an example, click `Search` at the top, `Features`, then enter the name of the bot you just created, as shown:
**Start LangBot**.
### Add Bot
This article uses DingTalk Windows desktop version as an example, click `Search` at the top, `Features`, then enter the name of the bot you just created, as shown:
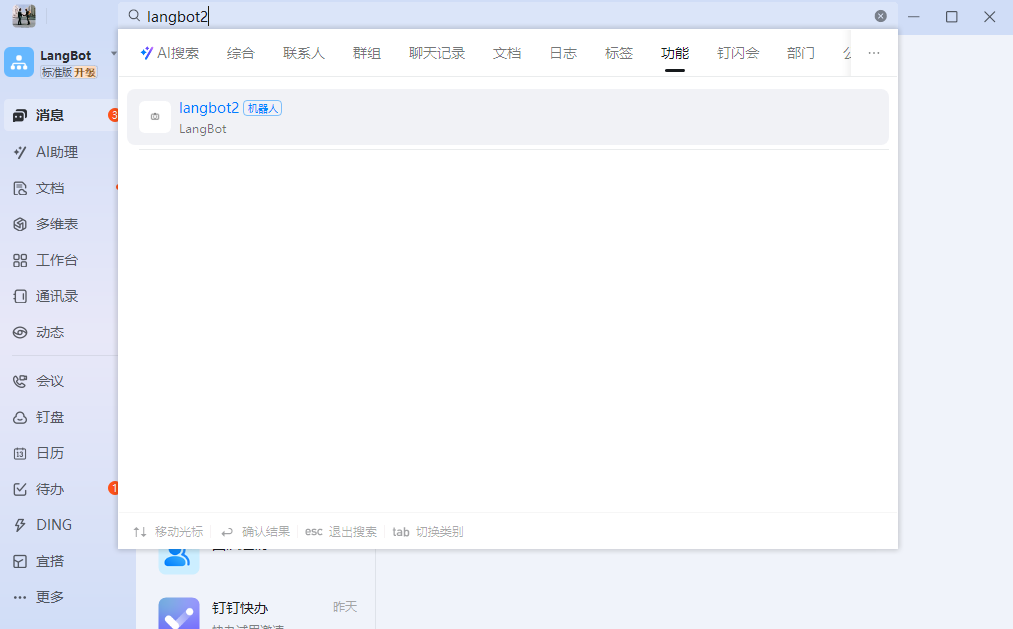 Click on the bot to chat with it.
If you want to add it to a group, click `Group Management`, `Robots`, `Add Robot` in the DingTalk group, then search for the bot name to use it in the group.
Click on the bot to chat with it.
If you want to add it to a group, click `Group Management`, `Robots`, `Add Robot` in the DingTalk group, then search for the bot name to use it in the group.