> ## Documentation Index
> Fetch the complete documentation index at: https://docs.langbot.app/llms.txt
> Use this file to discover all available pages before exploring further.
# How I Built a Multi-Platform AI Bot with Langflow's Drag-and-Drop Workflows
> How I Built a Multi-Platform AI Bot with Langflow's Drag-and-Drop Workflows
This article is synchronized from the LangBot Blog. [Read the canonical version](https://langbot.app/en/blog/langflow-drag-and-drop-ai-bot).
Published 2025-12-05 · Author: LangBot Team
 Drive chatbots across QQ, WeChat, Telegram, Discord, and more using visual workflows - no coding required.
***
[LangBot](https://github.com/langbot-app/LangBot) is an open-source instant messaging bot platform that connects AI workflow engines like Langflow, n8n, Dify, FastGPT, and Coze to platforms including WeChat, QQ, Feishu, DingTalk, Telegram, Discord, Slack, and LINE. This tutorial demonstrates how to use Langflow's visual workflows as LangBot's conversation engine.
## Why This Approach Works
* **True Multi-Platform**: One workflow powering 8+ messaging platforms simultaneously
* **Visual Orchestration**: Drag-and-drop conversation design with conditional branches, multi-turn dialogs, and external API calls
* **Flexible AI Models**: Support for OpenAI, Claude, Gemini, DeepSeek, and local models
* **Fully Open Source**: Both LangBot and Langflow are open-source projects for free deployment and customization
## Prerequisites
* Python 3.10+
* Docker (recommended for quick deployment)
* OpenAI API Key or API keys for other LLM services
## Step 1: Deploy LangBot
Launch with uvx in one command:
```bash theme={null}
uvx langbot
```
First run auto-initializes and opens your browser to [http://127.0.0.1:5300](http://127.0.0.1:5300).
Drive chatbots across QQ, WeChat, Telegram, Discord, and more using visual workflows - no coding required.
***
[LangBot](https://github.com/langbot-app/LangBot) is an open-source instant messaging bot platform that connects AI workflow engines like Langflow, n8n, Dify, FastGPT, and Coze to platforms including WeChat, QQ, Feishu, DingTalk, Telegram, Discord, Slack, and LINE. This tutorial demonstrates how to use Langflow's visual workflows as LangBot's conversation engine.
## Why This Approach Works
* **True Multi-Platform**: One workflow powering 8+ messaging platforms simultaneously
* **Visual Orchestration**: Drag-and-drop conversation design with conditional branches, multi-turn dialogs, and external API calls
* **Flexible AI Models**: Support for OpenAI, Claude, Gemini, DeepSeek, and local models
* **Fully Open Source**: Both LangBot and Langflow are open-source projects for free deployment and customization
## Prerequisites
* Python 3.10+
* Docker (recommended for quick deployment)
* OpenAI API Key or API keys for other LLM services
## Step 1: Deploy LangBot
Launch with uvx in one command:
```bash theme={null}
uvx langbot
```
First run auto-initializes and opens your browser to [http://127.0.0.1:5300](http://127.0.0.1:5300).
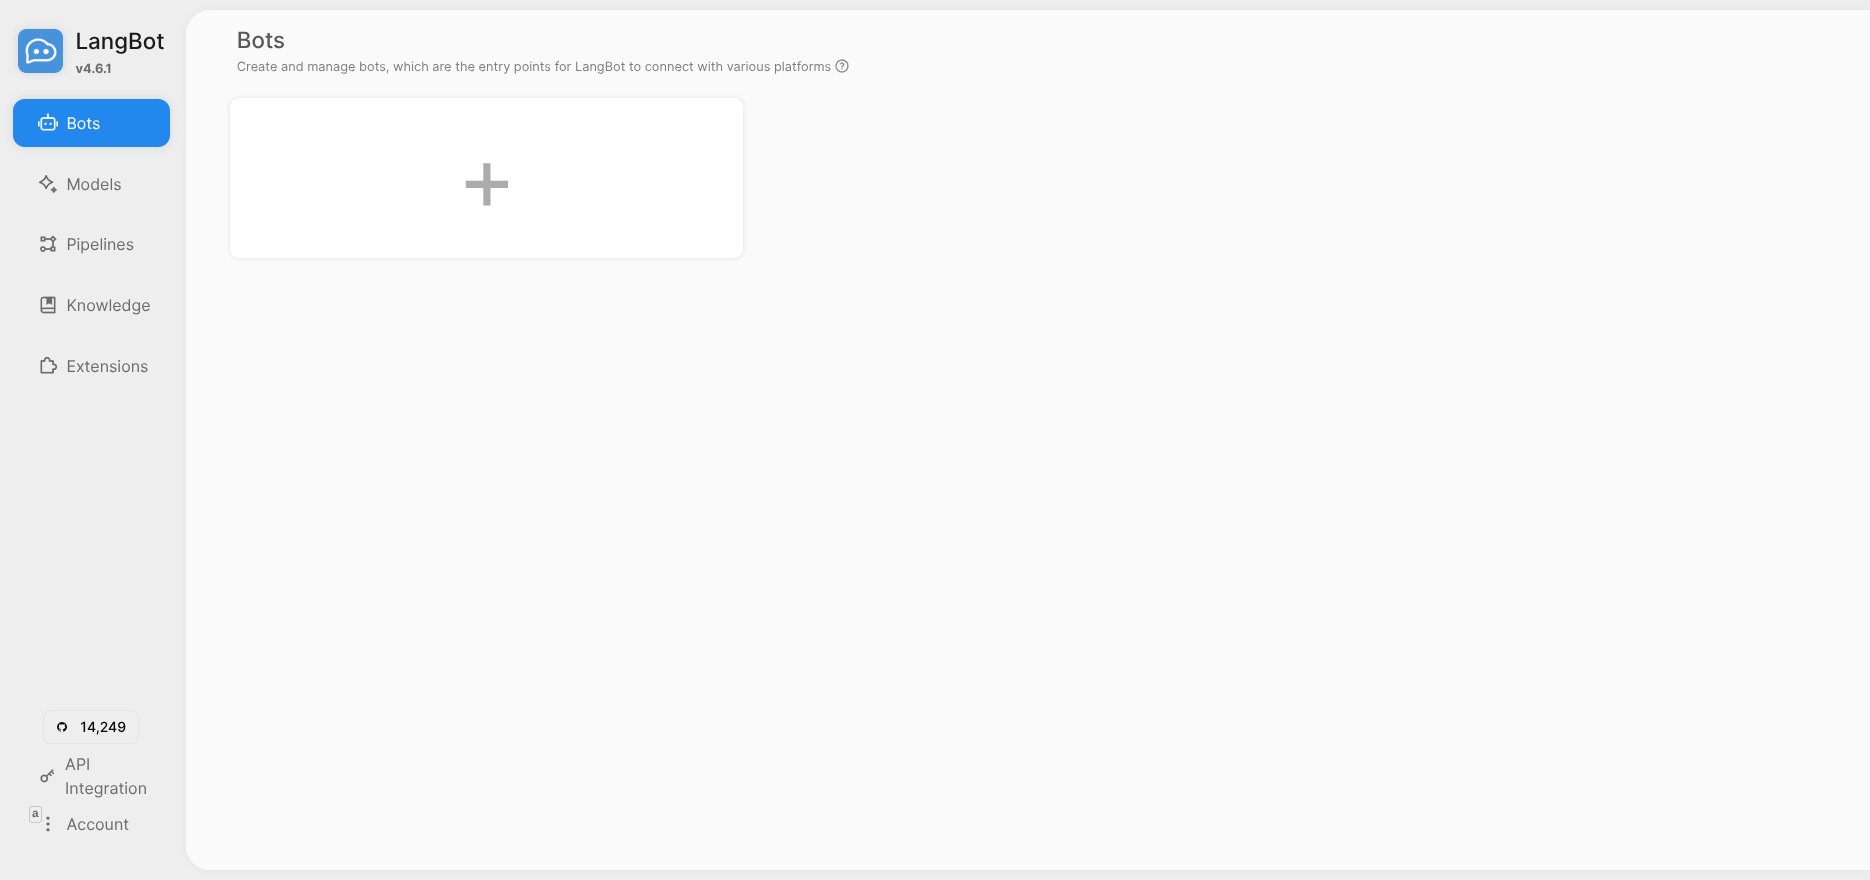
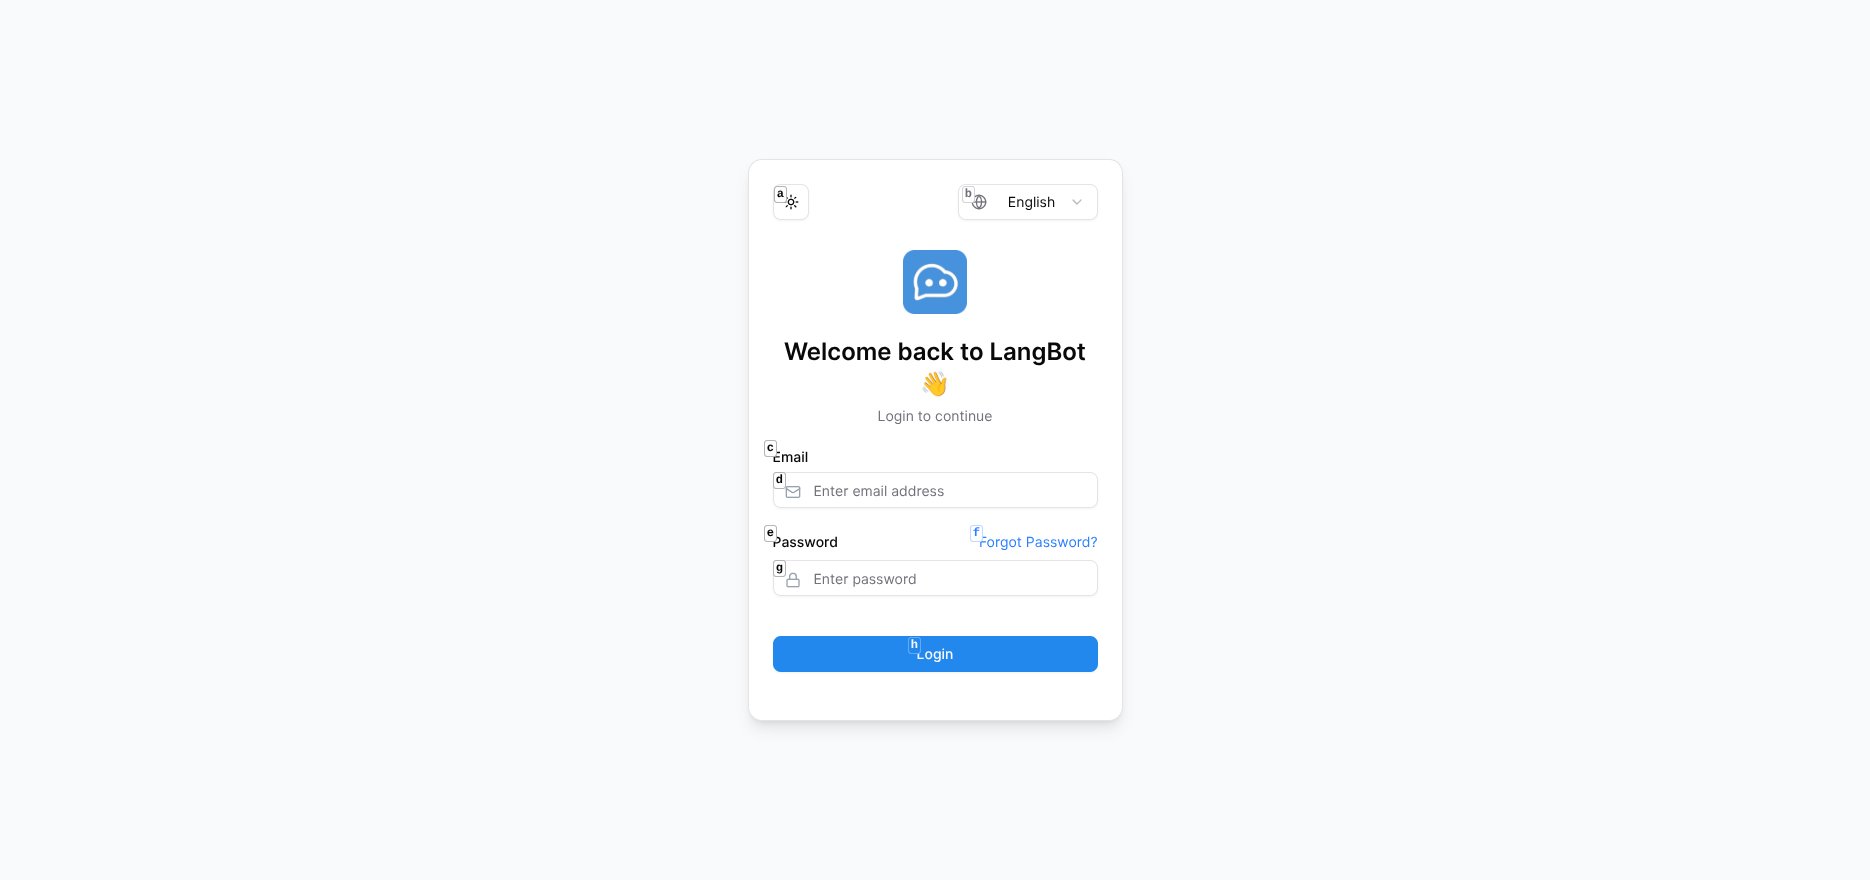 After registration, log in to access the dashboard:
 ## Step 2: Deploy Langflow
Deploy quickly with Docker:
```bash theme={null}
docker run -d --name langflow -p 7860:7860 langflowai/langflow:latest
```
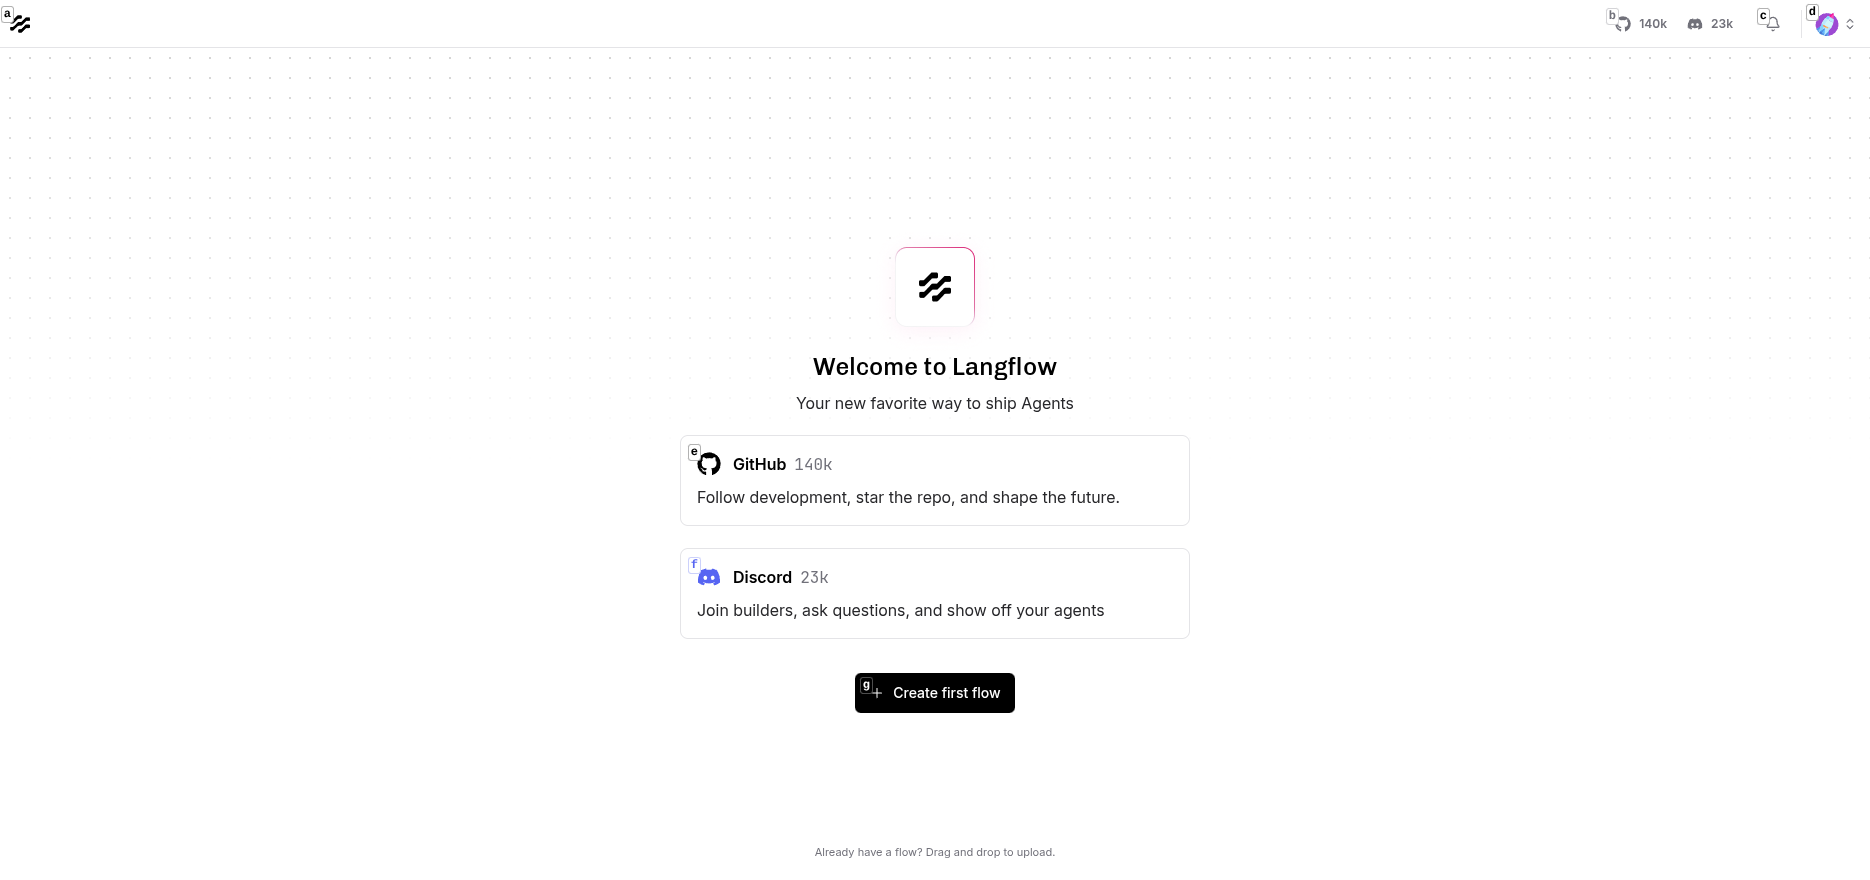
Visit [http://localhost:7860](http://localhost:7860) to access Langflow:
## Step 2: Deploy Langflow
Deploy quickly with Docker:
```bash theme={null}
docker run -d --name langflow -p 7860:7860 langflowai/langflow:latest
```
Visit [http://localhost:7860](http://localhost:7860) to access Langflow:
 ## Step 3: Create a Langflow Workflow
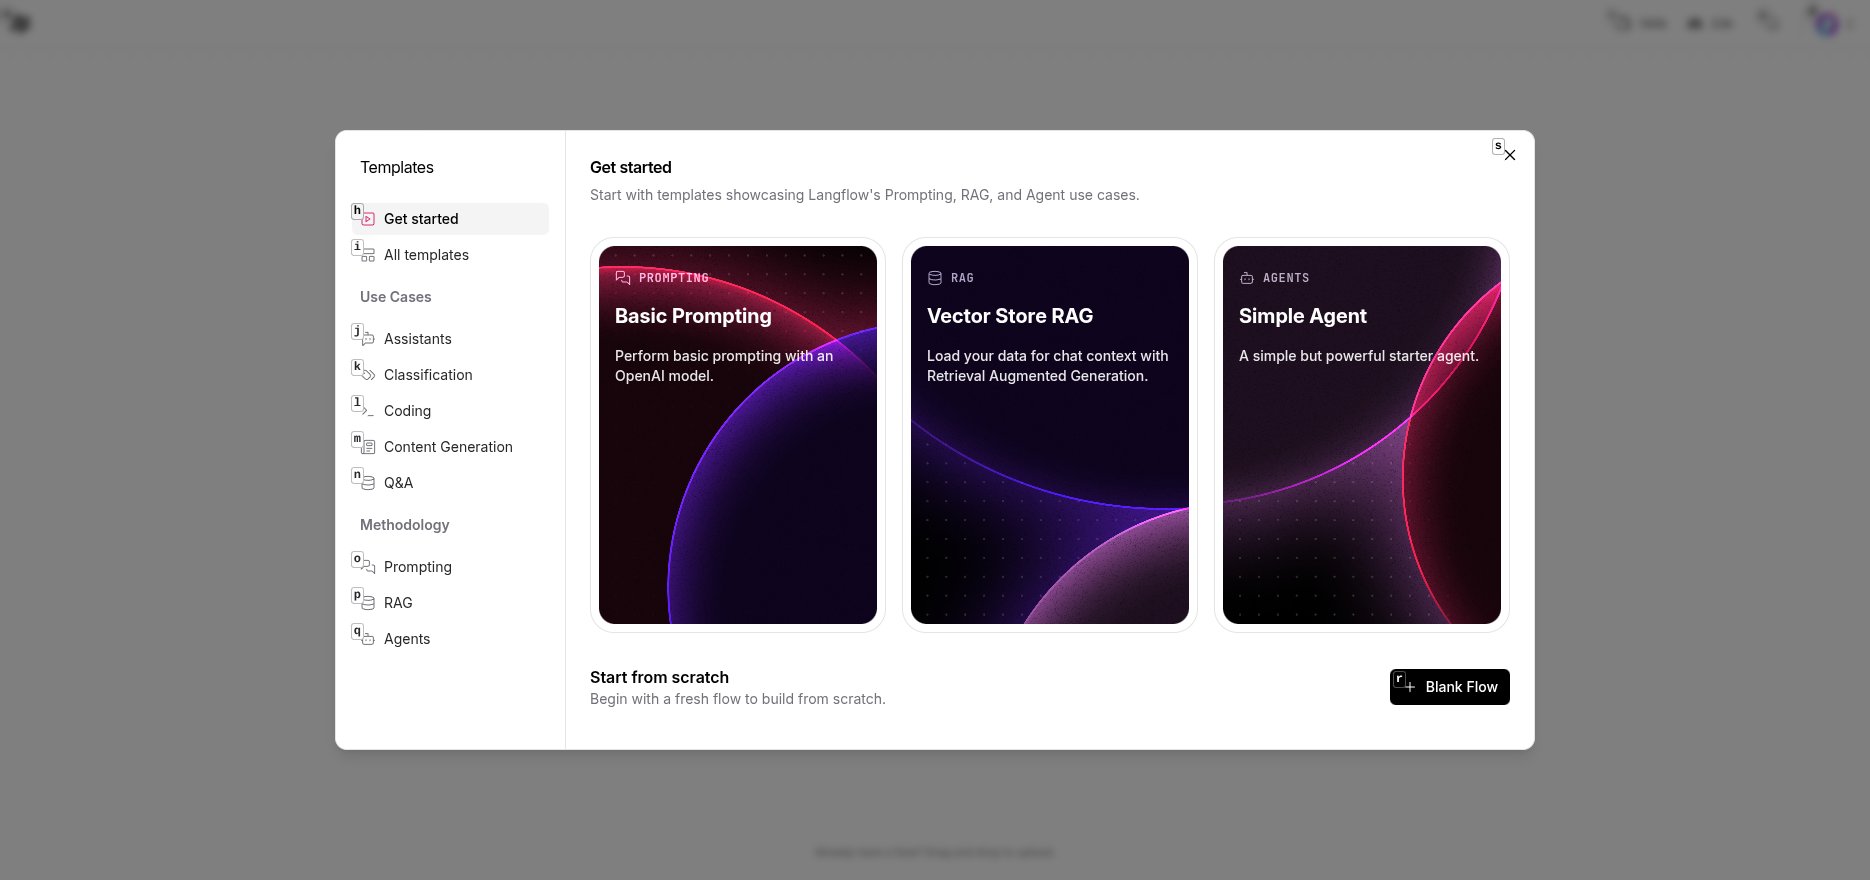
In Langflow, select the "Basic Prompting" template to get started quickly:
## Step 3: Create a Langflow Workflow
In Langflow, select the "Basic Prompting" template to get started quickly:
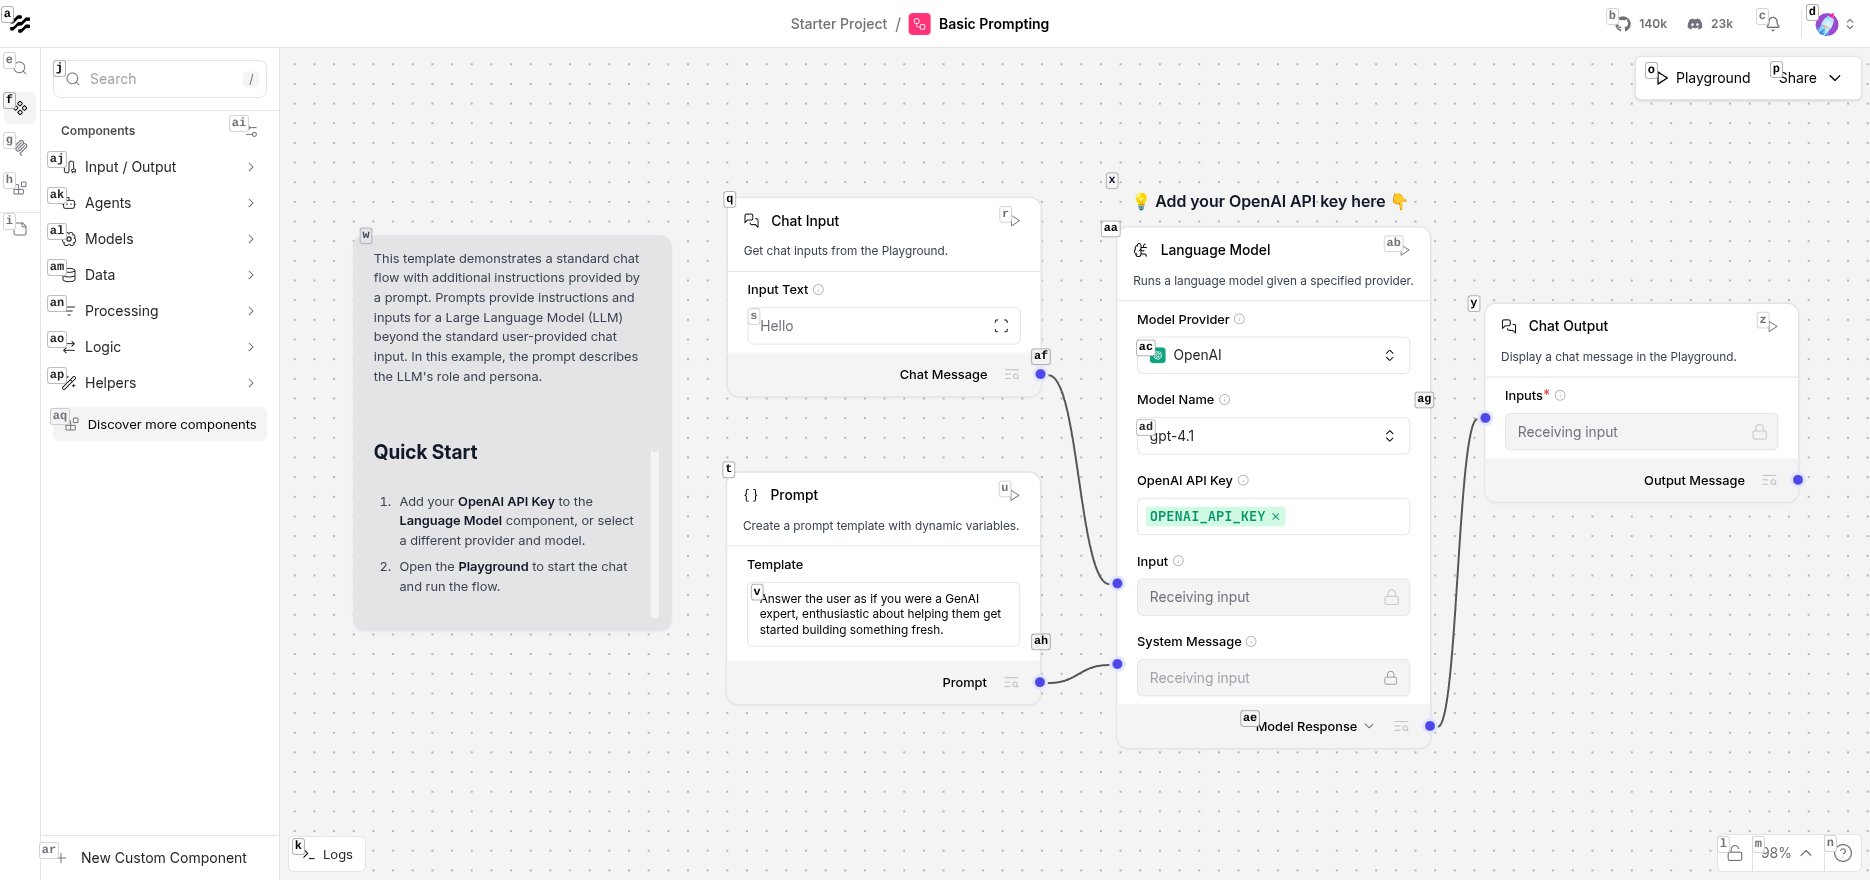
 This template includes four basic components:
* **Chat Input**: Receives user messages
* **Prompt**: Sets system instructions
* **Language Model**: Calls LLM to generate responses
* **Chat Output**: Returns results
This template includes four basic components:
* **Chat Input**: Receives user messages
* **Prompt**: Sets system instructions
* **Language Model**: Calls LLM to generate responses
* **Chat Output**: Returns results
 ### Configure Language Model
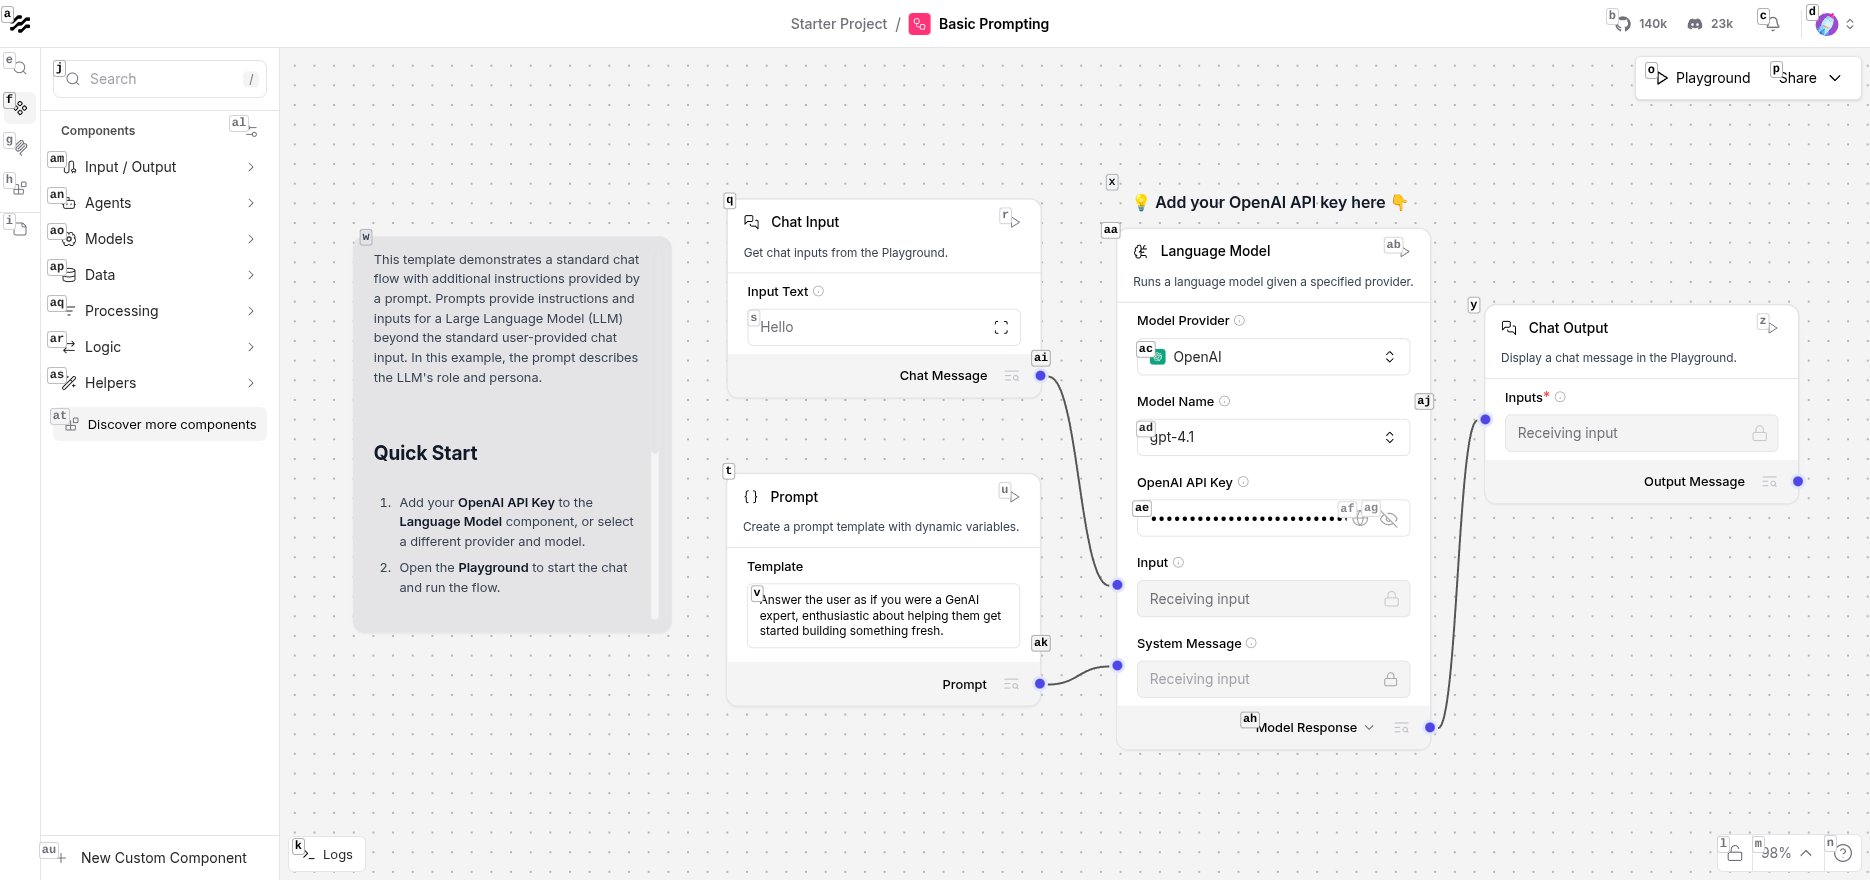
Click the Language Model component and configure:
1. **Model Provider**: Select OpenAI (or other compatible providers like SiliconFlow, New API)
2. **Model Name**: Select gpt-4o-mini or deepseek-chat
3. **OpenAI API Key**: Enter your API Key
### Configure Language Model
Click the Language Model component and configure:
1. **Model Provider**: Select OpenAI (or other compatible providers like SiliconFlow, New API)
2. **Model Name**: Select gpt-4o-mini or deepseek-chat
3. **OpenAI API Key**: Enter your API Key
 > Tip: You can use OpenAI-compatible API services like SiliconFlow or New API by simply modifying the Base URL.
Save the workflow after configuration.
## Step 4: Get Langflow API Information
### Generate API Key
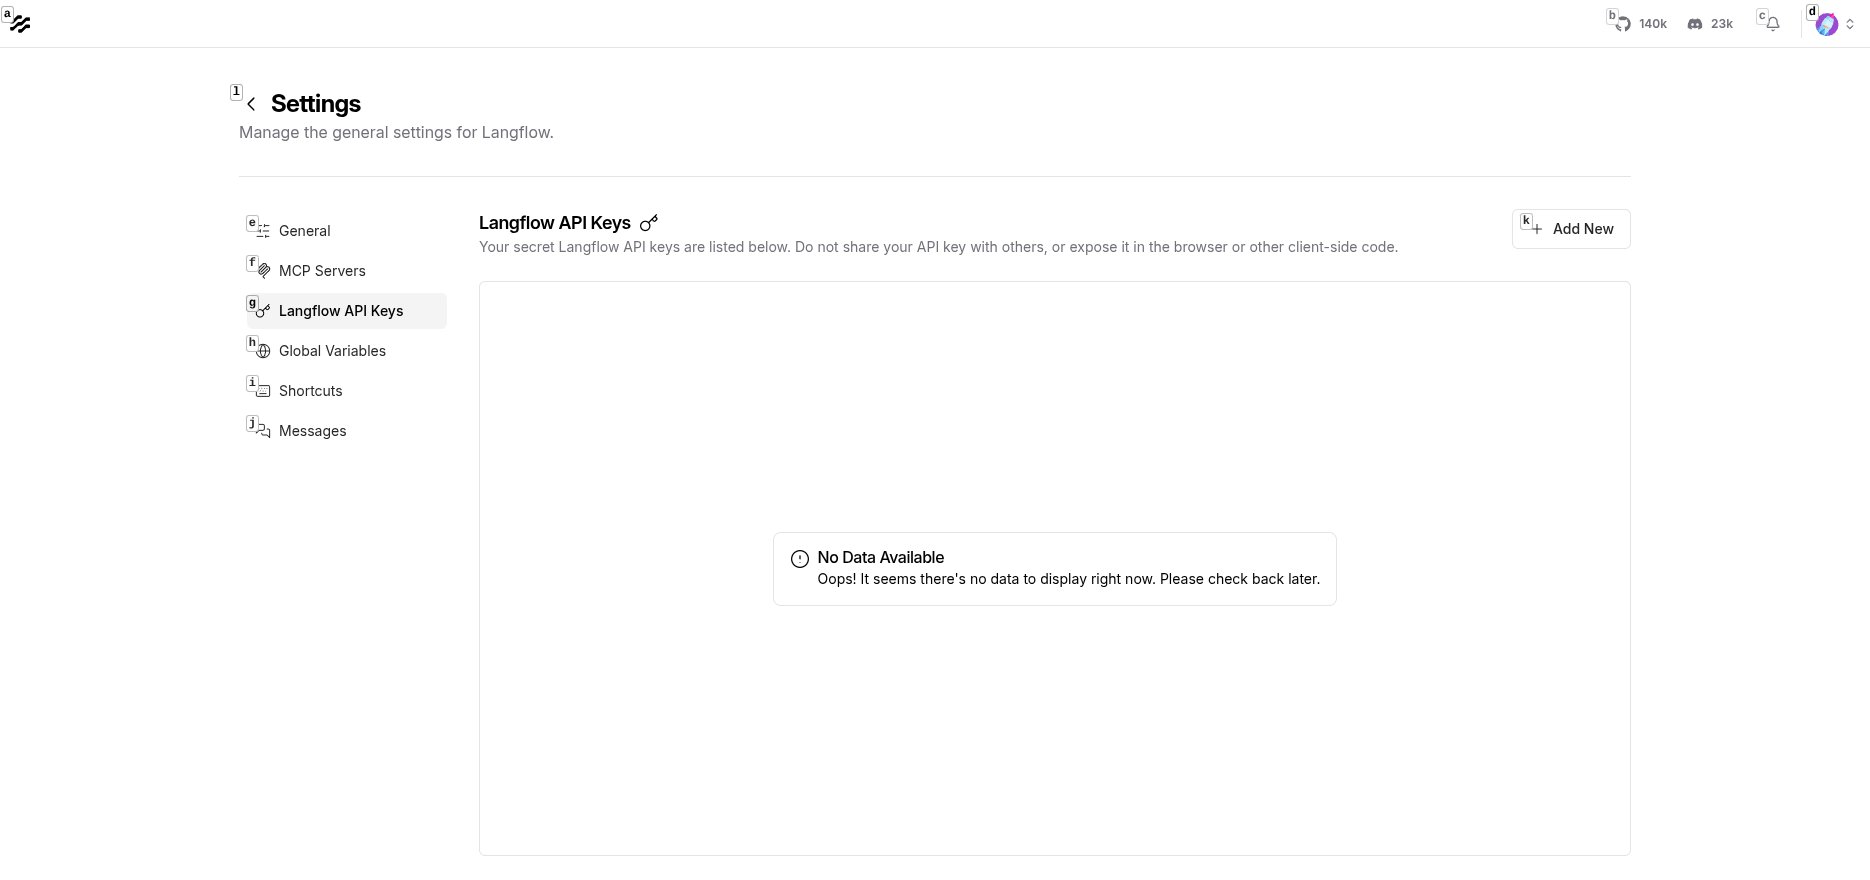
In Langflow's upper right: Settings → API Keys, navigate to the API Keys page:
> Tip: You can use OpenAI-compatible API services like SiliconFlow or New API by simply modifying the Base URL.
Save the workflow after configuration.
## Step 4: Get Langflow API Information
### Generate API Key
In Langflow's upper right: Settings → API Keys, navigate to the API Keys page:
 Click Create New Key:
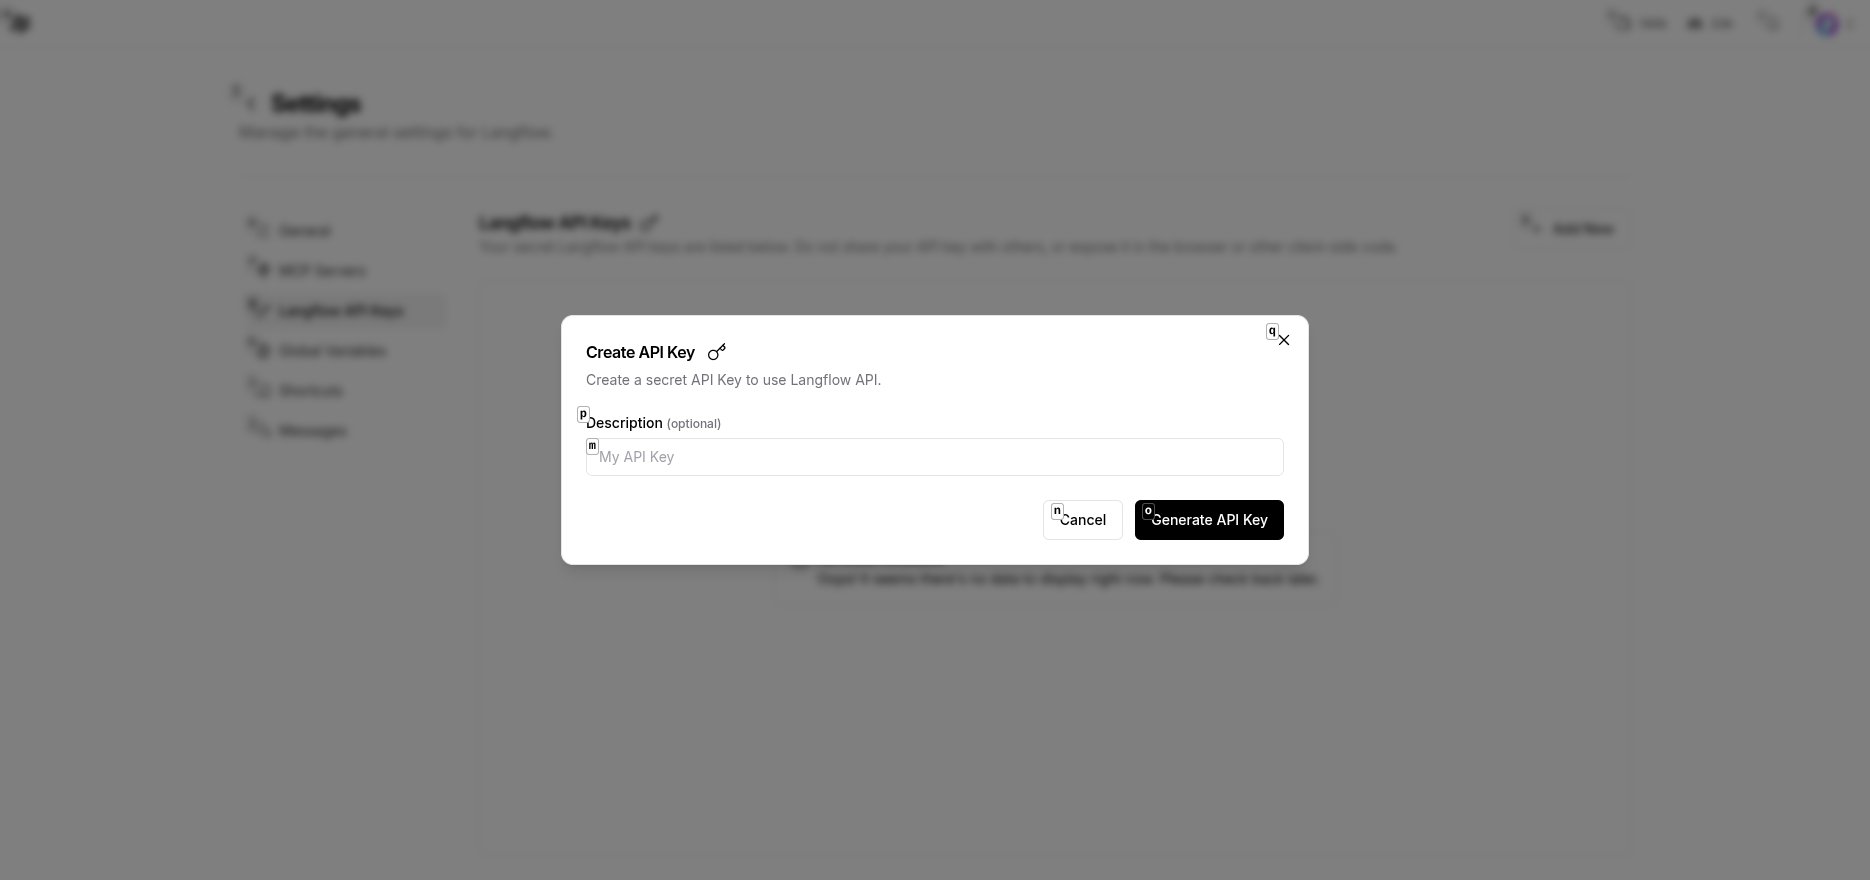 Generate and save the API Key:
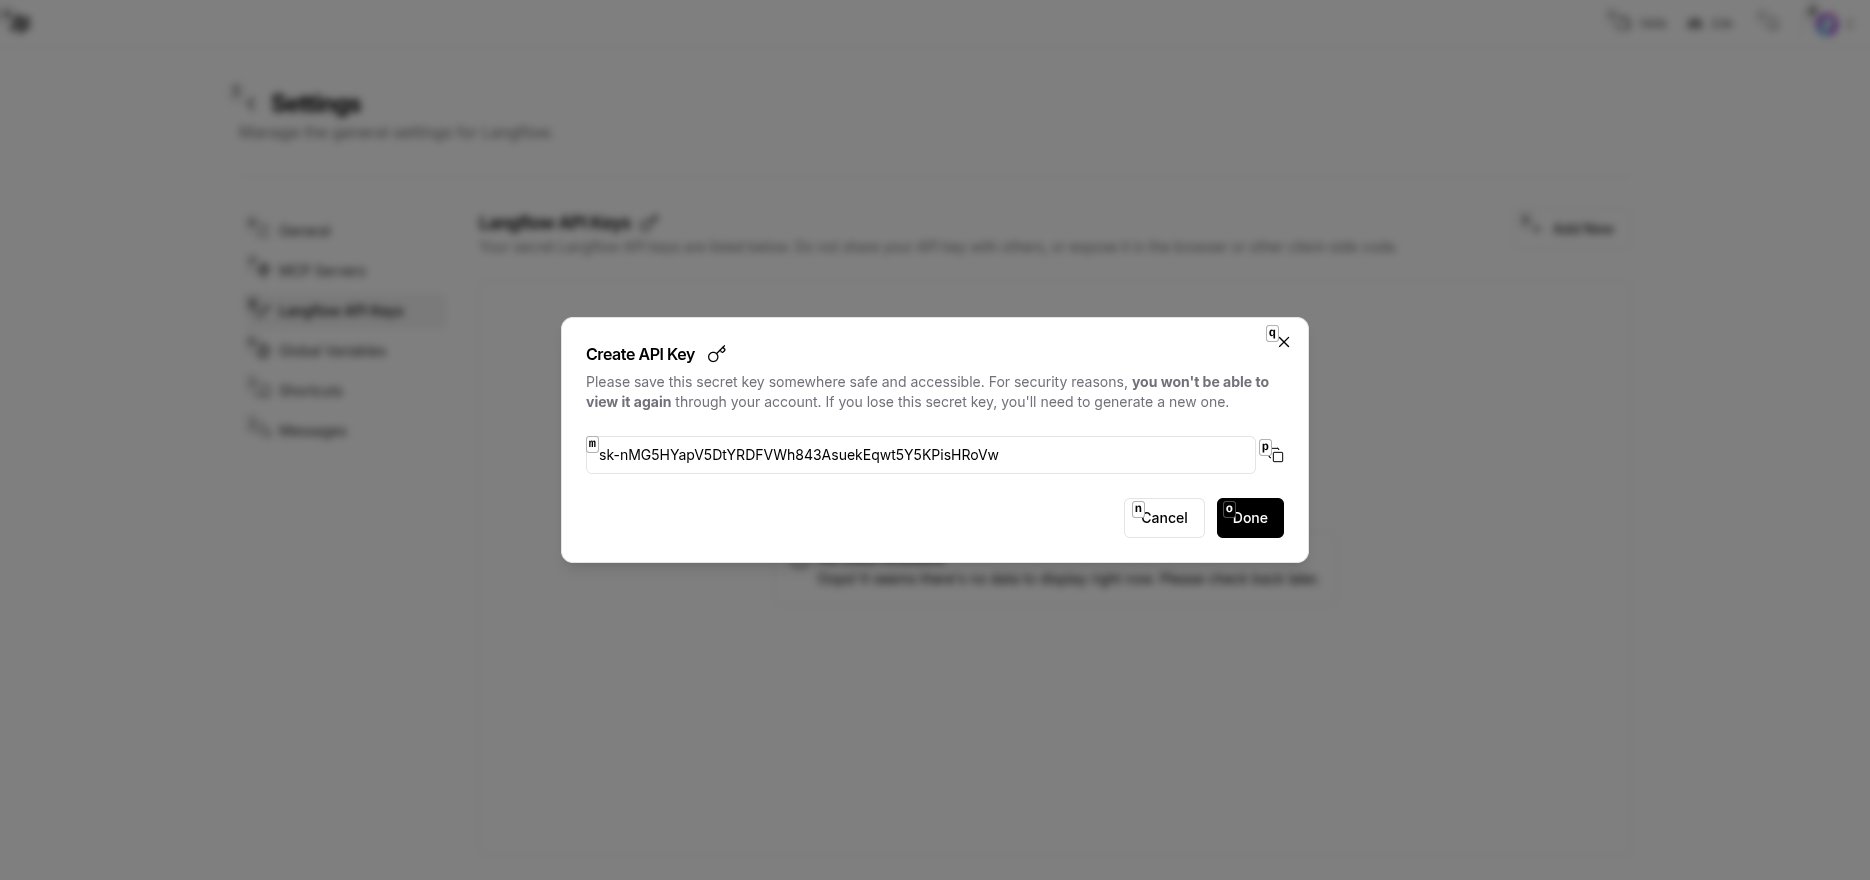 Format: `sk-xxxxxxxxxxxxxxxxxxxxxxxx`
### Get Flow ID
Extract from the flow editor's URL:
```
http://localhost:7860/flow/{flow-id}
```
Record this `flow-id`.
## Step 5: Configure Langflow in LangBot
Return to LangBot dashboard and go to **Pipelines** page.
Click ChatPipeline to edit, in the AI tab:
Format: `sk-xxxxxxxxxxxxxxxxxxxxxxxx`
### Get Flow ID
Extract from the flow editor's URL:
```
http://localhost:7860/flow/{flow-id}
```
Record this `flow-id`.
## Step 5: Configure Langflow in LangBot
Return to LangBot dashboard and go to **Pipelines** page.
Click ChatPipeline to edit, in the AI tab:
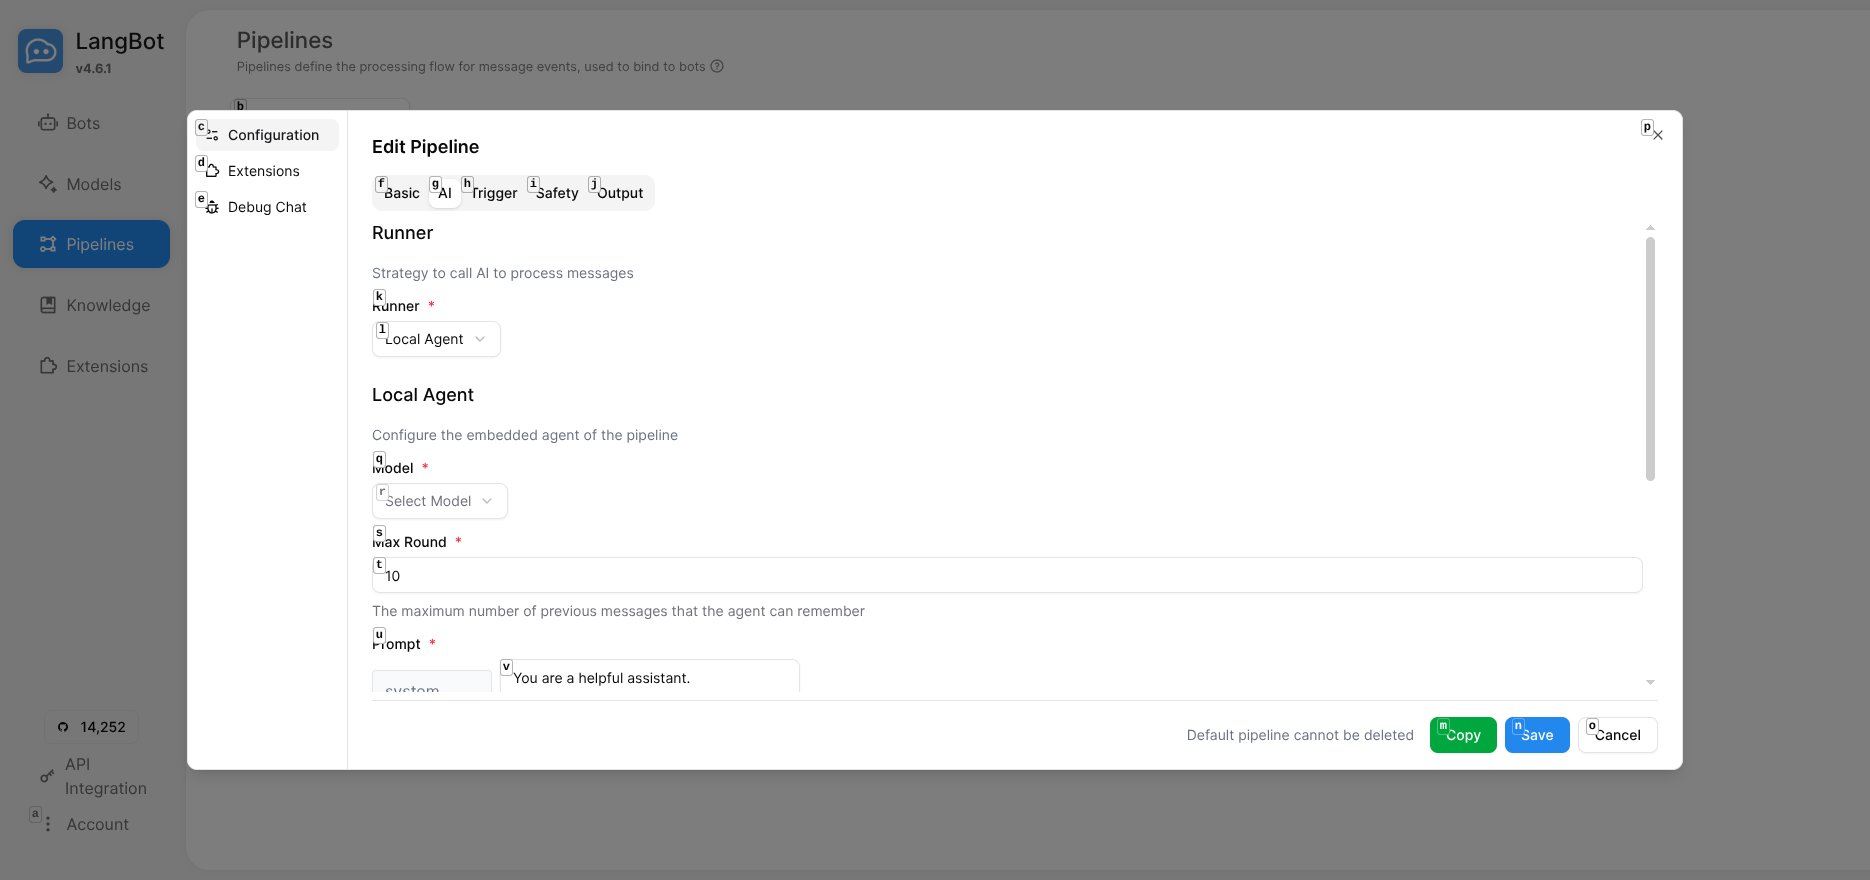 Configure **Runner**, select **Langflow API**:
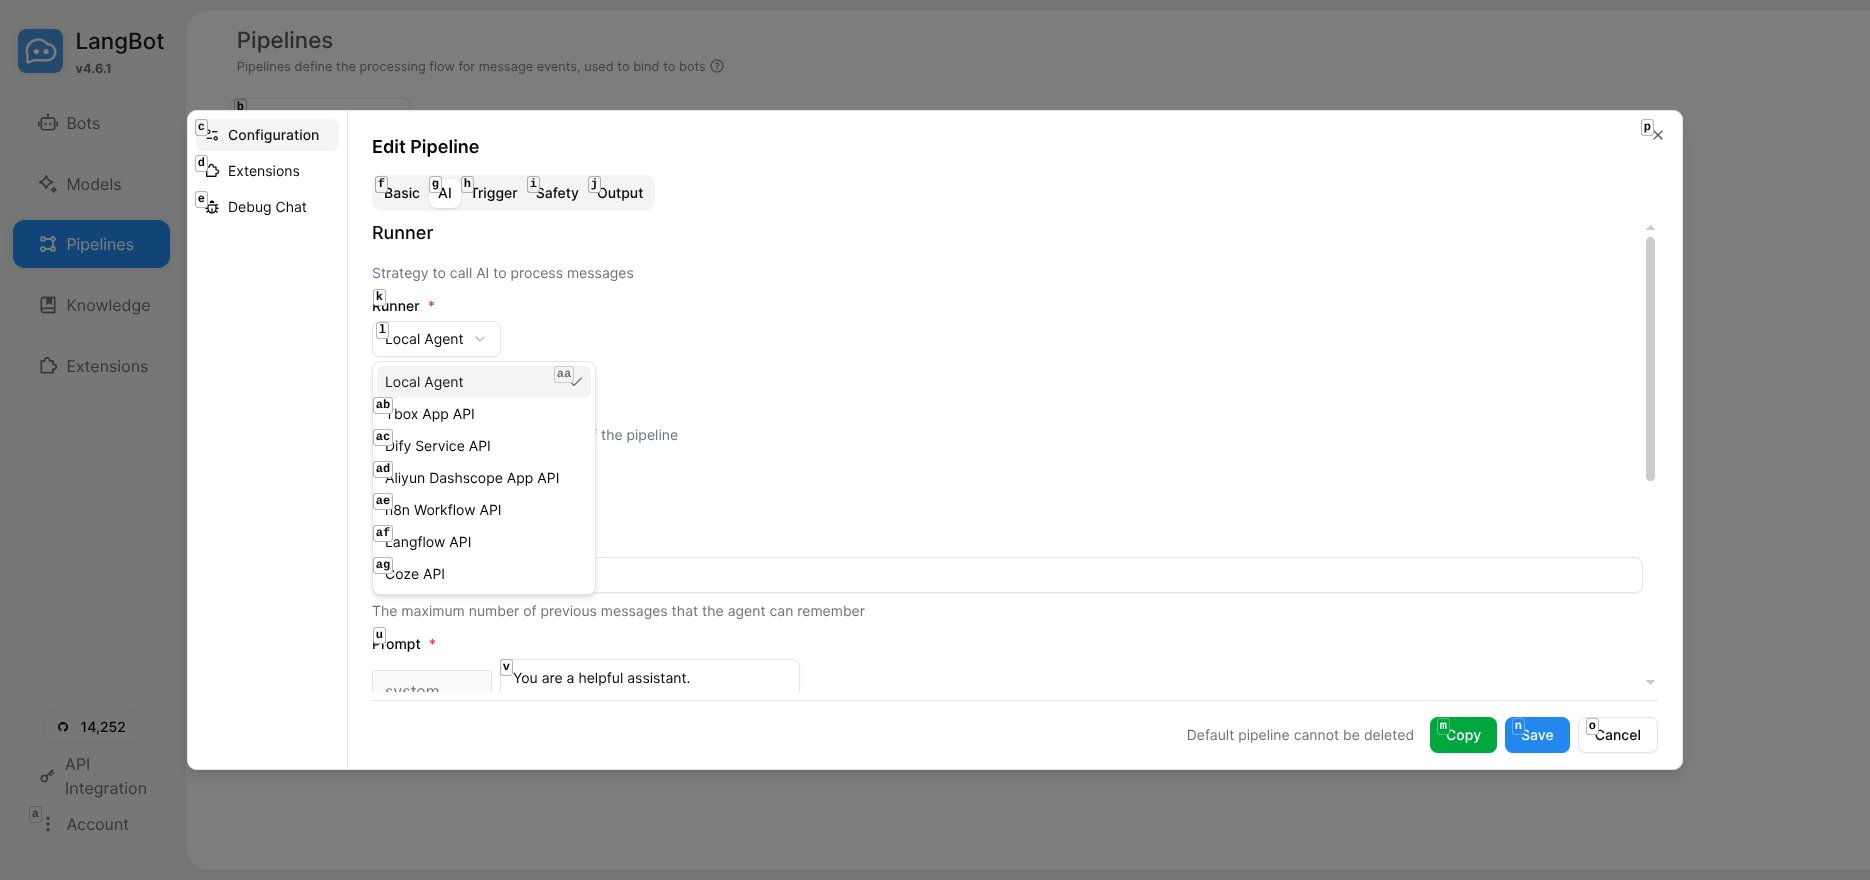 Fill in the Langflow configuration:
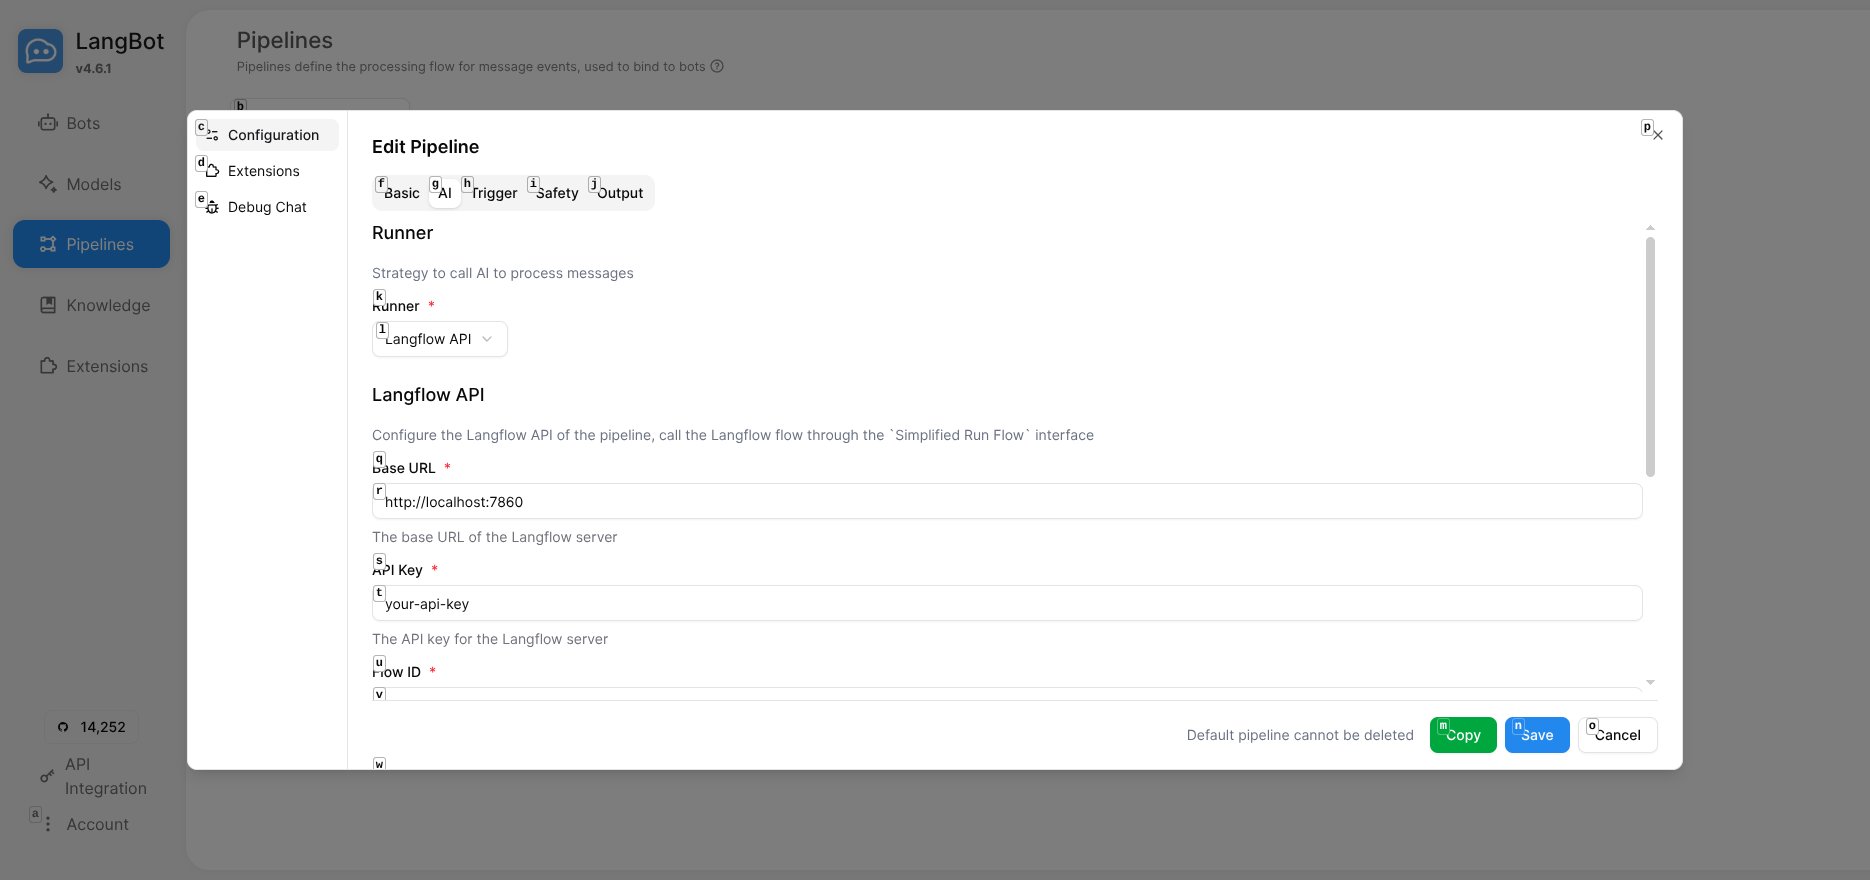 Configuration items:
* **Base URL**: `http://localhost:7860` (local) or `http://langflow:7860` (Docker network)
* **API Key**: The API Key generated in Langflow
* **Flow ID**: The Flow ID recorded earlier
Configuration items:
* **Base URL**: `http://localhost:7860` (local) or `http://langflow:7860` (Docker network)
* **API Key**: The API Key generated in Langflow
* **Flow ID**: The Flow ID recorded earlier
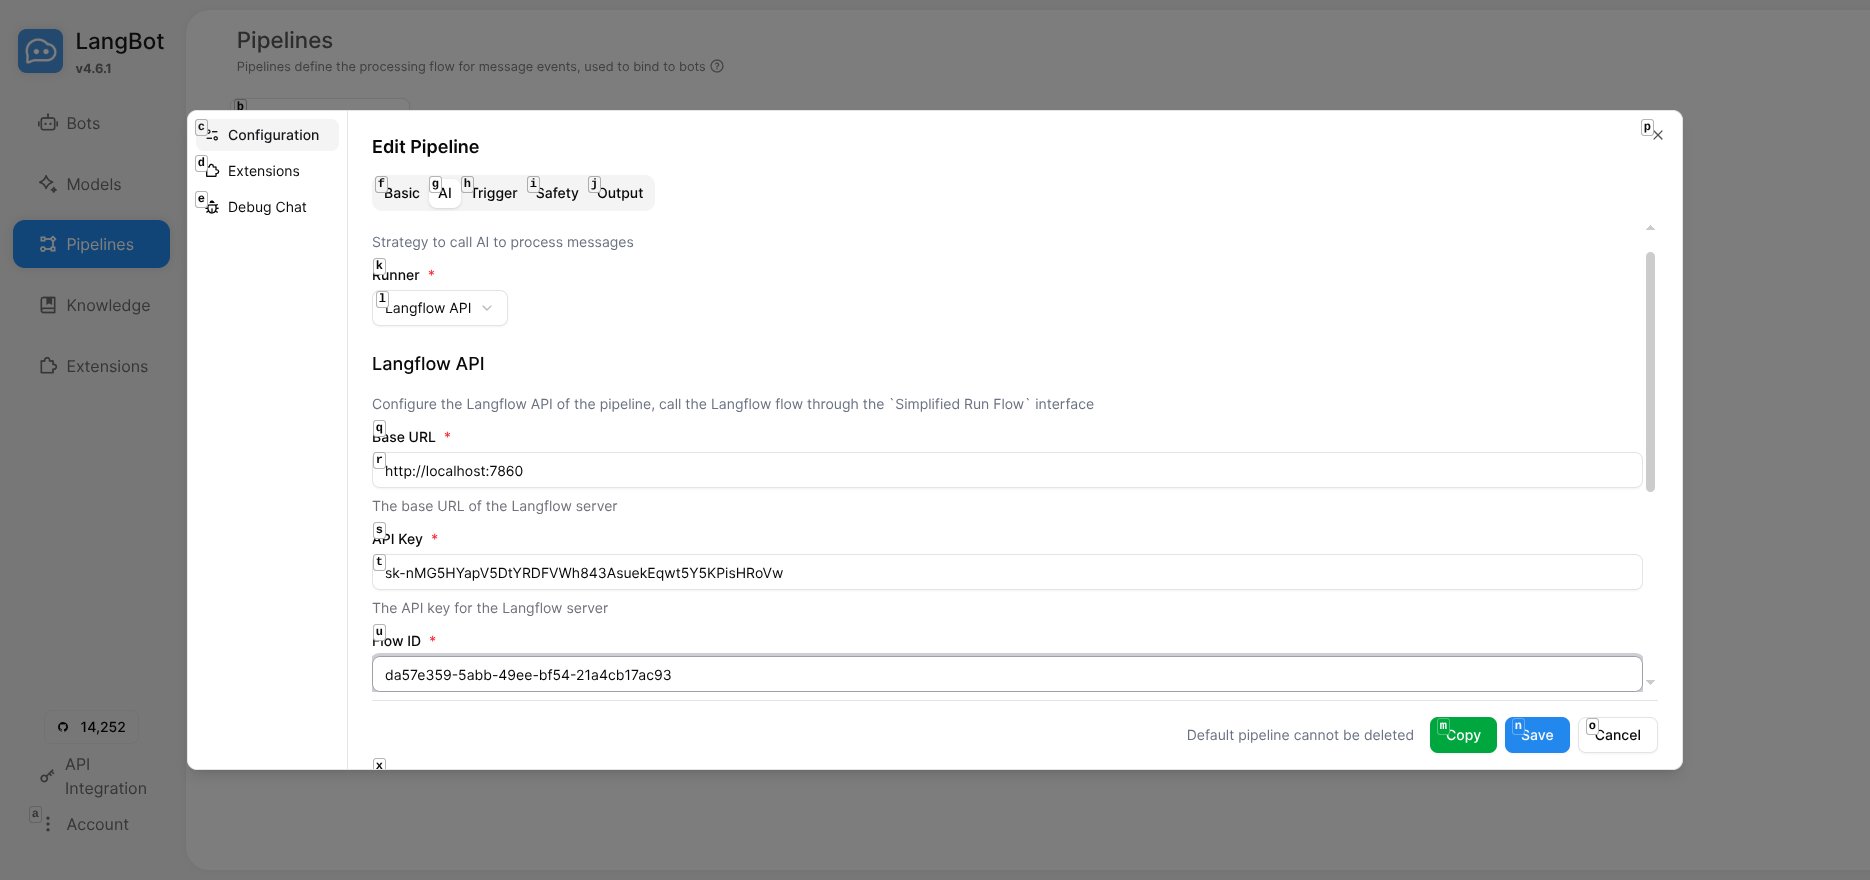 > Docker Tip: If both services run in containers, ensure they're on the same network and use the container name for Base URL.
Click **Save** to save the configuration.
## Step 6: Test the Conversation
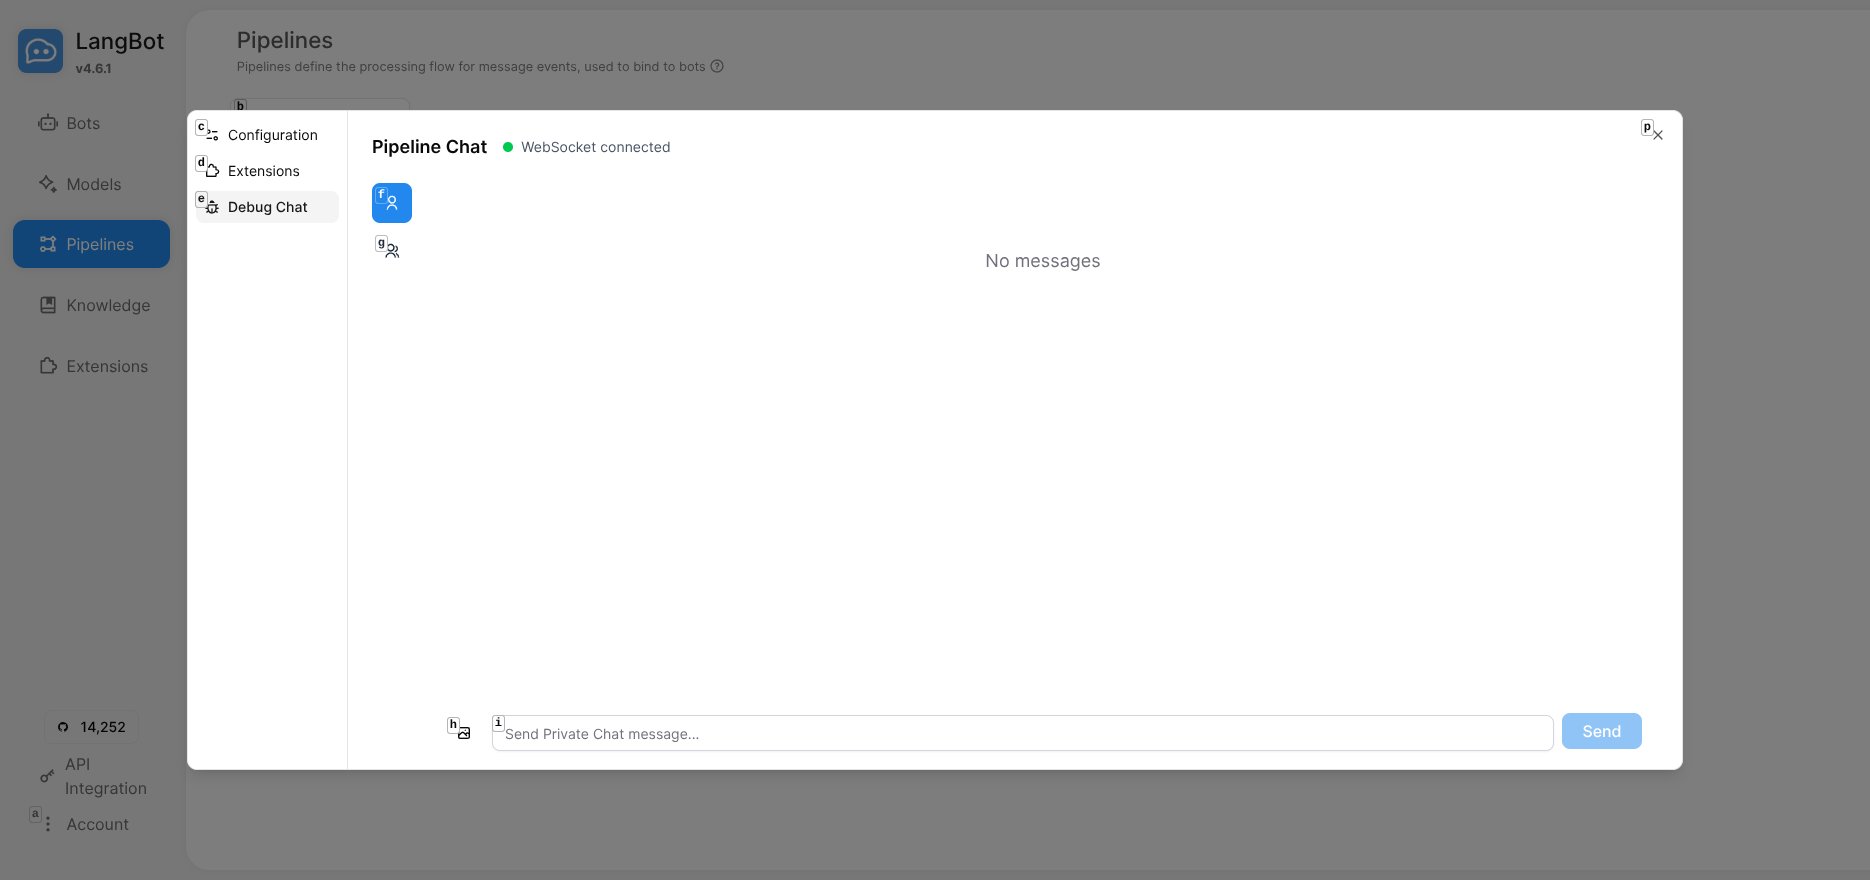
Click **Debug Chat** on the Pipelines page to open the debug chat interface:
> Docker Tip: If both services run in containers, ensure they're on the same network and use the container name for Base URL.
Click **Save** to save the configuration.
## Step 6: Test the Conversation
Click **Debug Chat** on the Pipelines page to open the debug chat interface:
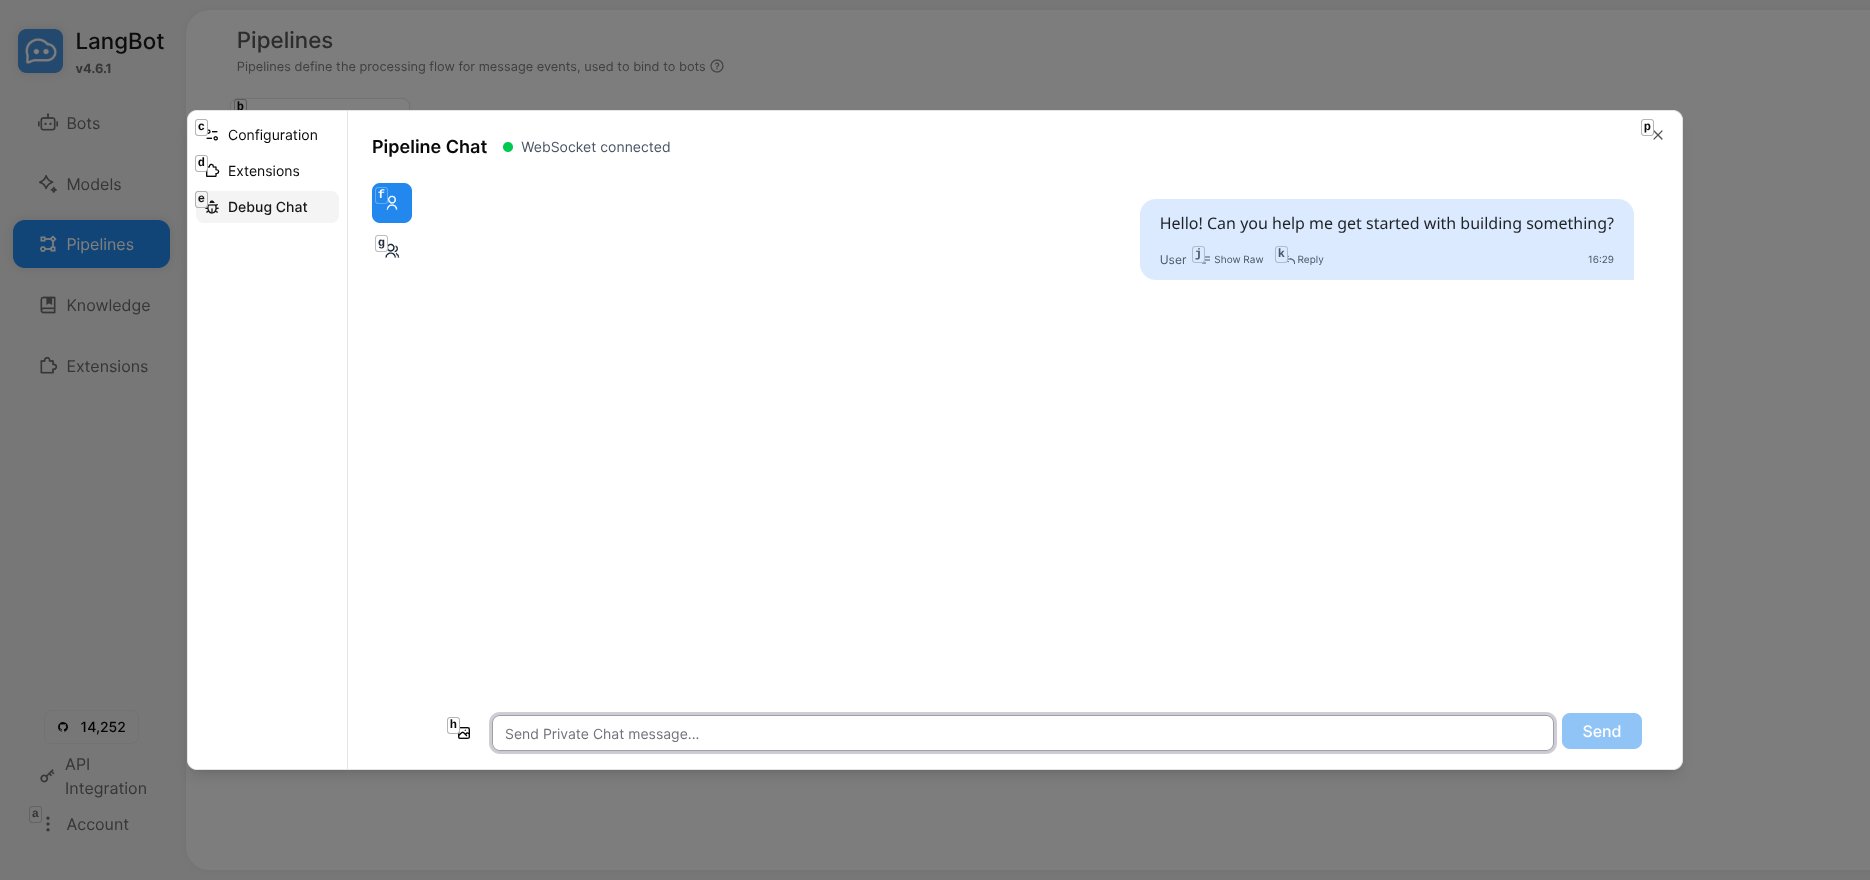
 Enter a test message like "Hello" and view the AI response:
 ## How It Works
1. User sends a message on a messaging platform
2. LangBot receives and passes it to the Pipeline
3. Pipeline calls Langflow API
4. Langflow executes the workflow: receives input → adds prompt → calls LLM → returns result
5. LangBot sends the response back to the user
## Common Issues
**Cannot connect to Langflow?**
Check Base URL. For Docker deployment, ensure containers are on the same network:
```bash theme={null}
docker network create langbot_network
docker network connect langbot_network langflow
docker network connect langbot_network langbot
```
Use container name: `http://langflow:7860`
**API call fails?**
* Confirm API Key and Flow ID are correct
* Verify the Language Model in Langflow has a valid LLM API Key configured
## Advanced Use Cases
Langflow's power lies in visually orchestrating complex AI workflows:
* **Multi-Turn Memory**: Add Memory components for contextual understanding
* **Conditional Branches**: Execute different logic based on user input
* **External API Integration**: Connect databases, search engines, third-party services
* **Multi-Agent Collaboration**: Multiple LLM models working together
* **RAG Applications**: Integrate vector databases for knowledge base Q\&A
All achievable through drag-and-drop without writing code.
## Summary
With LangBot + Langflow, you can rapidly build powerful multi-platform AI chatbots. Langflow provides visual workflow orchestration, LangBot handles messaging platform integration - together they create a complete loop from workflow design to multi-platform deployment.
This approach is ideal for:
* Scenarios requiring the same AI capabilities across multiple platforms
* Teams wanting rapid iteration and testing of different conversation flows
* Developers wanting to build complex AI applications without deep coding
## Related Resources
* [LangBot Official Site](https://langbot.app) | [Documentation](https://docs.langbot.app) | [GitHub](https://github.com/langbot-app/LangBot)
* [Langflow Official Site](https://www.langflow.org) | [Documentation](https://docs.langflow.org) | [GitHub](https://github.com/langflow-ai/langflow)
***
*This article is based on the latest version of LangBot. LangBot supports integration with Dify, n8n, FastGPT, Coze, and other AI platforms - choose the workflow engine that best fits your needs.*
## How It Works
1. User sends a message on a messaging platform
2. LangBot receives and passes it to the Pipeline
3. Pipeline calls Langflow API
4. Langflow executes the workflow: receives input → adds prompt → calls LLM → returns result
5. LangBot sends the response back to the user
## Common Issues
**Cannot connect to Langflow?**
Check Base URL. For Docker deployment, ensure containers are on the same network:
```bash theme={null}
docker network create langbot_network
docker network connect langbot_network langflow
docker network connect langbot_network langbot
```
Use container name: `http://langflow:7860`
**API call fails?**
* Confirm API Key and Flow ID are correct
* Verify the Language Model in Langflow has a valid LLM API Key configured
## Advanced Use Cases
Langflow's power lies in visually orchestrating complex AI workflows:
* **Multi-Turn Memory**: Add Memory components for contextual understanding
* **Conditional Branches**: Execute different logic based on user input
* **External API Integration**: Connect databases, search engines, third-party services
* **Multi-Agent Collaboration**: Multiple LLM models working together
* **RAG Applications**: Integrate vector databases for knowledge base Q\&A
All achievable through drag-and-drop without writing code.
## Summary
With LangBot + Langflow, you can rapidly build powerful multi-platform AI chatbots. Langflow provides visual workflow orchestration, LangBot handles messaging platform integration - together they create a complete loop from workflow design to multi-platform deployment.
This approach is ideal for:
* Scenarios requiring the same AI capabilities across multiple platforms
* Teams wanting rapid iteration and testing of different conversation flows
* Developers wanting to build complex AI applications without deep coding
## Related Resources
* [LangBot Official Site](https://langbot.app) | [Documentation](https://docs.langbot.app) | [GitHub](https://github.com/langbot-app/LangBot)
* [Langflow Official Site](https://www.langflow.org) | [Documentation](https://docs.langflow.org) | [GitHub](https://github.com/langflow-ai/langflow)
***
*This article is based on the latest version of LangBot. LangBot supports integration with Dify, n8n, FastGPT, Coze, and other AI platforms - choose the workflow engine that best fits your needs.*